Troubleshooting: Prospects were bulk added to a campaign
What's the problem when prospects are bulk added to an active campaign?
When you bulk add prospects to a campaign, all the emails will stack in the send queue. When this happens, it will be difficult to control running multiple campaigns using a single inbox.
Since the send queue must send all the bulk emails from the campaign first, it will take a lot of time before emails from another campaign will send.
Note: If there's really a need to send bulk emails, you can add multiple inboxes. This way the volume of emails will be shared by inboxes, hence, avoiding the send queue to be clogged. With this, you can send multiple campaigns at the same time. For a detailed guide on adding additional inboxes, click here.
How to avoid bulk-adding prospects to an active campaign?
To avoid bulk-adding prospects to a campaign, you can use Buckets and Schedules.
Bucket and Schedules will automate the adding of small batches of prospects to the campaign, on specific days and times that you chose.
What the schedules will do is to automatically pull out prospects from the bucket and add the prospects to the campaign. By using Buckets and Schedules, you can save yourself from the hassle of adding batches of prospects to the campaign from time to time.
How to revert to Buckets and Schedules?
To stop all emails from sending in one go, you can revert to Buckets and Schedules.
Step 1: Pause the campaign to stop further emails from sending
To do that, just go to the campaign and click Review.

After clicking the Review button, the Campaign Mission Control page will appear. Click Pause Campaign.

Step 2: Create a bucket
The Bucket is where the prospects will be added. The Bucket will store the prospects until they are added to the campaign by Schedules.
To do that, go to Campaign, then Bucket, and click Create a new bucket.

When creating a bucket, make sure that the bucket is set to accept prospects that have run any campaigns. This is so that the prospects from the campaign can be added to the bucket.
To do that, just leave the checkbox "Reject prospects who already ran a campaign" unchecked before creating the bucket.

Here a more detailed guide on creating Buckets and how they work -- Buckets
Note: You will notice that when a huge volume of emails is added to a campaign, the journeys of the prospects will be in various Steps. Others will be in the 1st email step, some will be on the Wait Step.
When this happens, you should create 2 buckets. 1 for prospects that are in Step 1 and another bucket for prospects who are in Step 2.
Step 3: Filter prospects based on the campaign steps
To be able to know which prospects are on Step 1, 2, etc, you can use Advanced Filters.
Note: Not all prospects on the campaign must have started already so please make sure to also filter those on Step 0 as well.
To do that, just go to the Prospect page and click Advanced filter.
From the Advanced filter, go to the Campaigns tab and select the campaign where the prospects are. Then, head to the Journeys tab, and on the Journey Step, put 1 as the value of the Maximum Step number. Finally, apply the filters.
For a more detailed guide on the Advanced Filters, here's an article -- Filtering Prospects.
Here's a screen recording of how to filter prospects that are on Step 1 in a campaign.
Step 4: Move the filtered prospects to a bucket
Next, select all filtered prospects, click Actions, then Move to Bucket. The bucket will be the temporary storage of prospects before the prospects get added to the campaign through Schedules.
For more information about how buckets work, here's an article -- Buckets.
From the list, select the bucket you created for prospects in Step 1.

Step 5: Cancel the prospects' journeys
The prospects' journeys must be canceled to make it easier to remove the prospects from the campaign.
To cancel the journeys, while all prospects are selected, click Action again then Cancel journeys.

Step 6: Export all prospects
This is to make sure that in case there's any mistake in deleting prospects from the campaign, you will have a list of prospects to re-import to the bucket.

Step 7: Delete the prospects' journeys from the campaign
To delete the prospects' journeys from the campaign, just head to the Campaign -> Journeys -> Click the filter canceled -> Select all -> Delete.

Do the same to filter prospects on Step 2, except on the Journey Step, put 2 as the value of the Minimum and Maximum Step numbers. Then, from the list of Journey Status, click Running.
This is to avoid contacting prospects who unsubscribed, replied, and prospects whose journeys ran into an error or bounced.
Step 8: Recompute the campaign stats
After all the prospects have been deleted from the campaign, go to Campaign Settings and Recompute Stats.
This is to avoid skewed campaign stats moving forward.
Here's a screen recording showing how to filter prospects on Step 2 -> Move to Bucket -> Cancel Journeys -> Delete journeys from the campaign -> recompute stats.
Step 9: Schedule the campaign using the bucket for Step 1
What the Schedules will do pull out a specific number of prospects from the bucket and the prospects to the campaign on specific days and times.
To create a schedule, head to the Campaign -> click Schedules -> Add Schedule.

A Create Schedules window will pop up.
Select the days, a time, then the Timezone that the schedule will follow when adding prospects to the campaign. Then, select how many prospects should be added to the campaign and choose the Bucket for Step 1.

Step 10: Clone the campaign
Cloning the campaign will allow you to continue the journeys of the prospects that were in Step 2.
To clone a campaign, just go to the Campaign Settings.

Next, scroll down to the end of the page then click Clone Campaign.

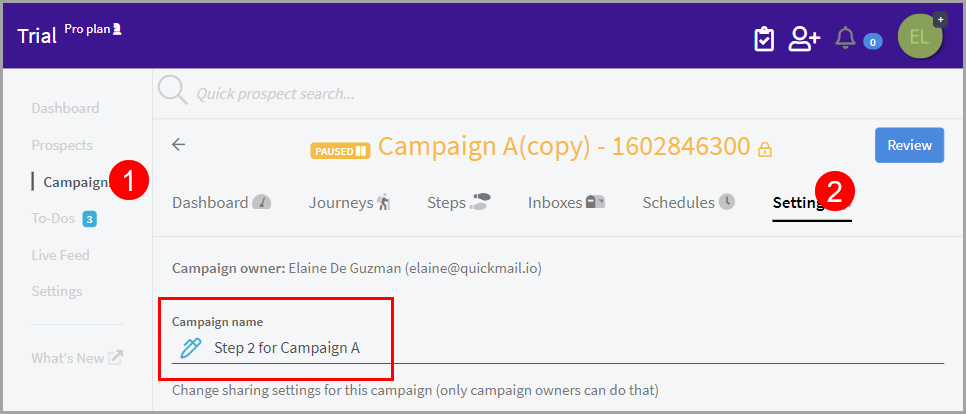
Step 11: Rename the cloned campaign
Renaming the campaign will help you avoid confusing the original campaign for the cloned campaign.
To rename a campaign, just go to the Campaign Settings then edit the Campaign name.
Step 12: Delete Step 1 and 2 of the cloned campaign

Doing so will help you avoid sending the initial email twice to the prospects. Furthermore, the prospects who will be added to the campaign don't need to wait before they receive the 2nd email.
To delete the cloned campaign's Step 1, go to the Campaign Journeys -> Click the 1st email step -> Delete.

Step 13: Schedule the cloned campaign
The cloned campaign must also be scheduled to control how many emails are coming out from the campaign daily.
When Scheduling the cloned campaign, use the Bucket that has the prospects that were in Step 2.
For a more detailed guide on Schedules, check out this article -- How to Schedule Campaigns
Step 14: Activate the campaigns
For the Schedule to start adding prospects to the campaign, the campaign must be activated.
To activate the campaign, just go to the Campaign then click Review.

Next, click Go Live! and the prospects should be added to the campaign at the earliest schedule.
