Buying Gmail Accounts & Domains Through QuickMail
Buying Gmail Accounts & Domains Through QuickMail
In this article:
Why buy Google email accounts in QuickMail?
How much does it cost?
How to buy Google email accounts in QuickMail?
Where can I see pending domain orders?
Where can I get the password and 2FA?
How to cancel Google email accounts purchased from QuickMail?
How to add or remove email forwarding?
How to add or remove domain forwarding?
How to renew domains?
Can I change the DNS records of the domain?
Can I bring my own domain and get email accounts from QuickMail?
Why Buy Google Email Accounts in QuickMail?
Create new Google inboxes in just a few clicks — no manual setup needed. Each email account is automatically added to your QuickMail workspace.
Skip the technical headaches — QuickMail automatically configures DNS records (SPF, DKIM, DMARC) and custom tracking domains for optimal deliverability.
Built-in Stealth Mode — email accounts purchased through QuickMail use their own Gmail API, so Gmail sees emails as sent directly from the user, not a third party. This reduces the chance of being flagged and improves deliverability. You can start sending from day one as long as you keep the volume low. No more waiting for 2 weeks.
Premium Auto-Warmer — QuickMail's Auto-Warmer is currently only available for email accounts purchased through QuickMail. It generates realistic email exchanges within a trusted group of high-deliverability accounts, helping your emails land in the inbox more consistently.
Lower monthly cost — Gmail email accounts through QuickMail cost $4/month per email account, significantly less than buying directly from Google Workspace or other providers.
Important: Domains purchased through QuickMail are valid for one year. They are non-refundable and non-transferable.
How Much Does It Cost?
For users on new pricing (Starter, Growth, Agency plans):
To purchase new email accounts, you must first buy a Google email package. Each package includes 10 email accounts.
For accounts created before December 2025, the cost is $30 per package.
For accounts created on or after December 2025, the cost is $40 per package.
You can purchase as many packages as needed.
Bringing your own domain is not supported — a new domain must be purchased through QuickMail. Domain pricing depends on availability.
It is currently not possible to add more email accounts under a domain you have already purchased. For example, if you bought a domain and added two email accounts, you will not be able to add a third later.
Note: Users on old pricing (Basic, Pro, and Expert plans) do not need to purchase a package.
How to Buy Google Email Accounts in QuickMail?
Important: This feature is only available to accounts on a paid subscription.
Step 1. Purchase a Gmail package.
Go to Billing/Plan → Manage Plan.
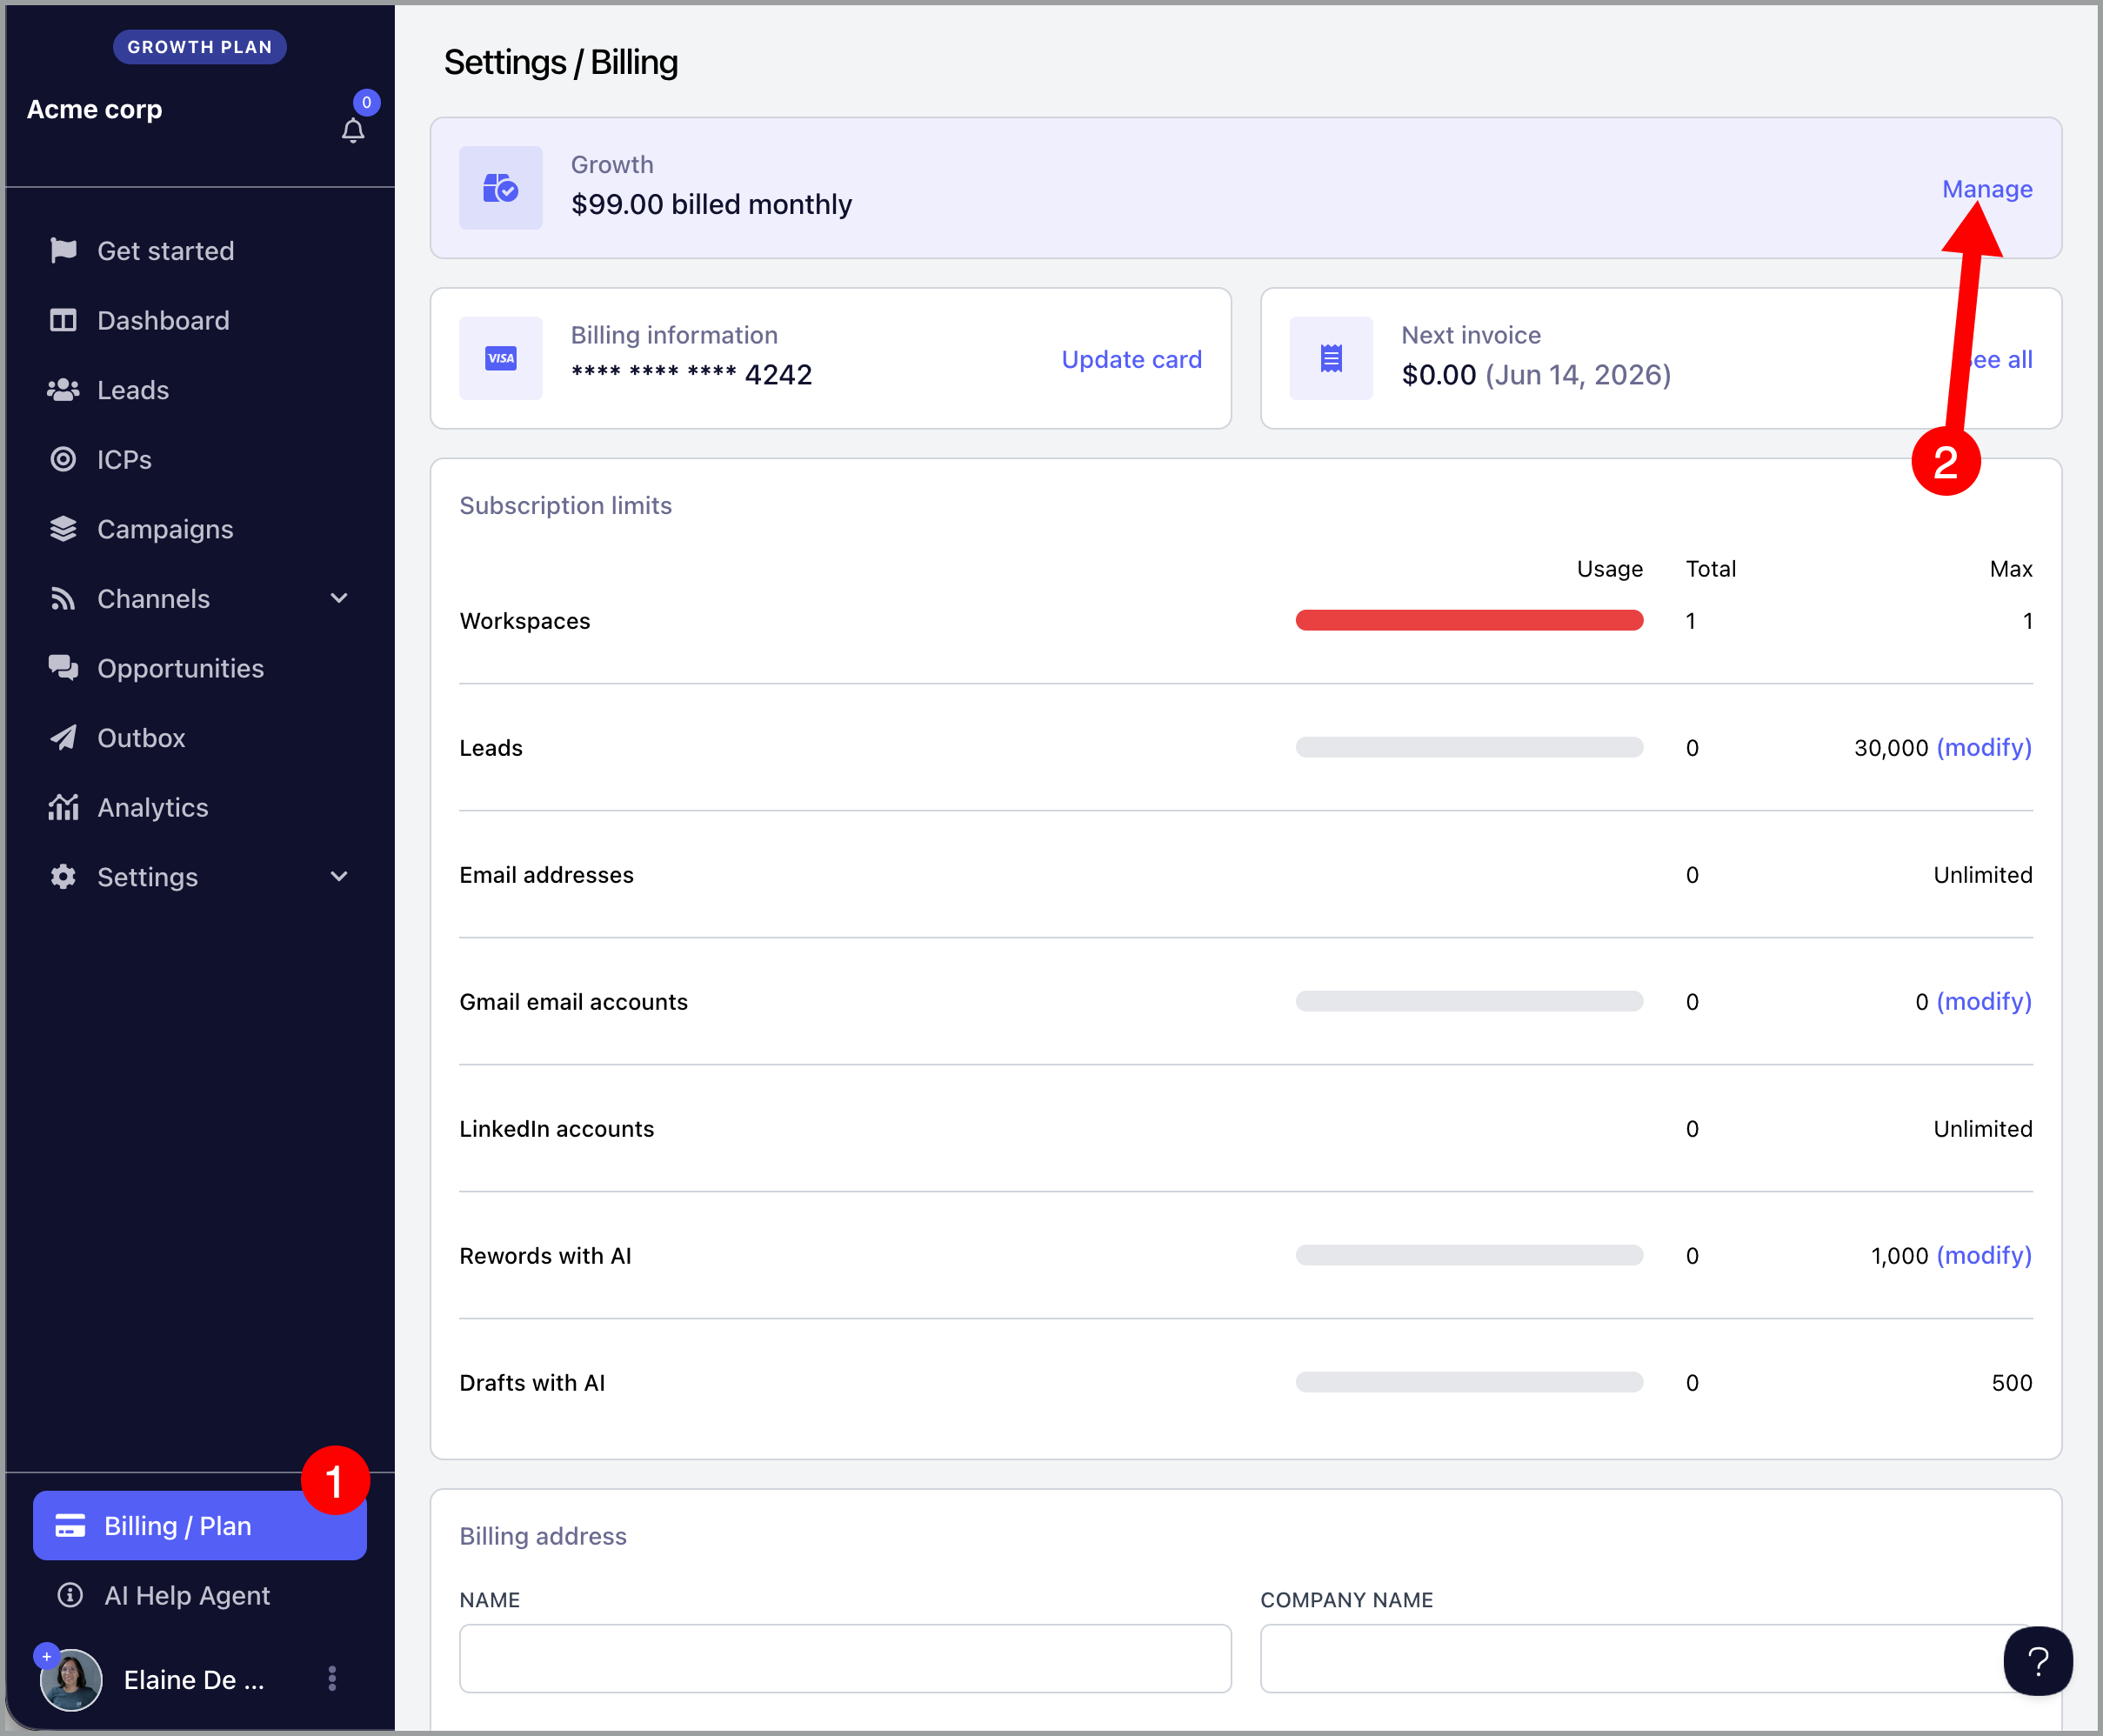
Click Add Gmail Package → Update Subscription.
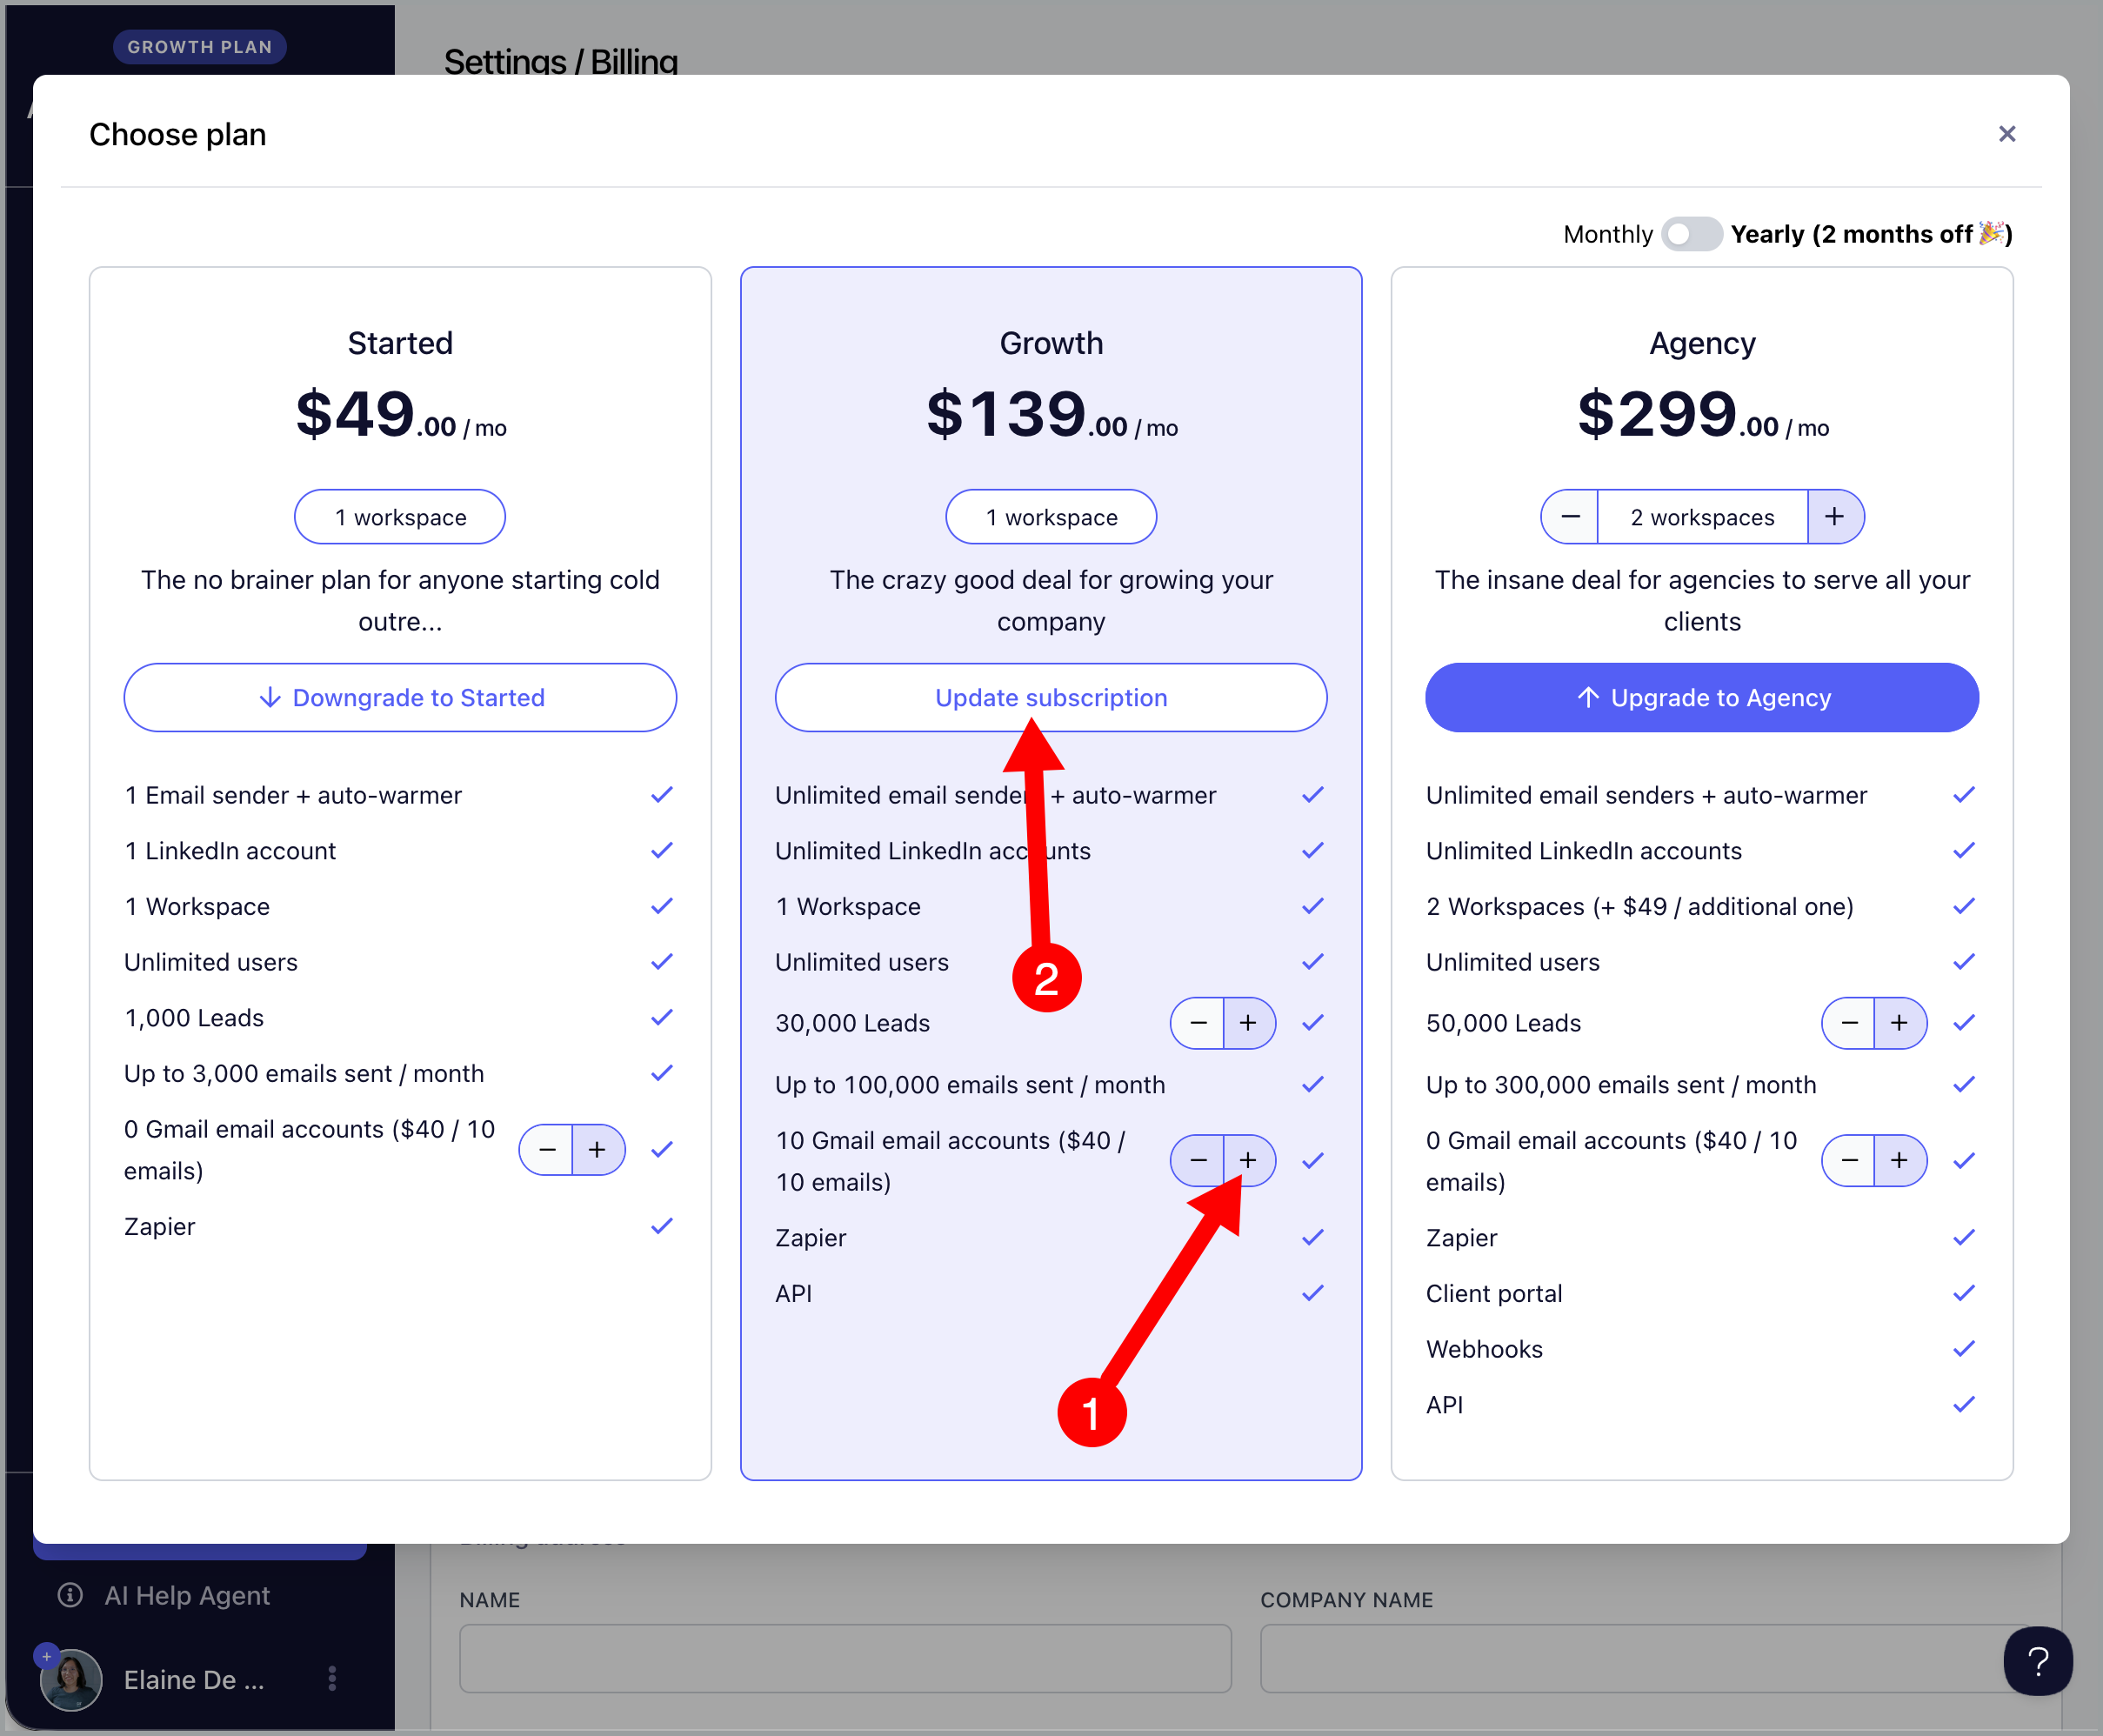
Each package costs $40 and allows you to add up to 10 email accounts.
Note: Users on old pricing (Basic, Pro, and Expert plans) can skip this step.
Step 2. Go to Email → Buy Gmail Email Accounts.

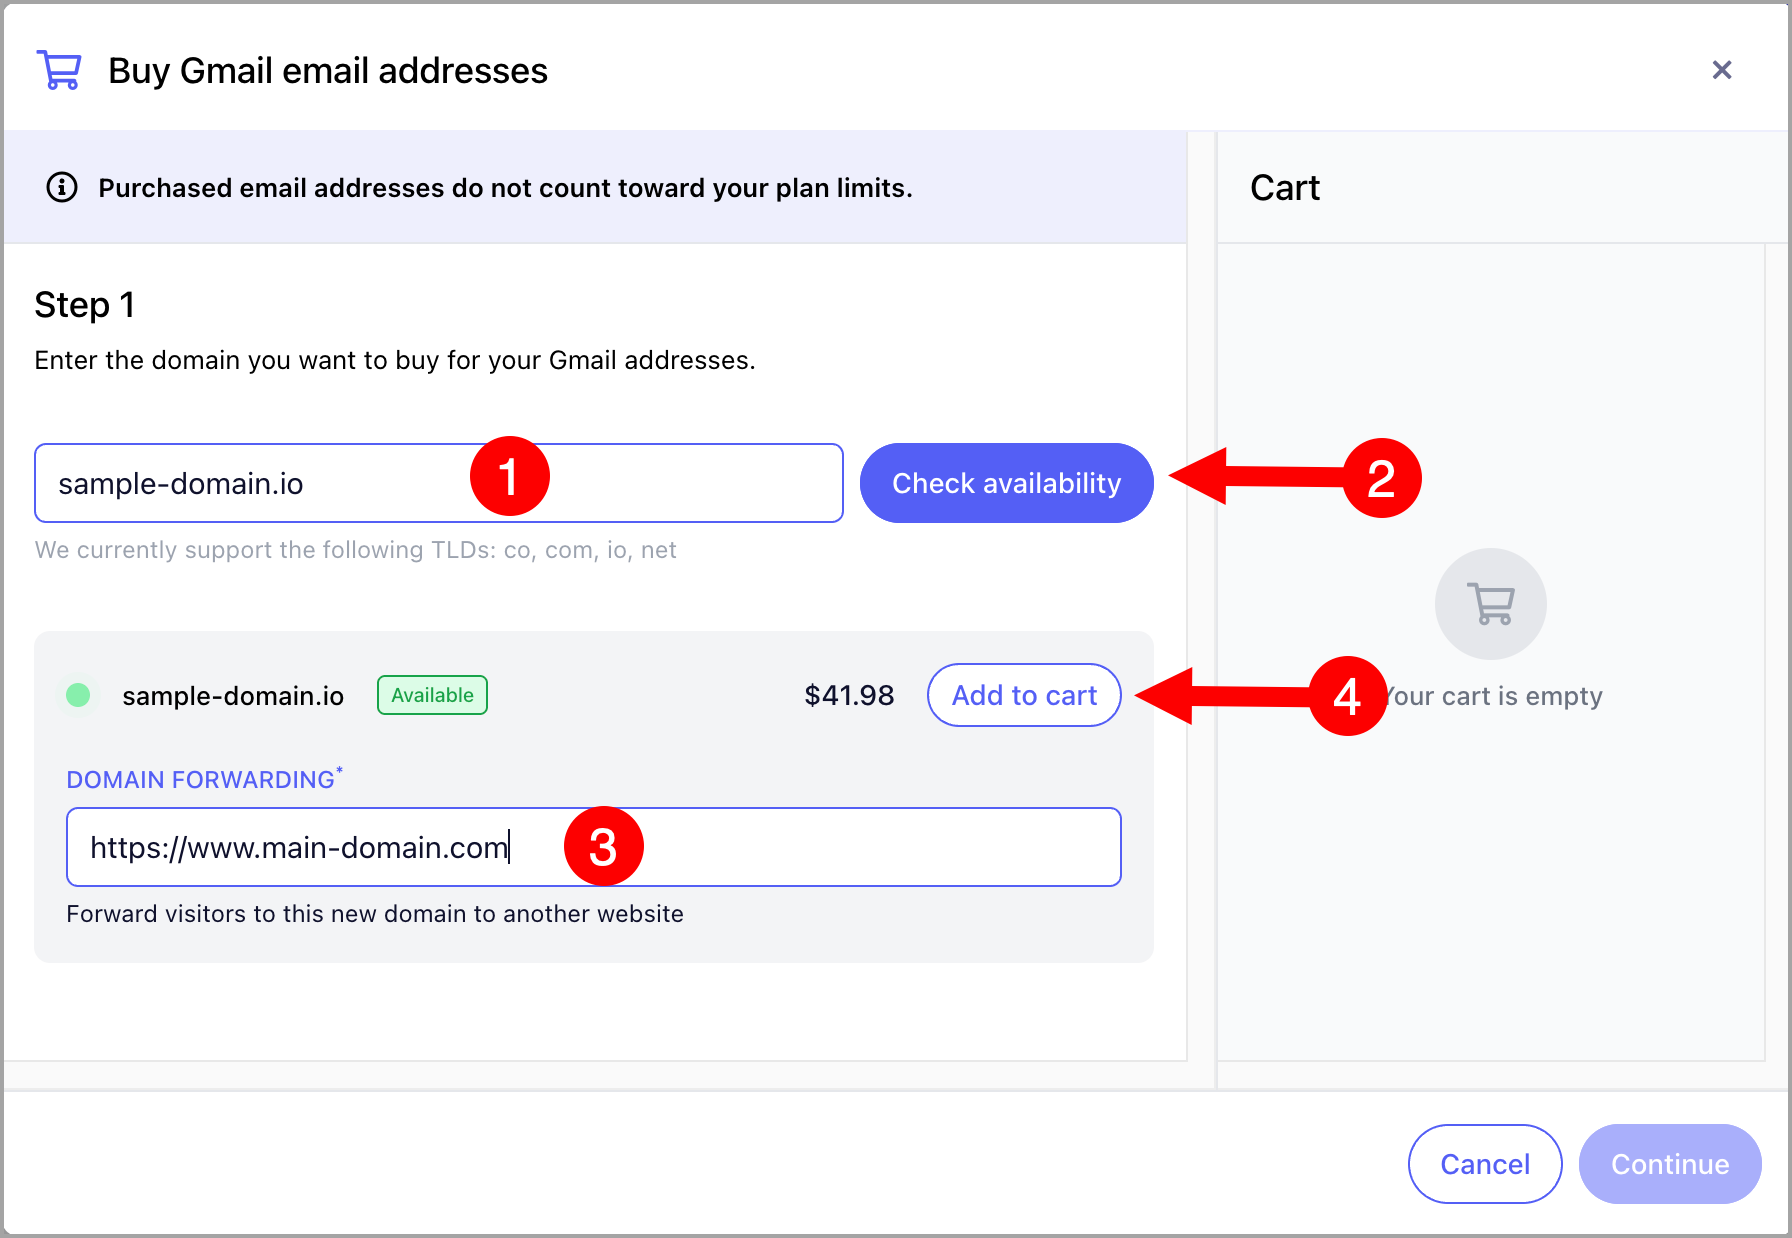
Step 3. Search for the domain you would like to buy → check availability → add the website you would like to redirect the domain to → Add to Cart.
Important: Adding a redirect helps prevent new domains from being blacklisted. If recipients visit the domain in your emails, they will be automatically redirected to your main website.

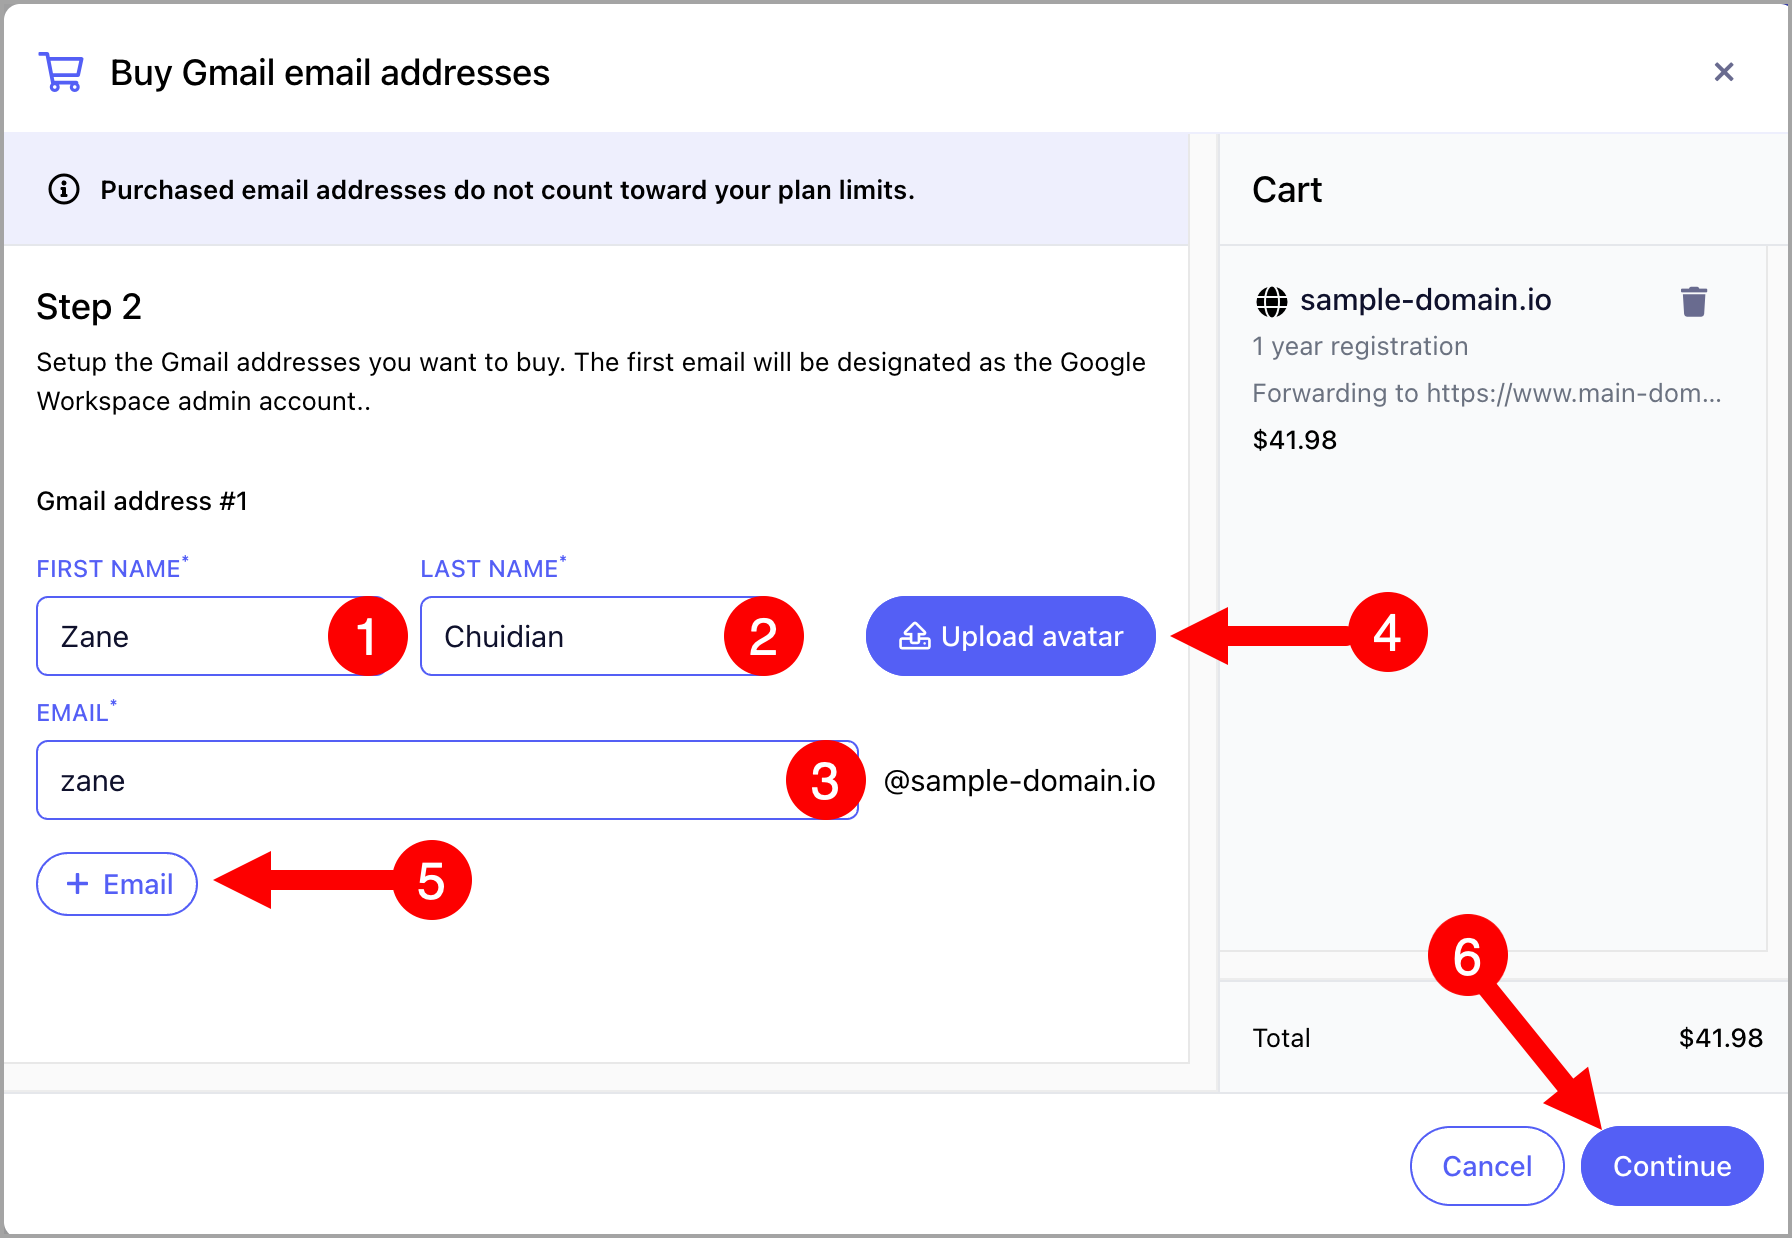
Step 4. Fill in the first name and last name → add a username → upload an avatar (optional). To add more email accounts, click + Email. Otherwise, click Continue.
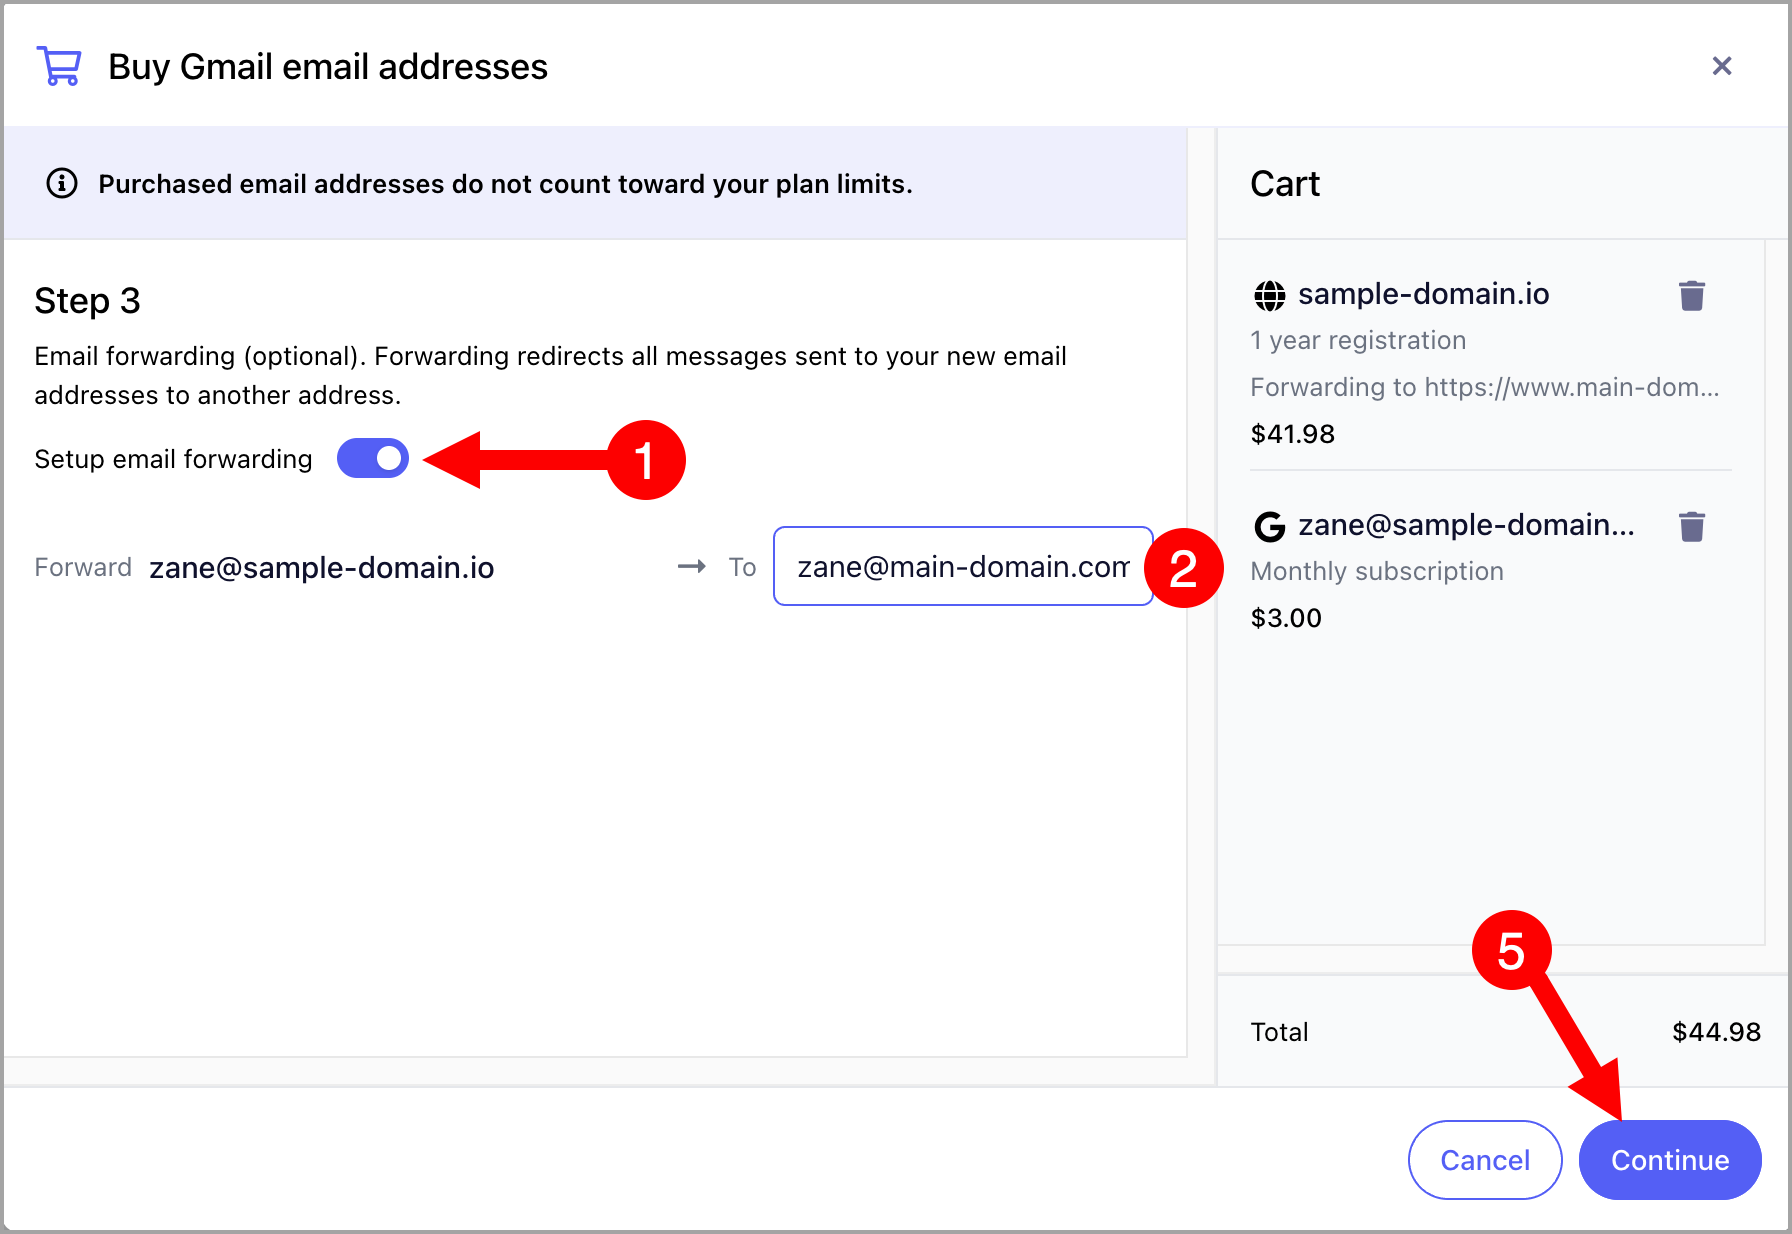
Step 5. (Optional) To set up email forwarding, toggle on Setup Email Forwarding → add the email address to forward to → click Continue. Otherwise, skip this step.
Note: If you wish to set up email forwarding in the future, you will need to configure it manually in your Gmail settings.

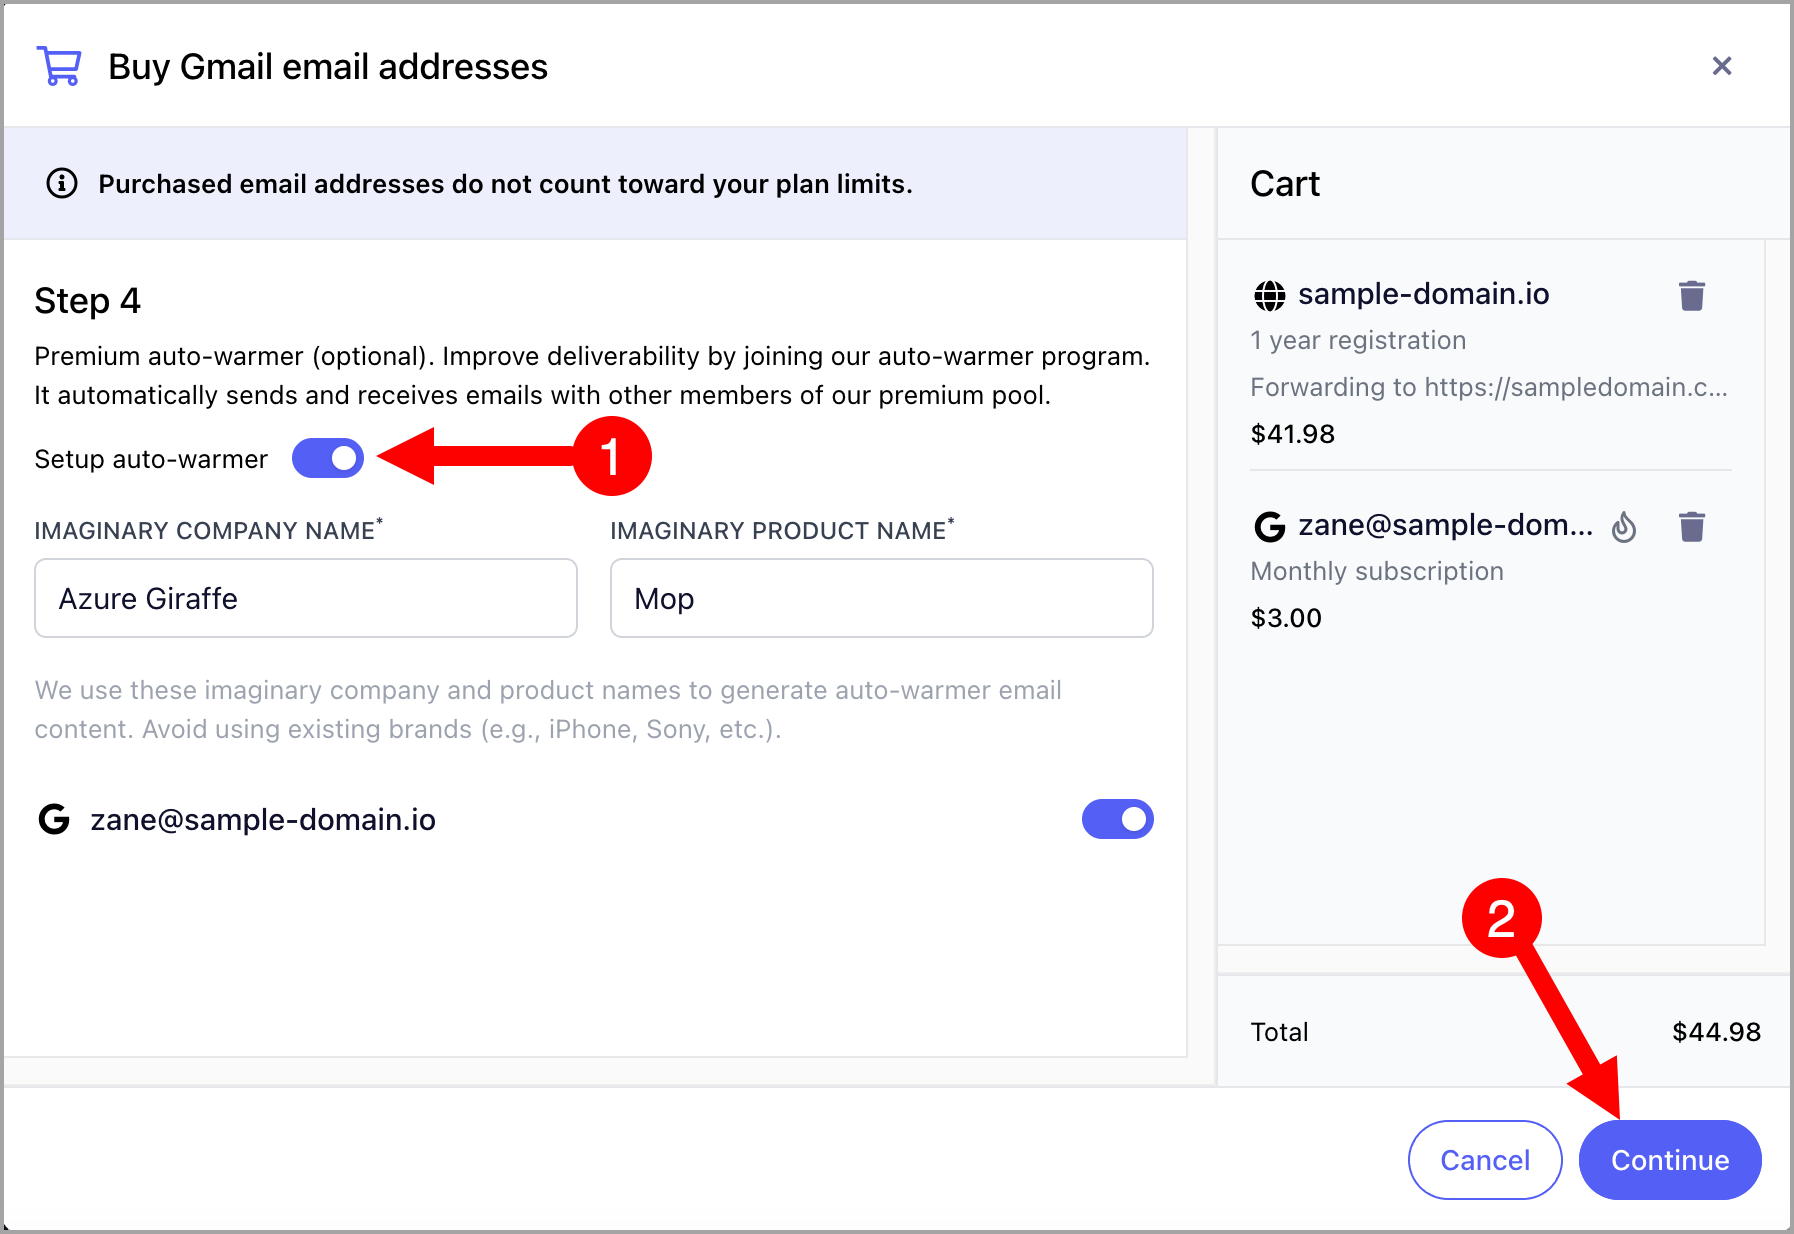
Step 6. (Optional) To set up the auto-warmer, toggle on Setup Auto-Warmer → update the company and product name if needed → click Continue.
Tip: To learn more about the auto-warmer, check out this guide: QuickMail Auto-Warmer.
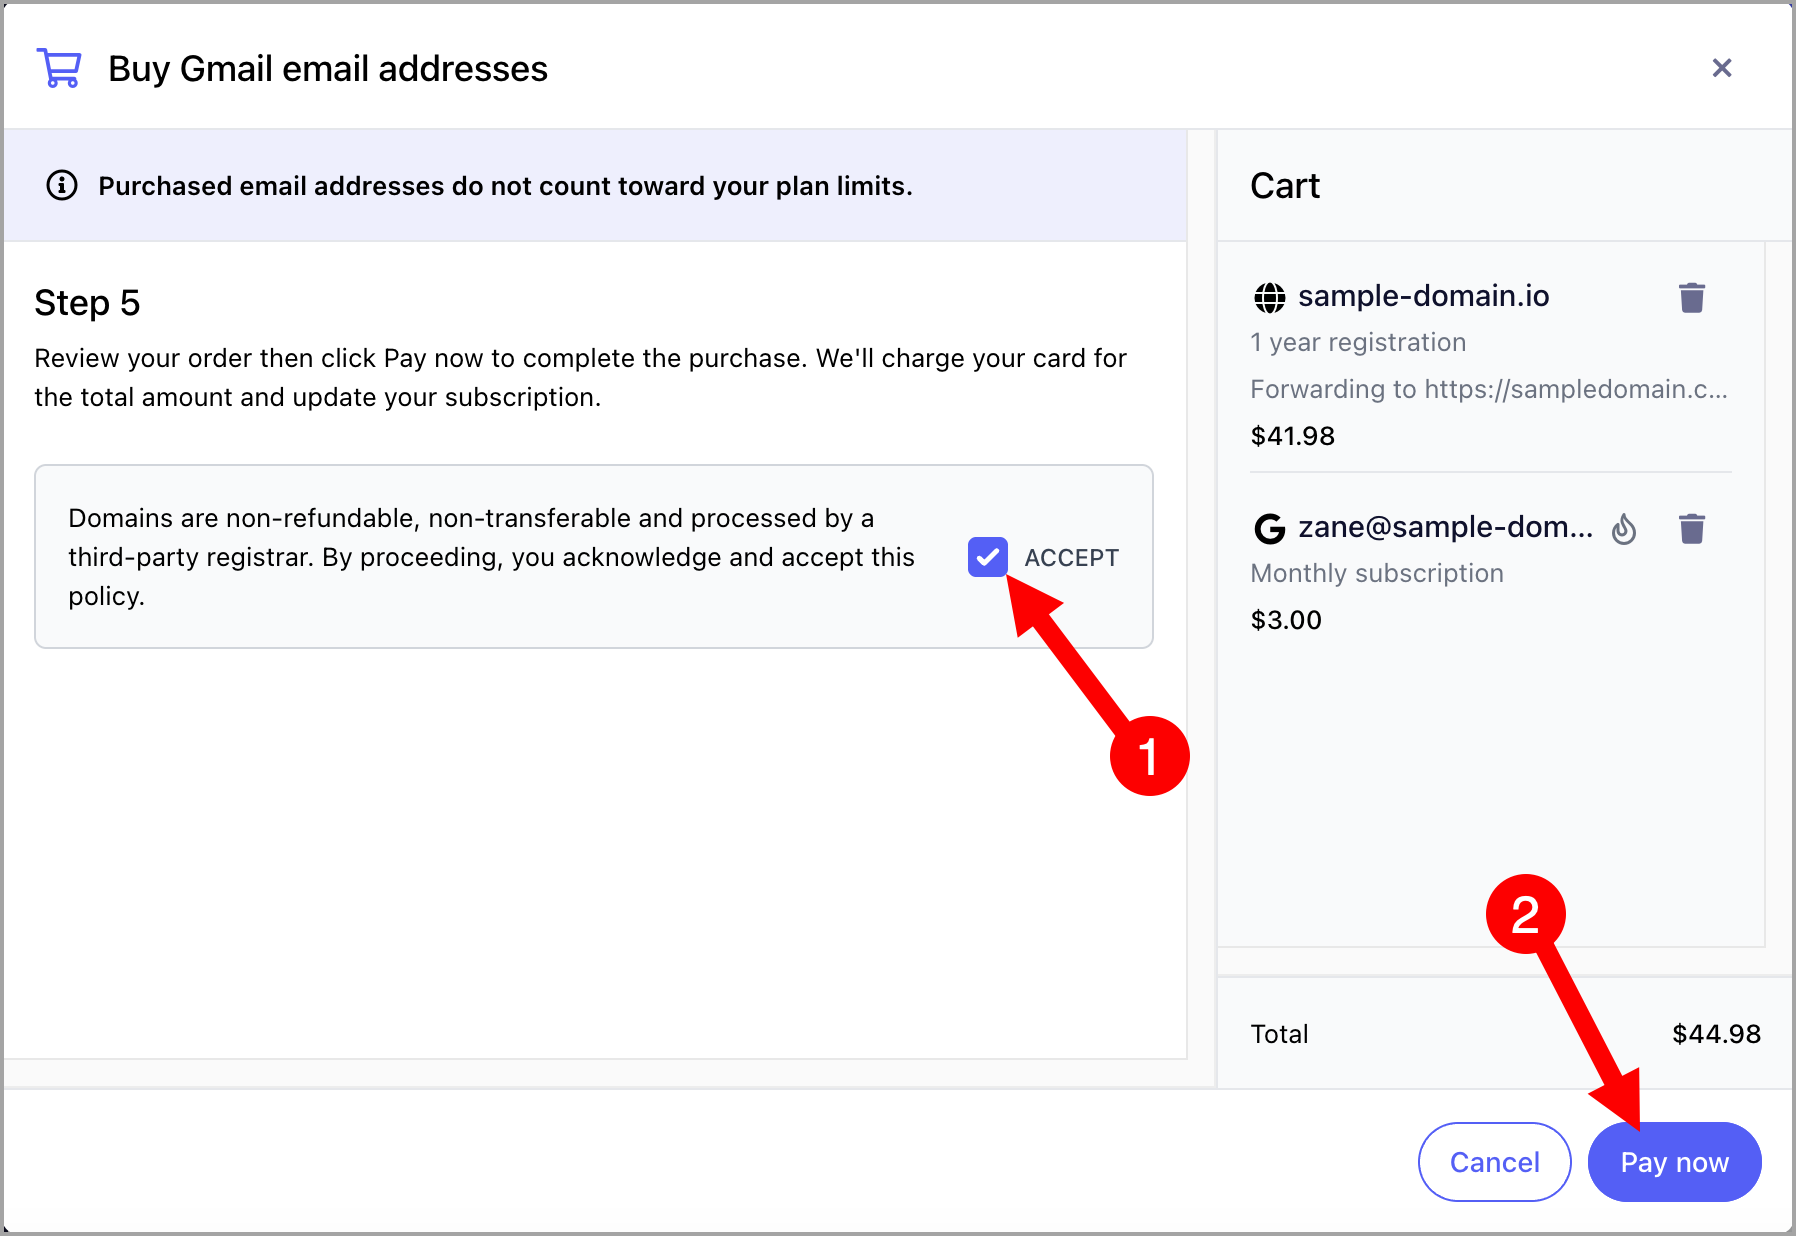
Step 7. Review the total cost → check the I Accept box → click Pay Now.
Step 8. After payment, the email accounts will automatically appear in the Emails page within 48 hours and will be ready for use.
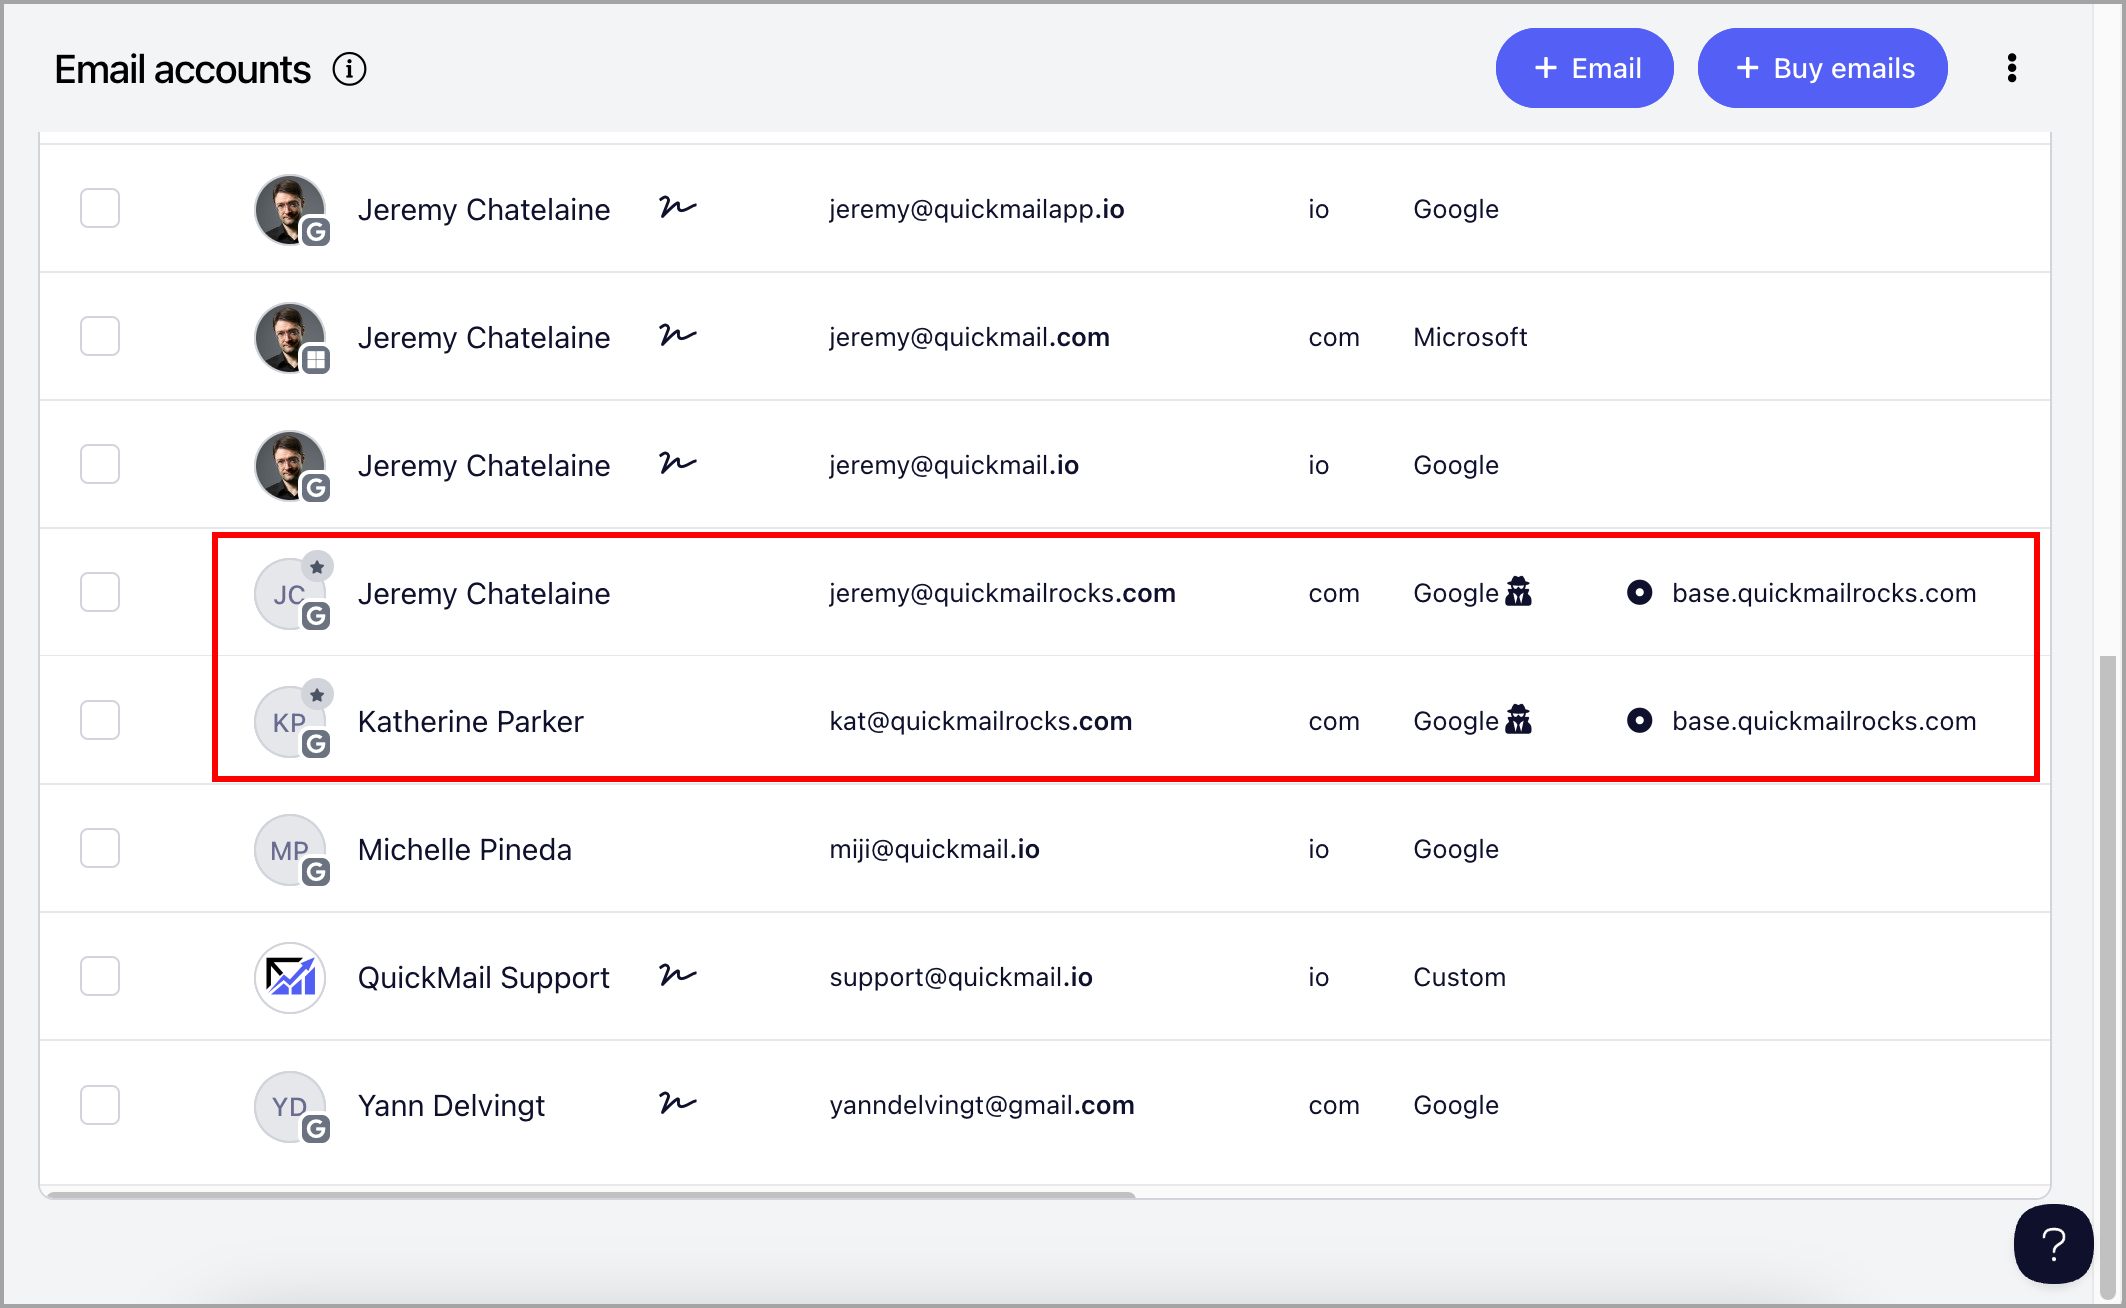
Note: Domains purchased through QuickMail have a ★ icon on their thumbnail. Email accounts in Stealth Mode display a detective icon next to "Google."
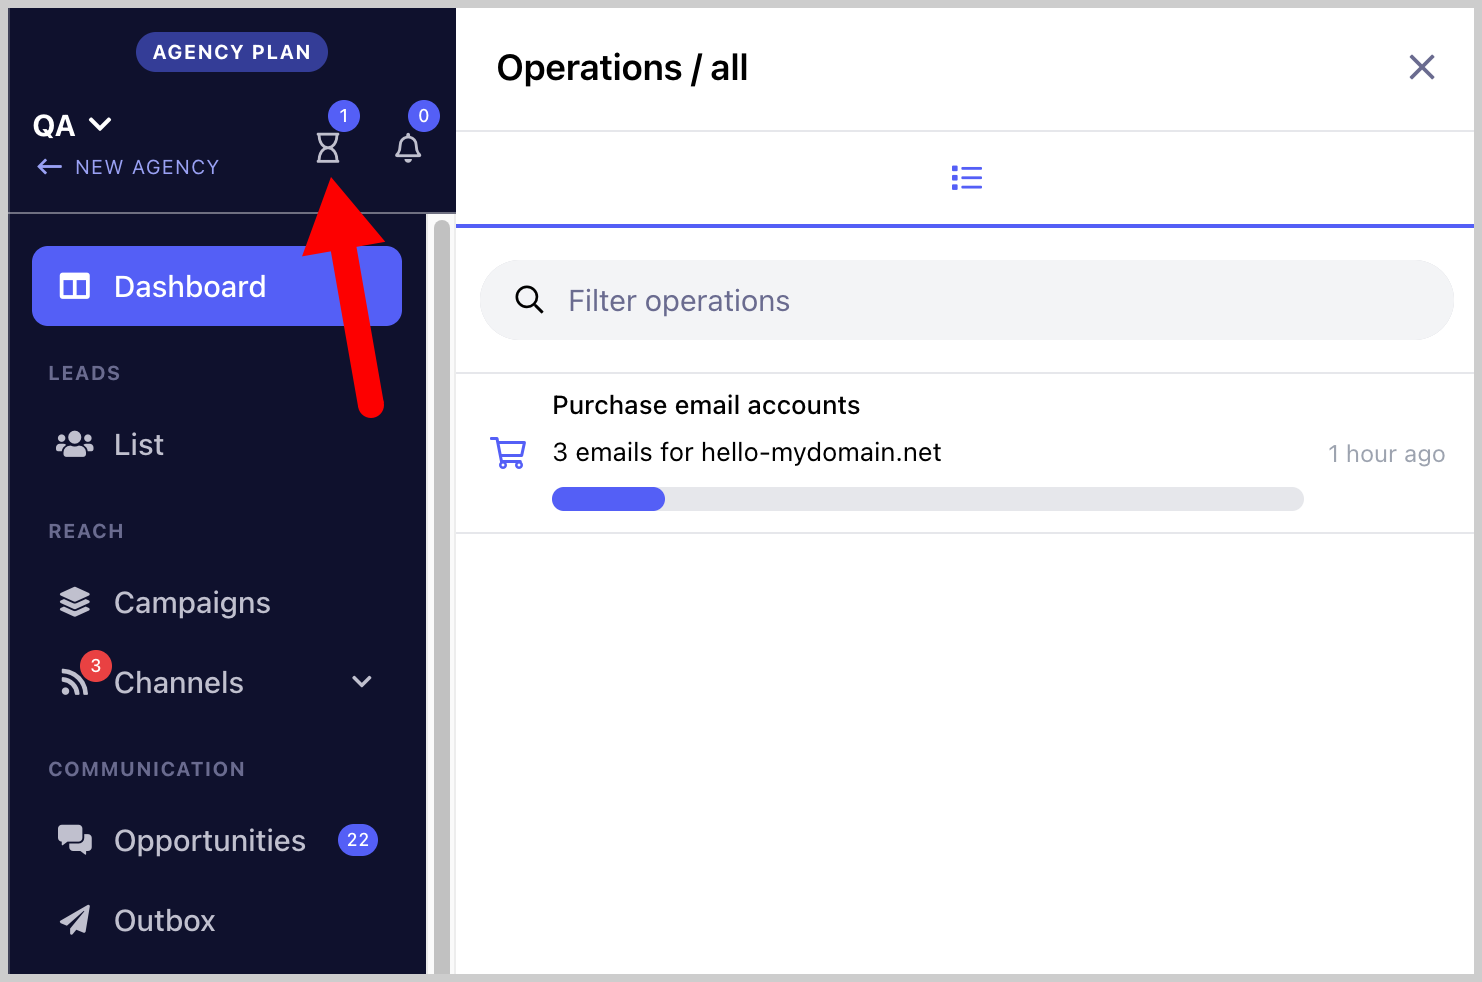
Where Can I See Pending Domain Orders?
Pending domain orders can be viewed by clicking the hourglass icon here:
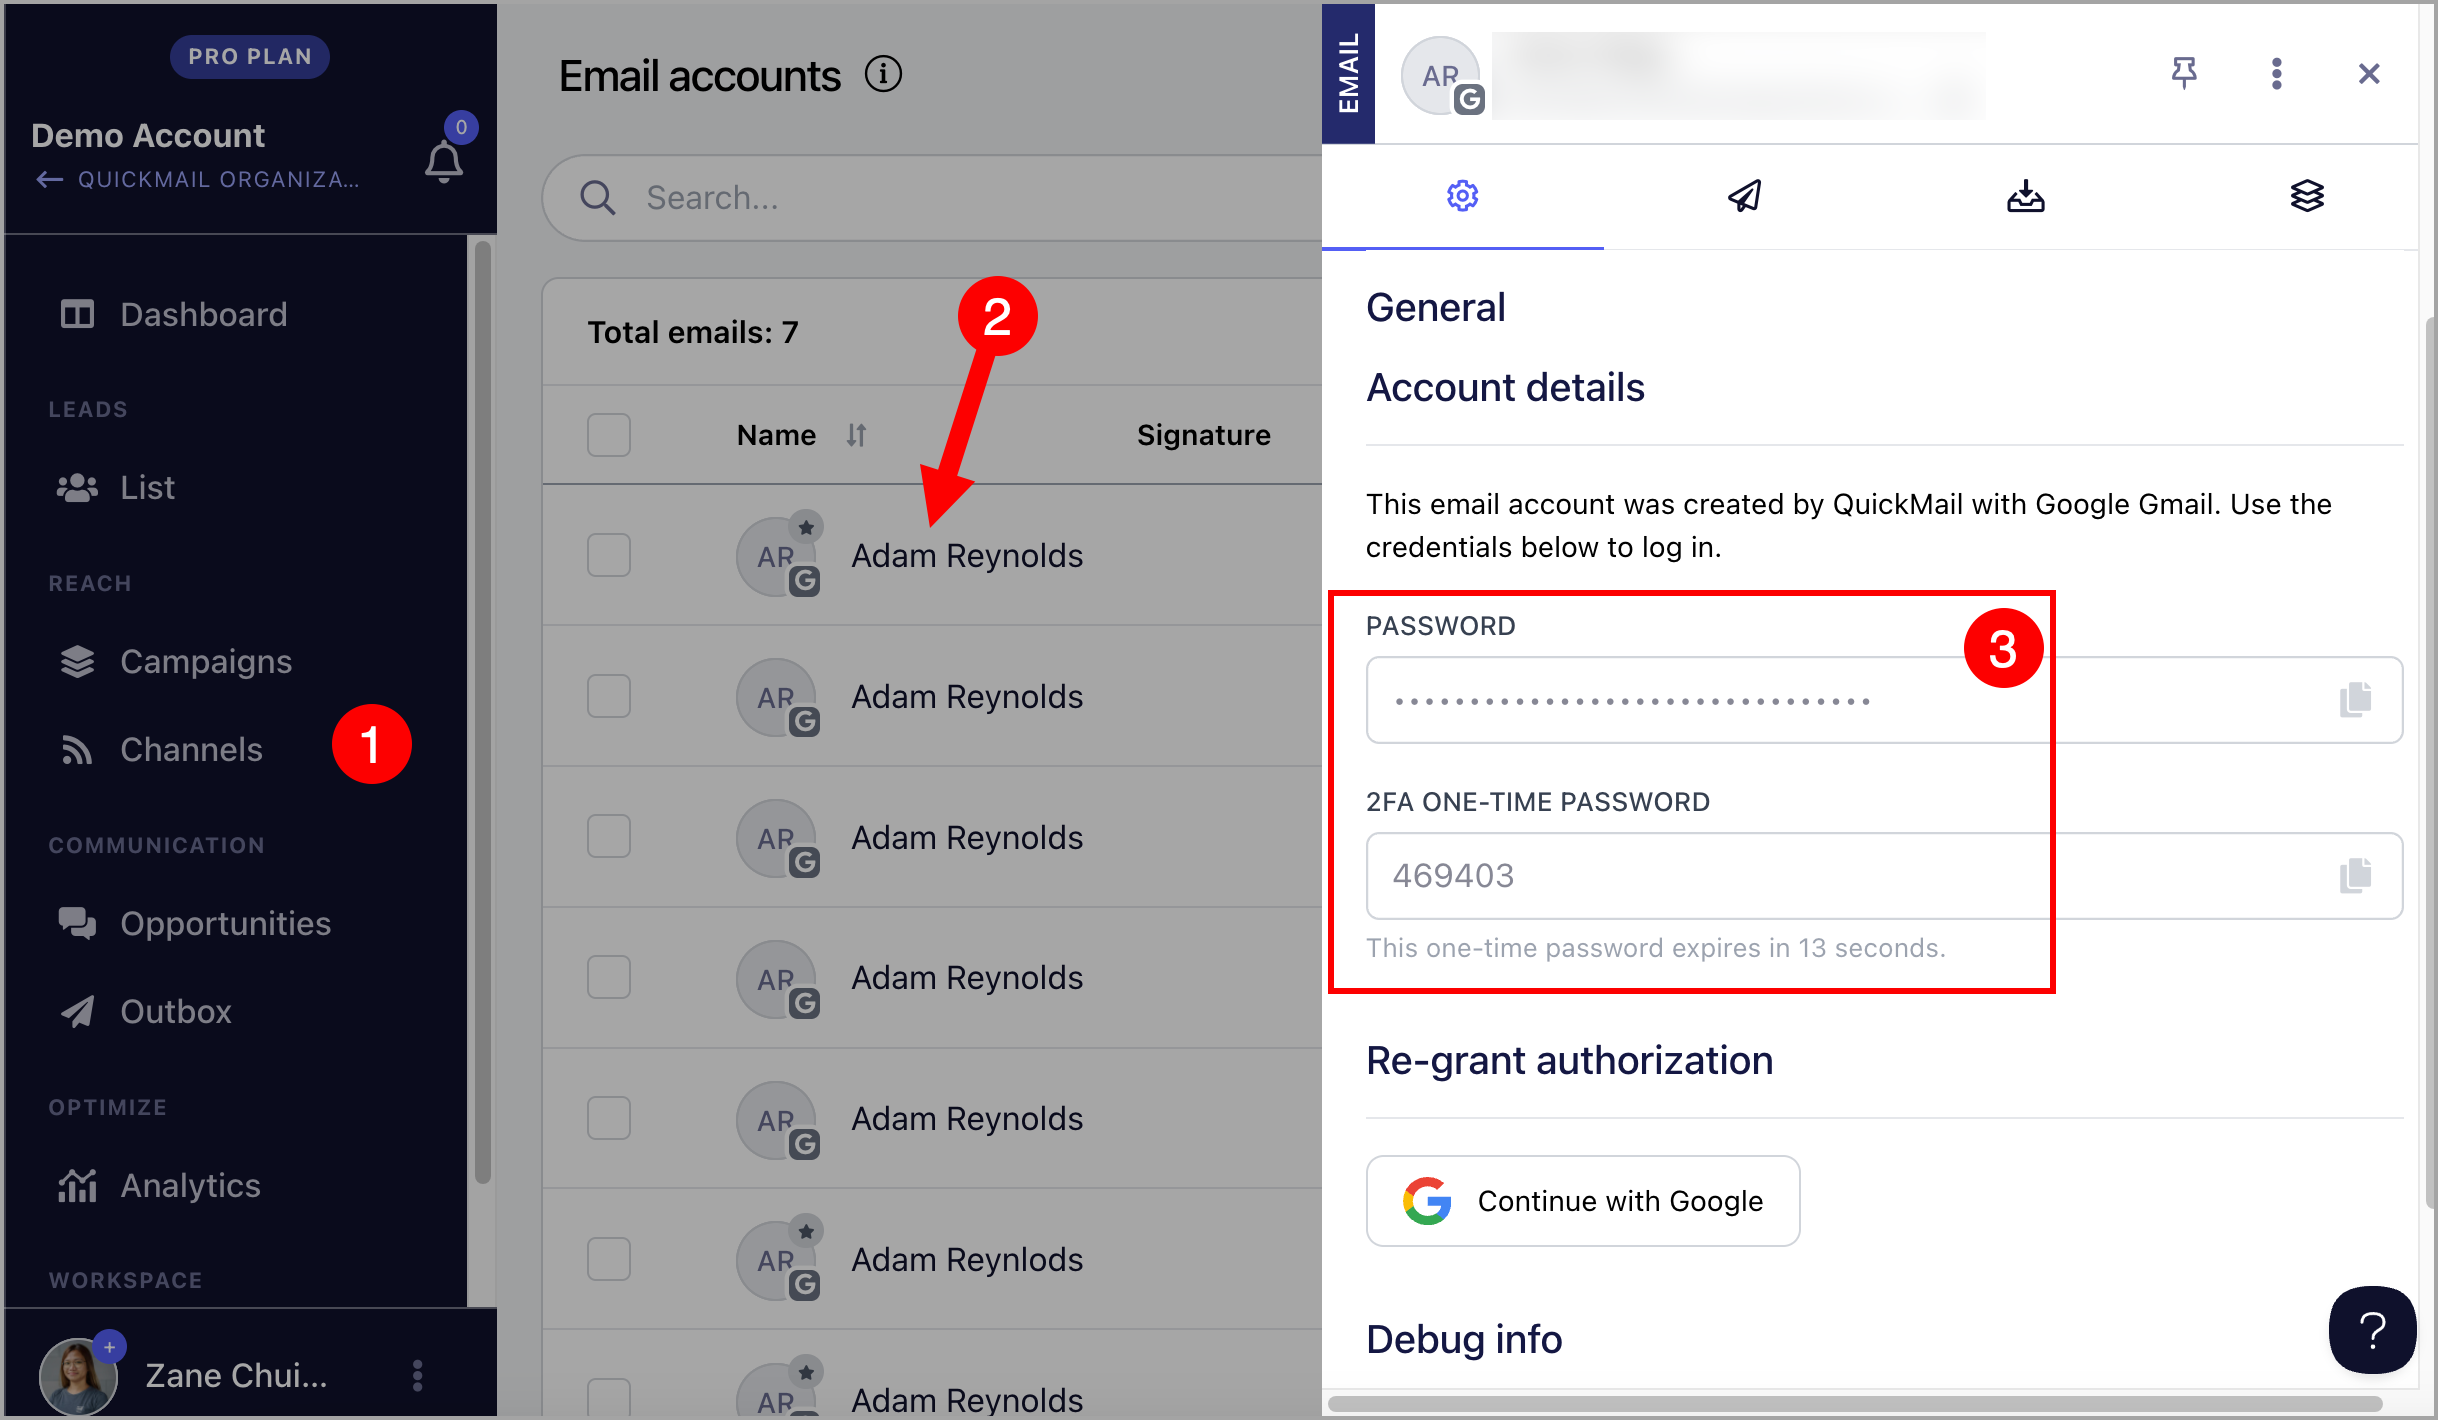
Where Can I Get the Password and 2FA of Purchased Email Accounts?
Go to Email → click on an email account to open the quick view → Password / 2FA One-time Password.
How to Cancel Purchased Email Accounts?
Contact support@quickmail.io or use the chat widget at the bottom right of the page to request a cancellation.
Once the email accounts are canceled, you can remove your Gmail package by going to Billing → Manage Subscription → downgrade the Gmail package to 0.
How to Add or Remove Email Forwarding?
Email forwarding can only be added during the domain order process. To add, remove, or update email forwarding after that, contact support@quickmail.io.
How to Add or Remove Domain Forwarding?
Domain forwarding can only be added during the domain order process. To add, remove, or update domain forwarding after that, contact support@quickmail.io.
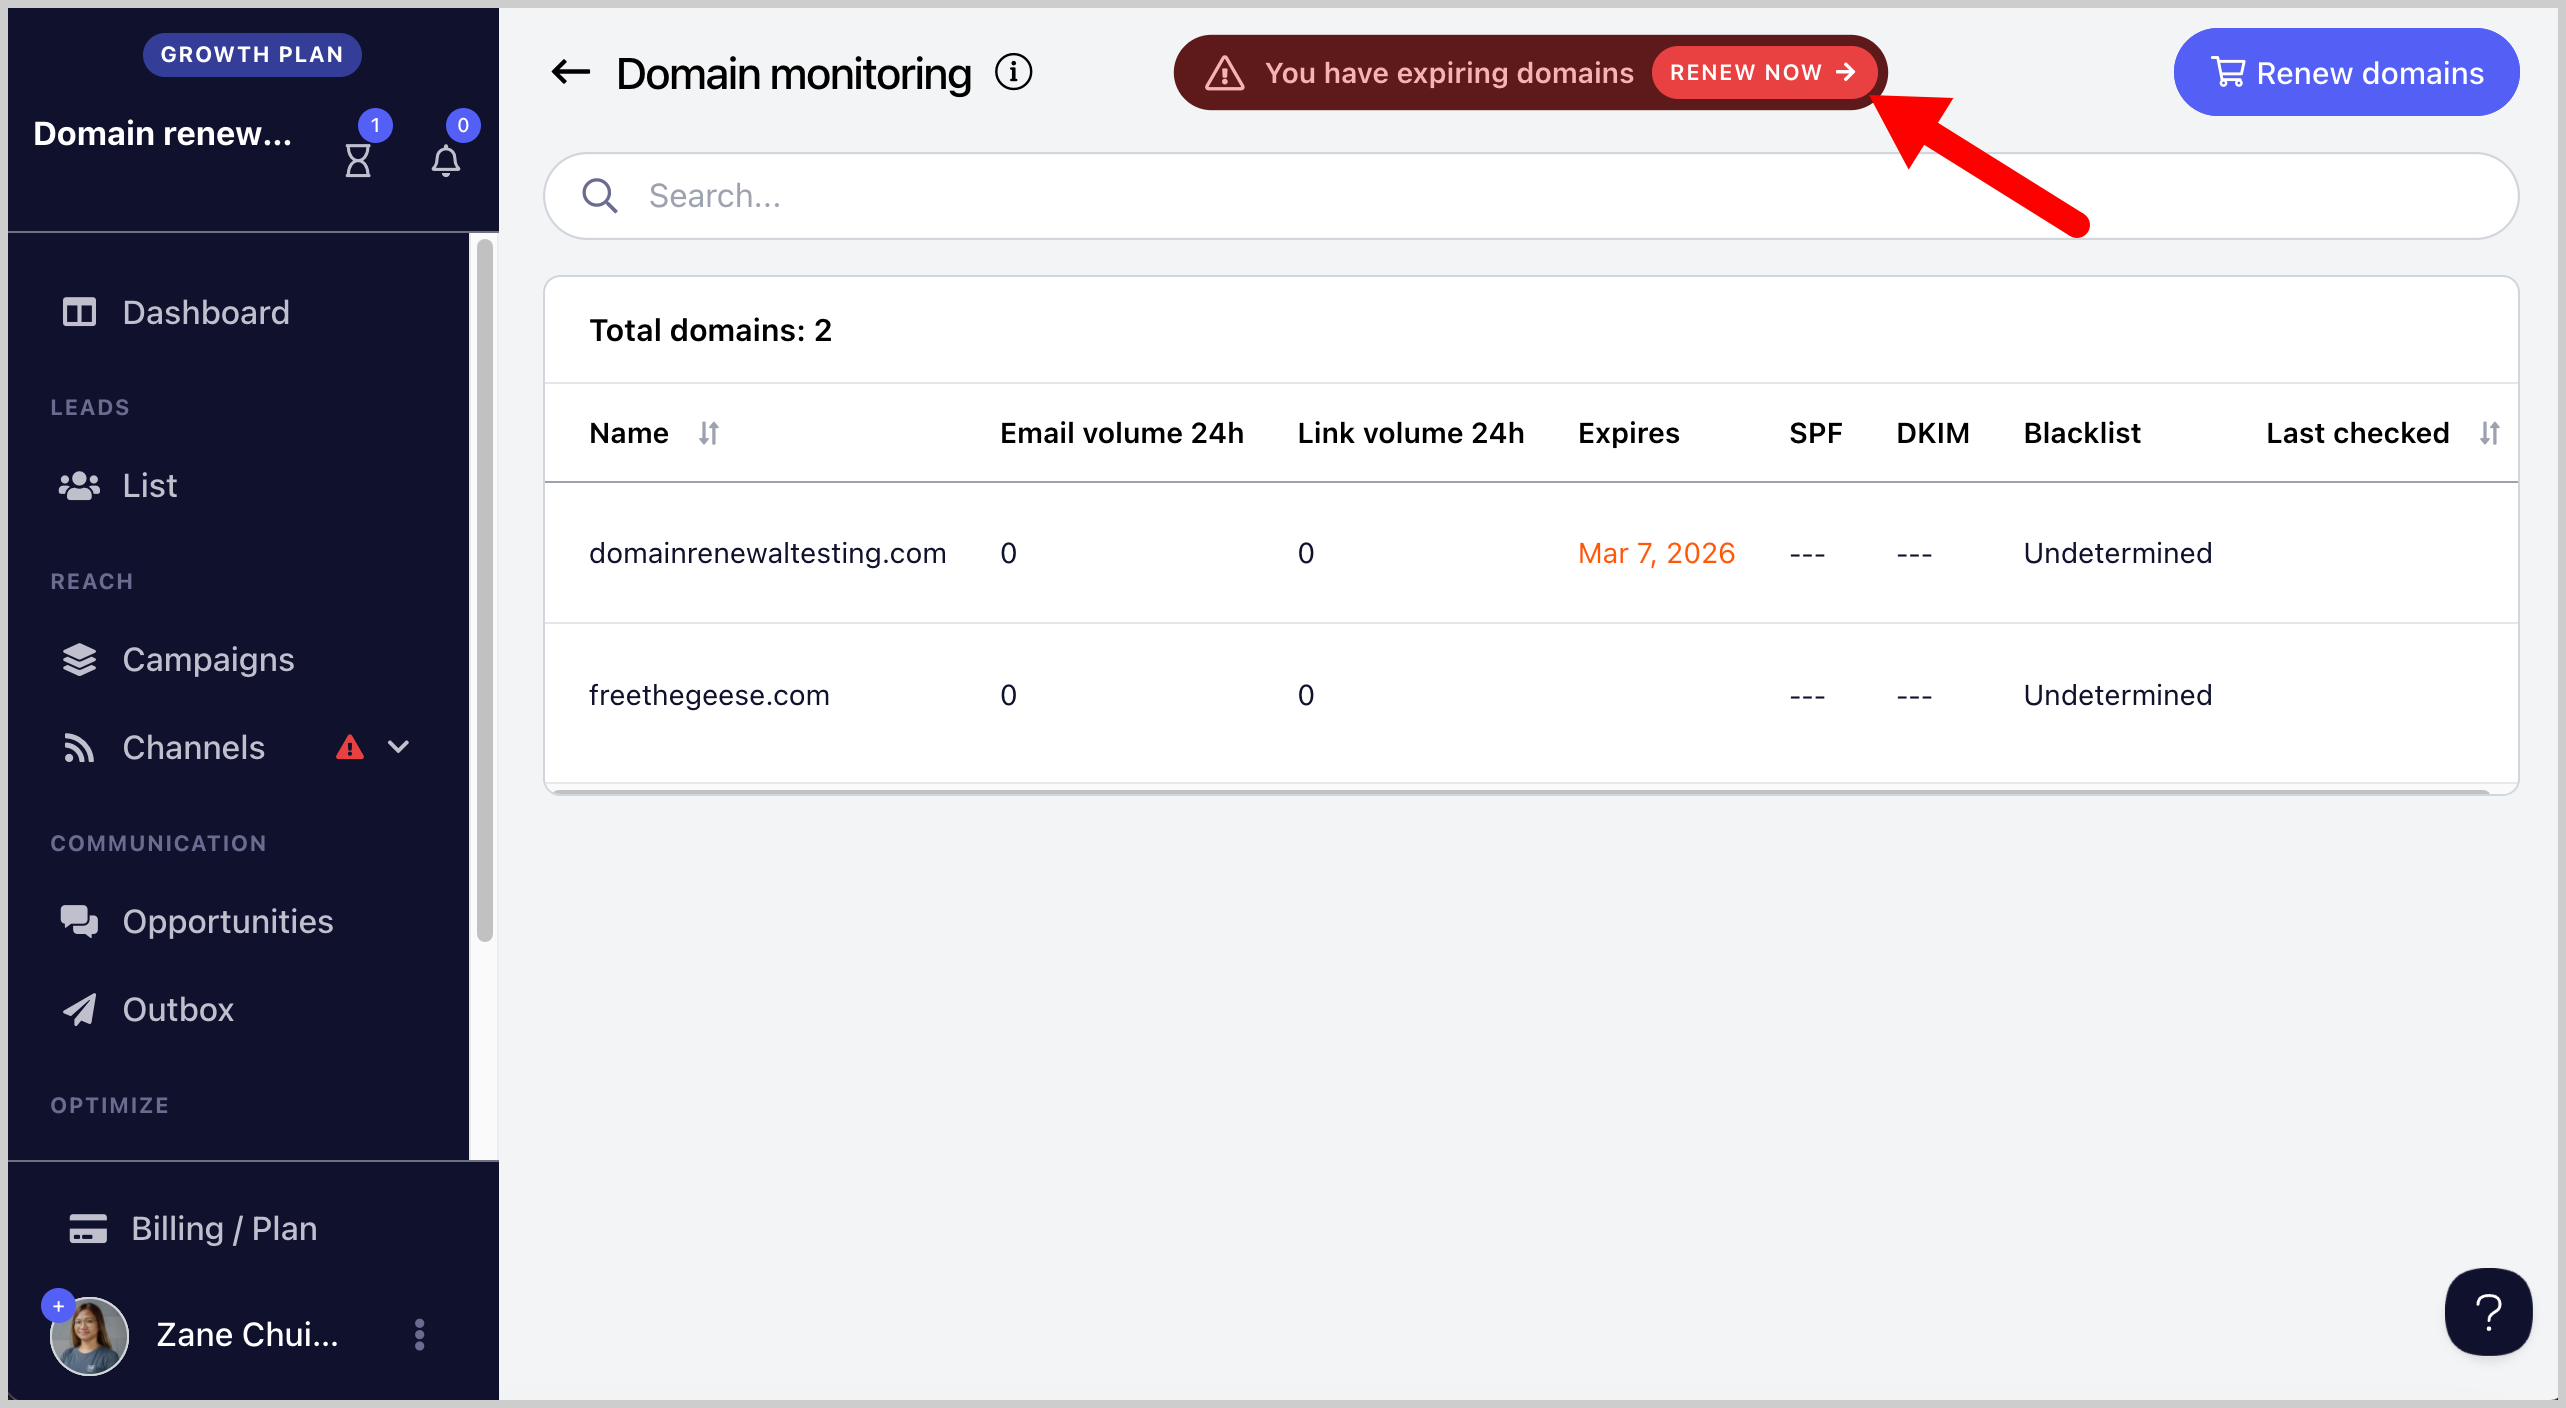
How to Renew Domains?
When a domain is approaching its expiration date, you will be notified both in the interface and via email. The notification will include a Renew button to extend the domain before it expires.
Can I Change the DNS Records of the Domain?
No. Domain creation is fully automated, which means DNS records cannot be changed manually.
Does auto-warmer come with it?
Yes. Auto-warmer is available only on Gmail emails purchased through QuickMail. You can find it by going to Emails > click the email > find the auto-warmer tab.
Emails not purchased from us will not have the auto-warmer tab. So you need to go to MailFlow to warm up your emails: https://help.quickmail.com/deliverability/auto-warmer-for-quickmail-inboxes/
Why did my emails suddenly disappear?
One reason it can happen is if the domains expired. A domain is valid only for a year so if it's due for renewal, an email notification will be sent to you.
If it's not renewed before the domain expires, the domain and emails will be canceled automatically.
Can I bring my own domain and get email accounts from QuickMail?
No, it's not possible to bring your own domain or use an existing domain to get email accounts from QuickMail. A new domain purchased from QuickMail is required to get email accounts from QuickMail.