Adding an Email Signature
Adding an Email Signature
In this article:
Why create an email signature in QuickMail?
How to create a signature?
What is the signature attribute?
How to create an HTML signature?
Why Create an Email Signature in QuickMail?
Signatures in QuickMail are created on a per-inbox basis. This means that regardless of which email account is used to send a message, QuickMail will automatically apply the correct signature.
This is especially useful when using multiple email accounts across campaigns. Rather than updating the signature in every email step manually, you only need to update it once on the email account itself.
If you add your signature directly to the email body instead of using the signature attribute, the signature will be static and will not update automatically when the email account signature changes.
How to Create a Signature?
Go to Email → click on an email account to open the quick view → Sending Settings → scroll down to Signature → add your signature → Save.
What Is the Signature Attribute?
The signature attribute dynamically inserts the correct email account signature into each email based on which account is sending it.
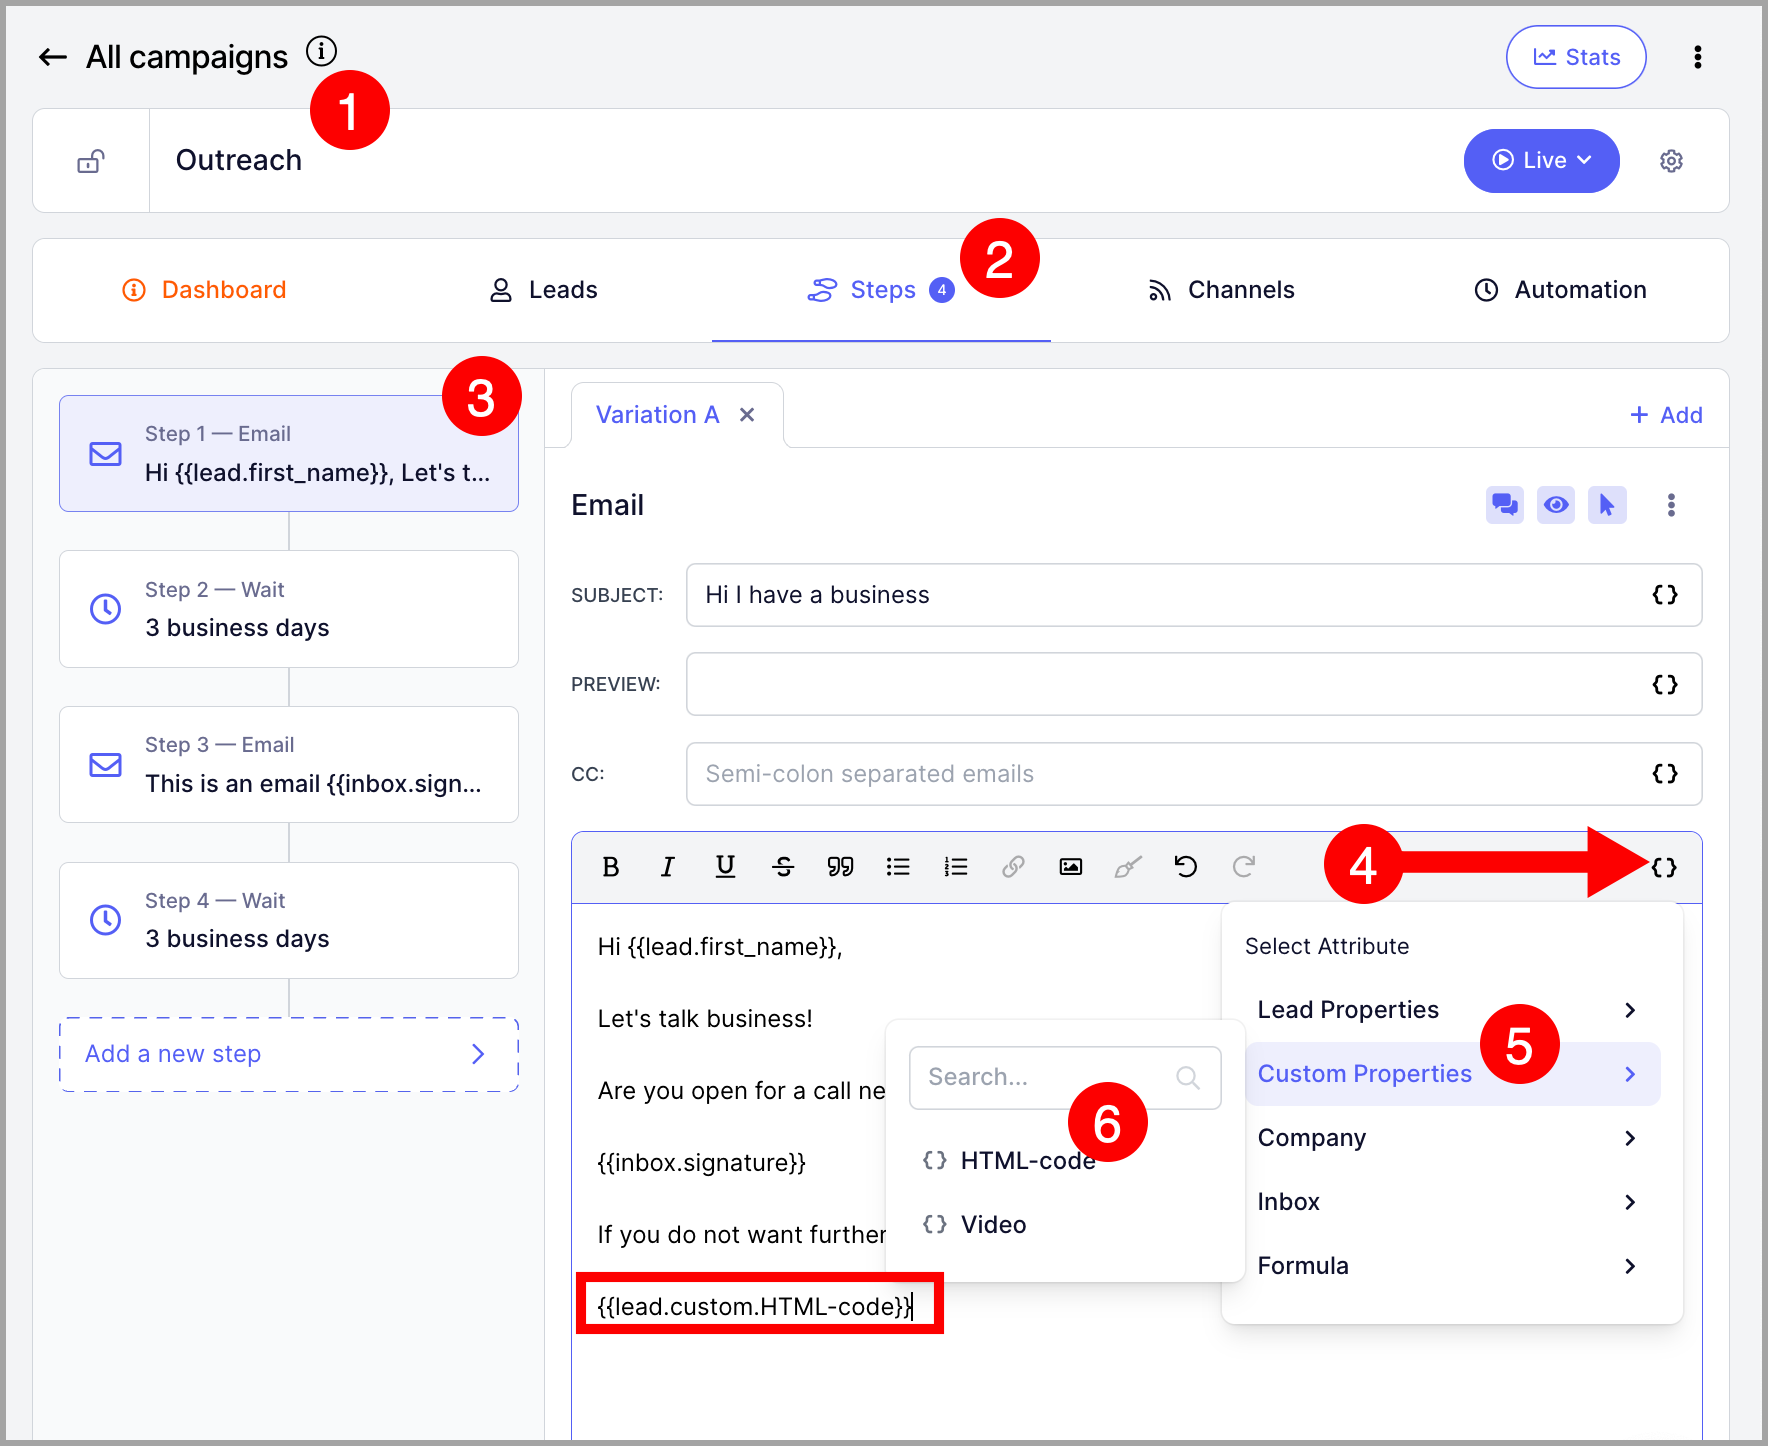
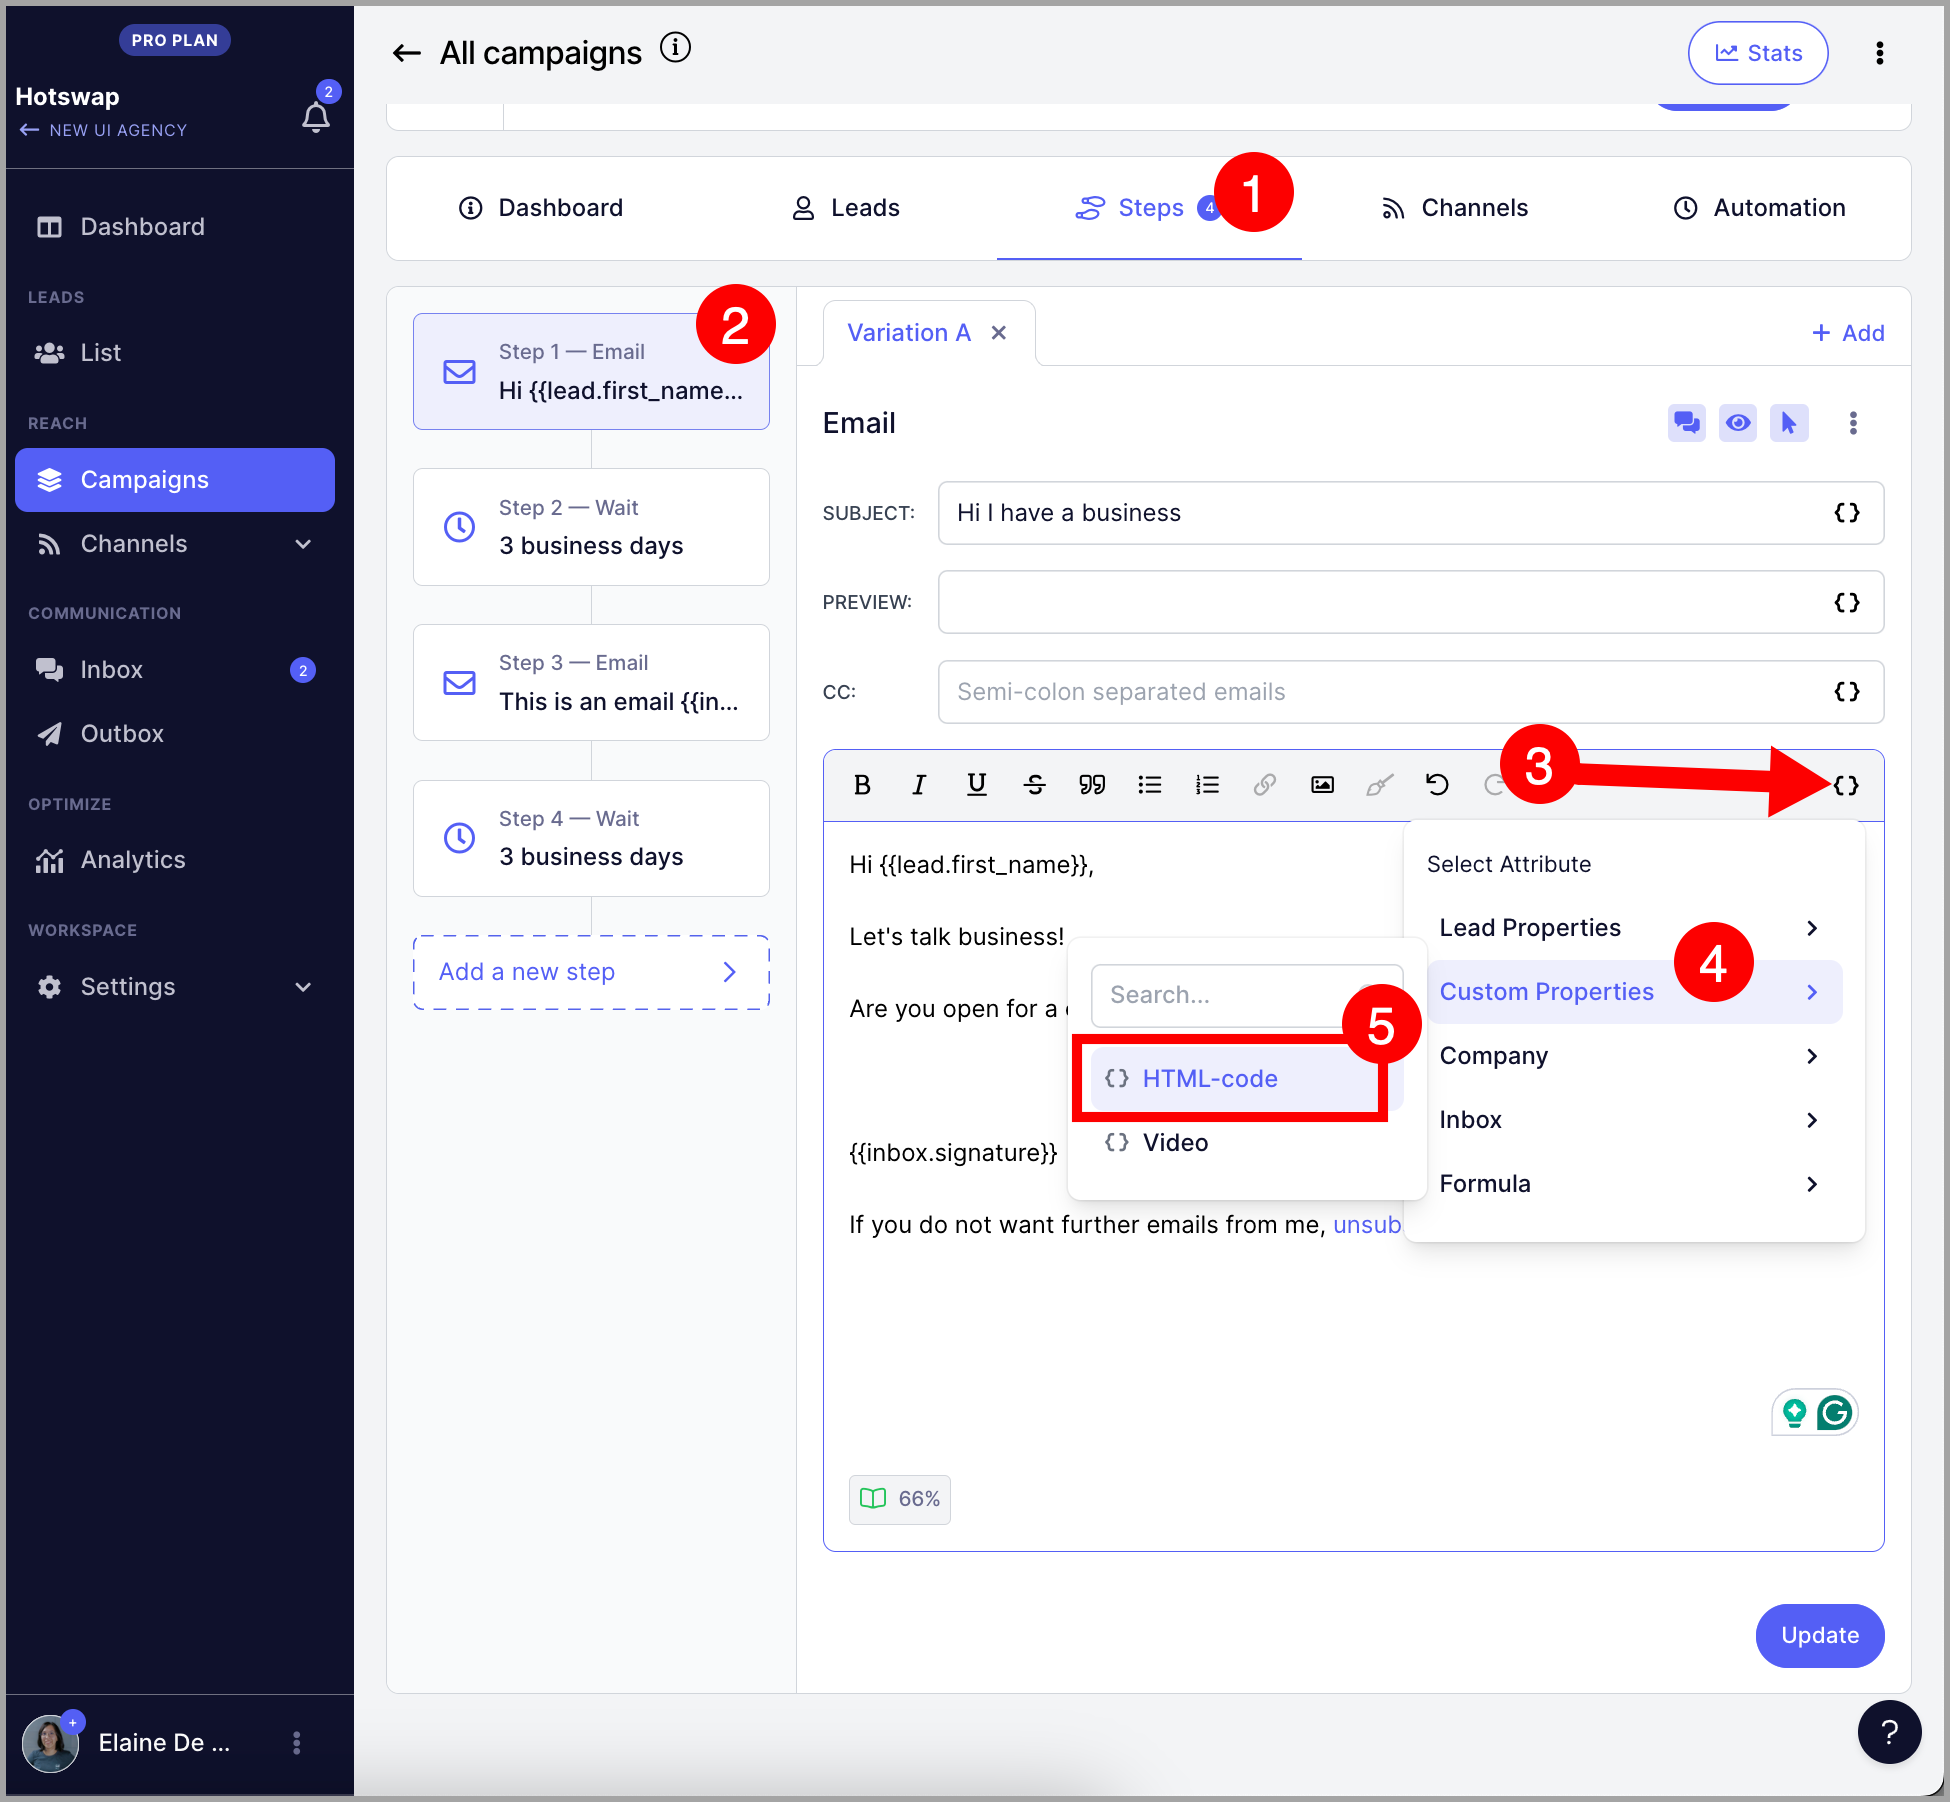
To add the signature attribute, type {{inbox.signature}} in the email body, or click the { } button to open the properties panel → click Inbox → select inbox.signature.

Pro tip: Other inbox-specific properties are also available under the Inbox heading, such as the sender's name, email address, and reply-to address.
How to Create an HTML Signature?
HTML is not supported directly in the signature field, but you can use a custom property as a workaround by pasting the HTML as the property's default value.
Step 1. Go to List → + Leads → Import from CSV or Google Drive.
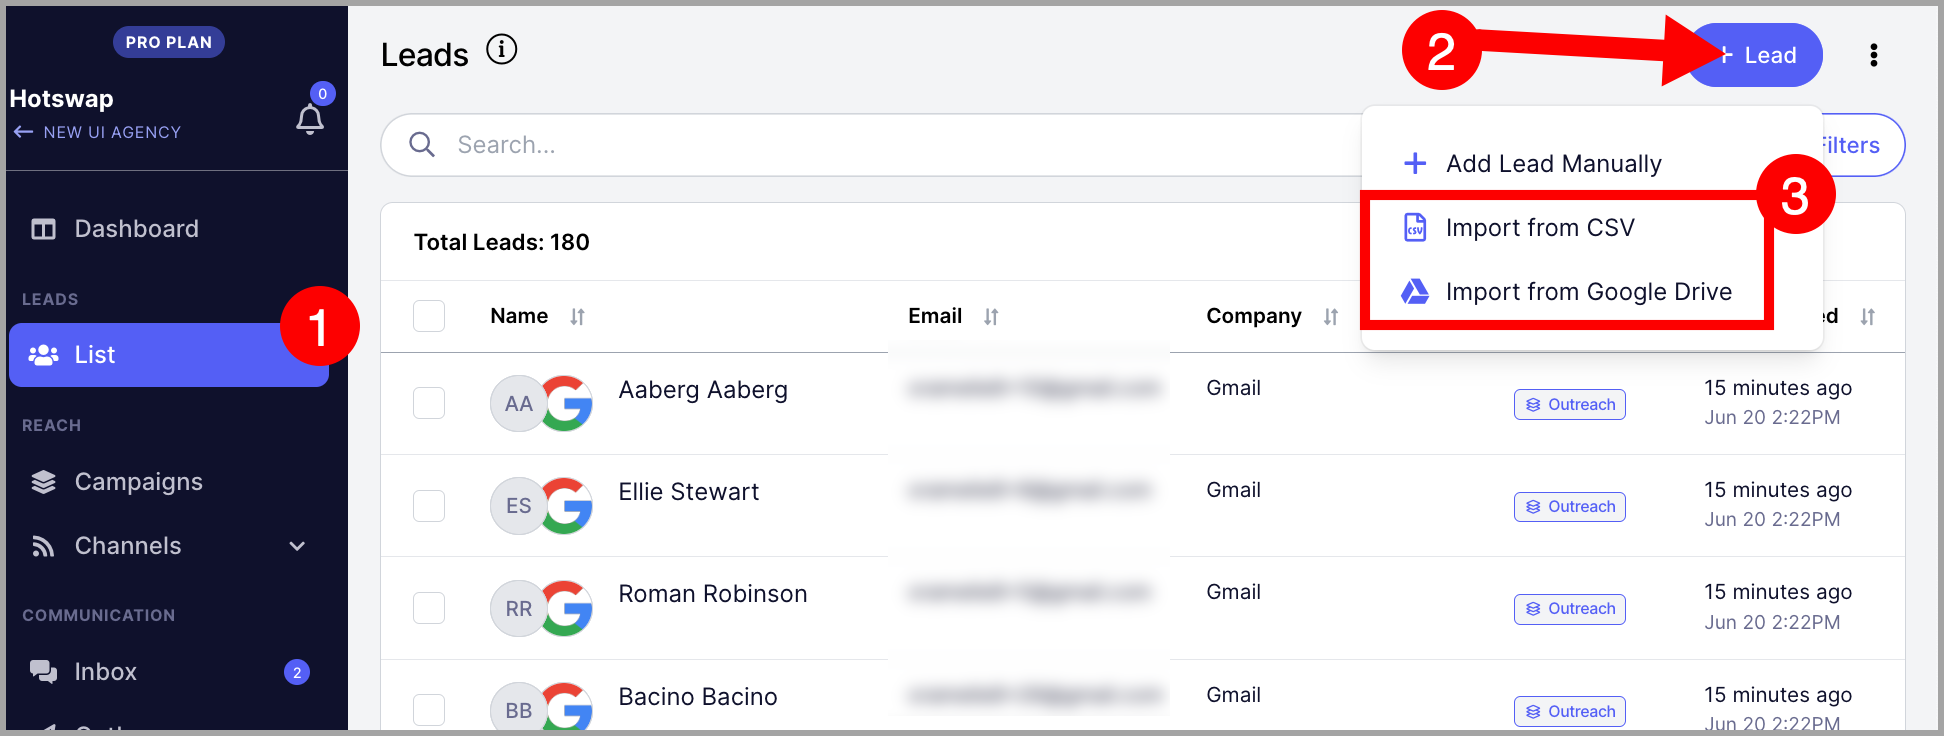
Note: You do not need to complete the import to create a custom property. You can load any CSV just to access the custom properties tab.
Go to the Custom Properties tab → click + New Property.
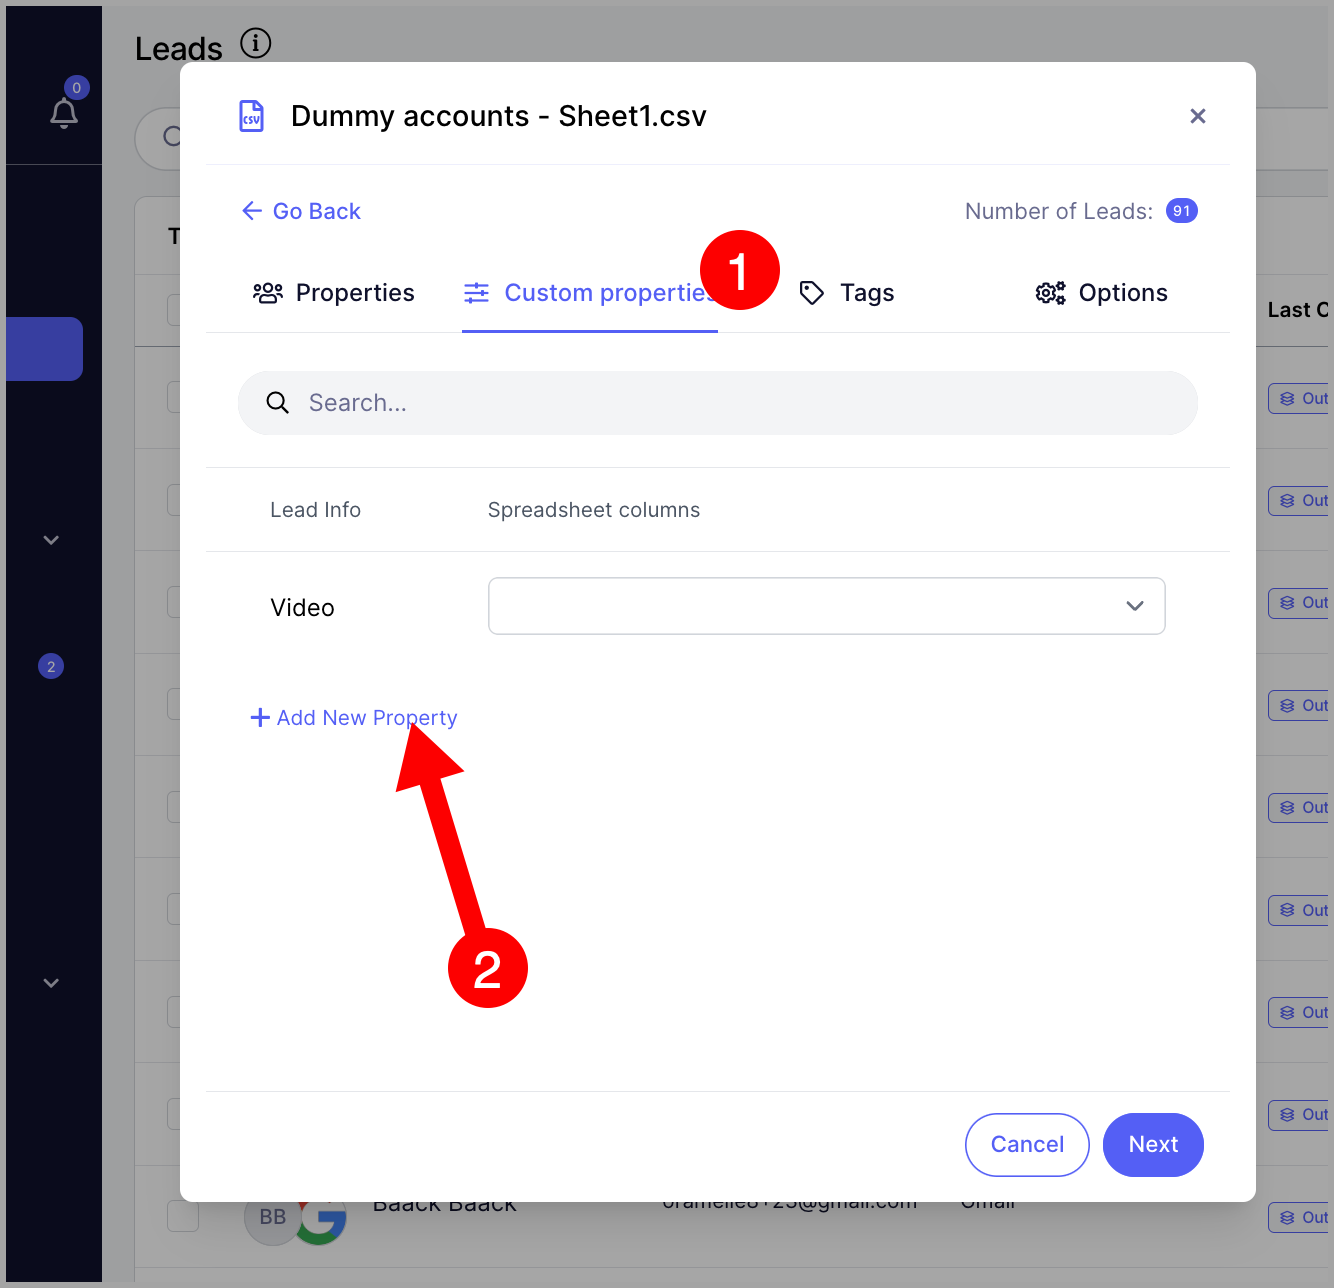
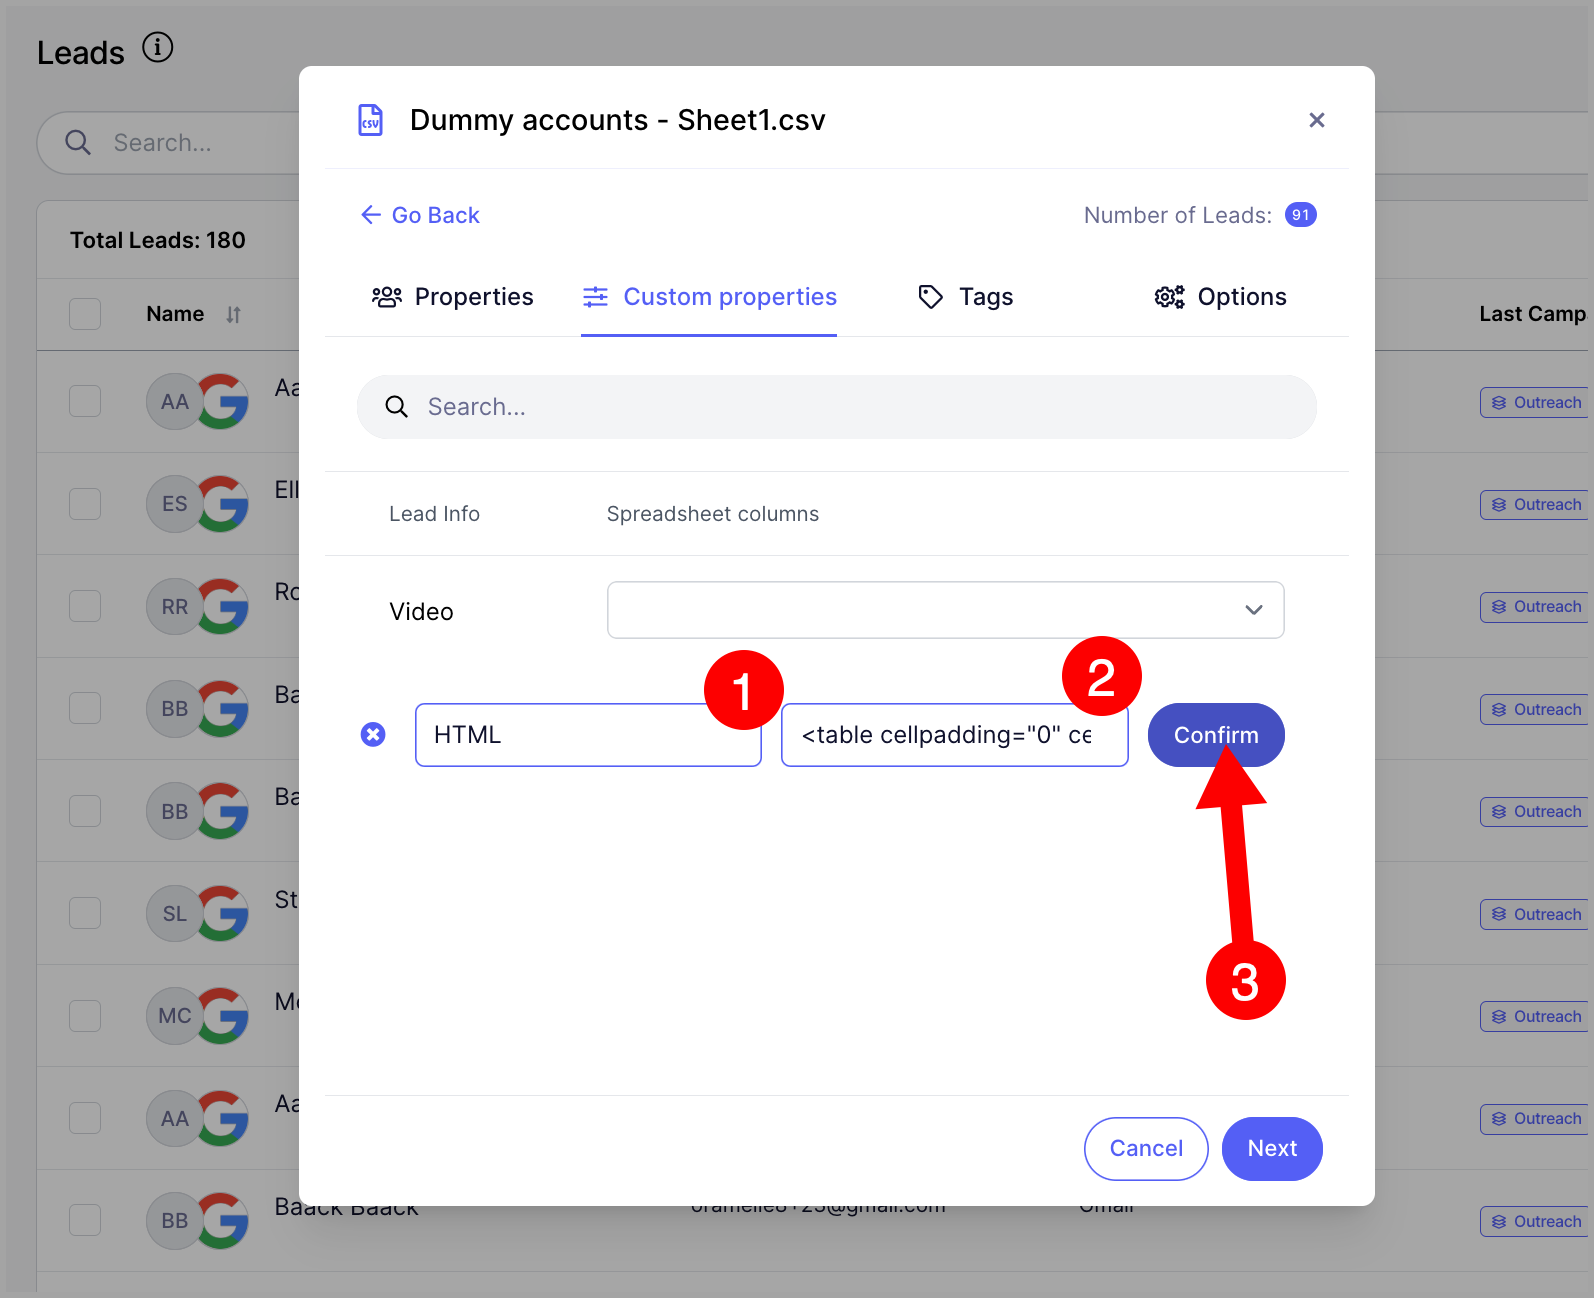
Step 2. Name the custom property → paste the HTML code as the default value → Confirm.
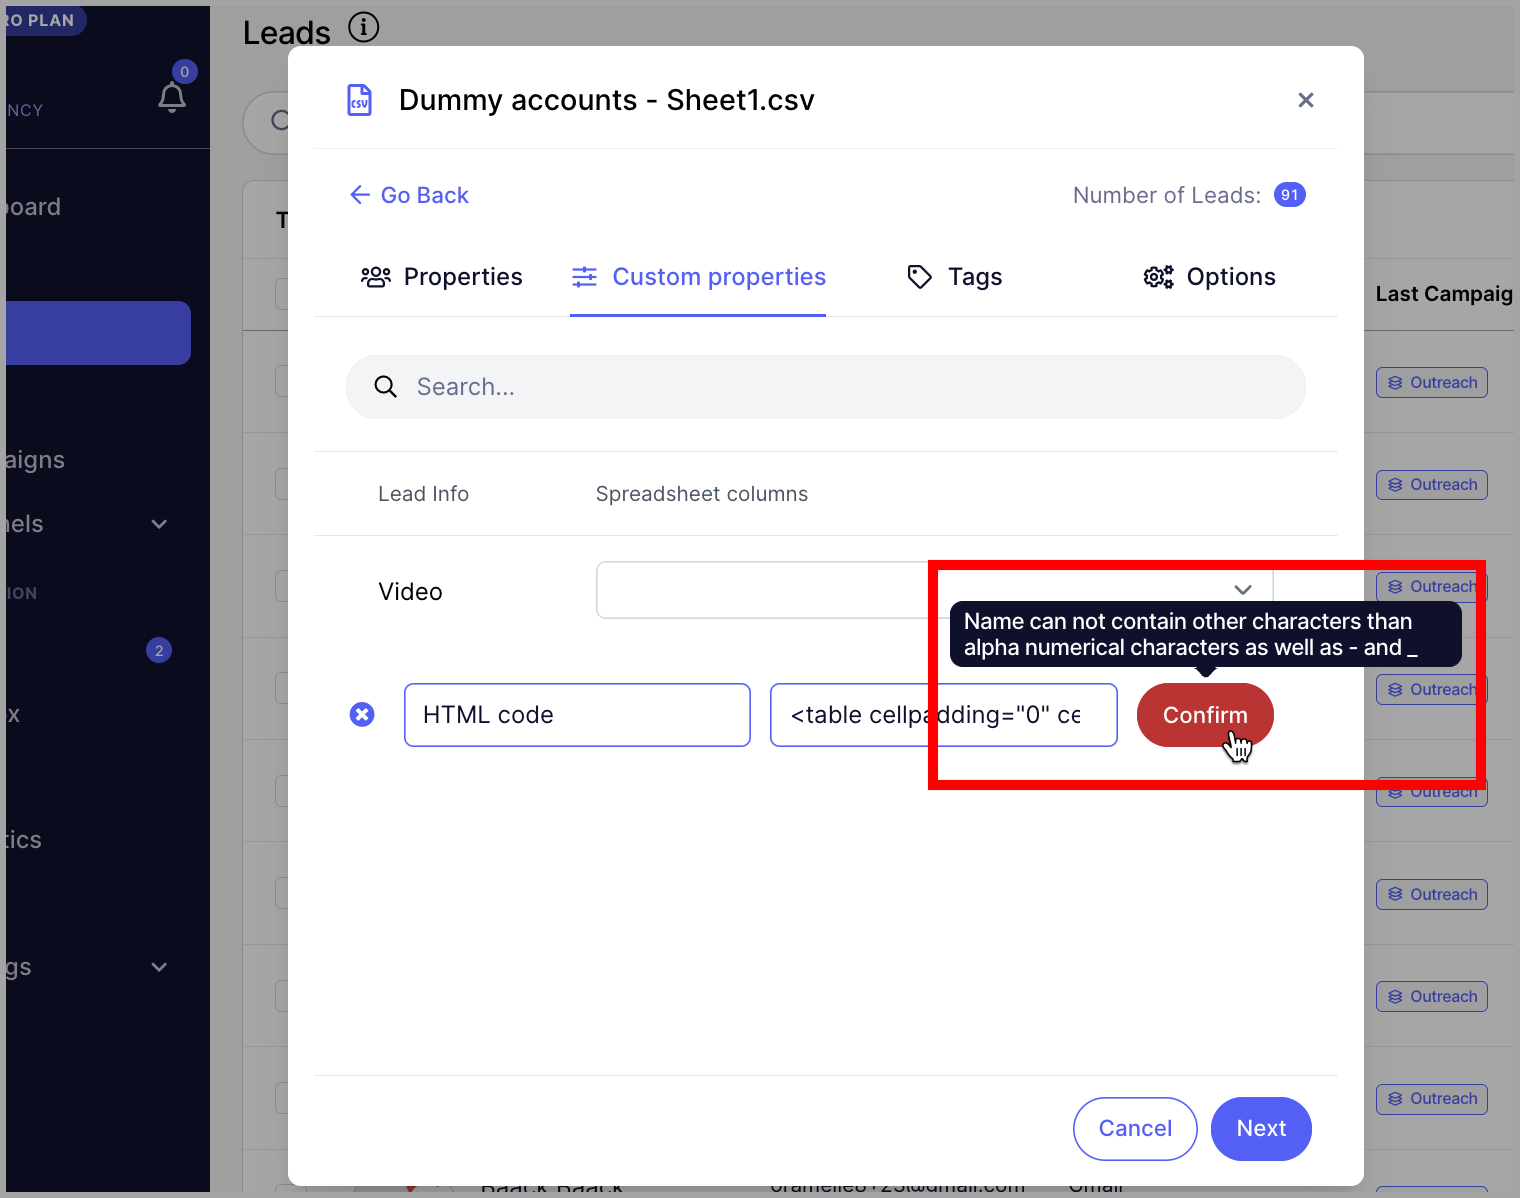
Warning: Custom property names can only contain letters, numbers, hyphens (-), and underscores (_). Names with spaces cannot be created.
Note: Make sure your HTML code is finalized before saving it as the default value. Custom property default values cannot be edited after creation.
Step 3. Copy the property syntax.
Step 4. Paste the property into your signature field.
As long as the signature attribute is included in your emails, the HTML will render correctly for every recipient.
Can I Add a Logo or Image to My Signature?
Yes. To add an image, go to Email → click on an email account → second tab → scroll down to Signature → click the image icon → choose Upload or Image URL.
Note that there is no option to resize images within QuickMail. Resize your image before adding it to ensure it displays correctly.
Also note that images with large file sizes may be treated as attachments by email service providers. To prevent this, keep image file sizes under 2MB.