Setting Up an Email Alias (Replace Sent-From & Reply-To)
Setting Up an Email Alias (Replace Sent-From & Reply-To)
In this article:
Why set up an alias?
Can I add an alias email account as a separate sender?
How to use an alias with a Gmail inbox?
How to use an alias with a Microsoft inbox?
How to use an alias with a custom inbox?
Why Set Up an Alias?
Setting up an alias allows you to send emails from or receive replies to a different address. This can help you sort your emails more easily or present a different sender address to recipients.
Can I Add an Alias Email Account as a Separate Sender?
No. It is not possible to add an alias email account (or an email account without its own login or license) as a separate sender.
IMPORTANT NOTES:
- Changing the Send-From or Reply-To address can prevent QuickMail from detecting replies if those email addresses are not connected to the workspace.
QuickMail only scans inboxes that have been added as sending email accounts. Therefore, if you use a different Send-From or Reply-To address, that address must also be added as an email account in QuickMail so the system can monitor it for incoming replies.
The account does not need to be actively used to send emails—it only needs to be connected so QuickMail can scan it for replies and correctly track conversations.
Also note that aliases still affect the deliverability of the primary email account, since emails sent via an alias are technically still sent from the primary address. If the goal is to avoid getting flagged, using an alias is not recommended.
Additionally, emails sent from aliases are not signed with SPF and DKIM records, which makes them more likely to land in spam.
How to Use an Alias with a Gmail Inbox?
Step 1. Set up an alias directly in your Gmail account. Here is a guide on how to do this.
Note: If you would like to use a secondary domain in your Google Workspace as an alias, it must also be set up as an alias in Gmail.
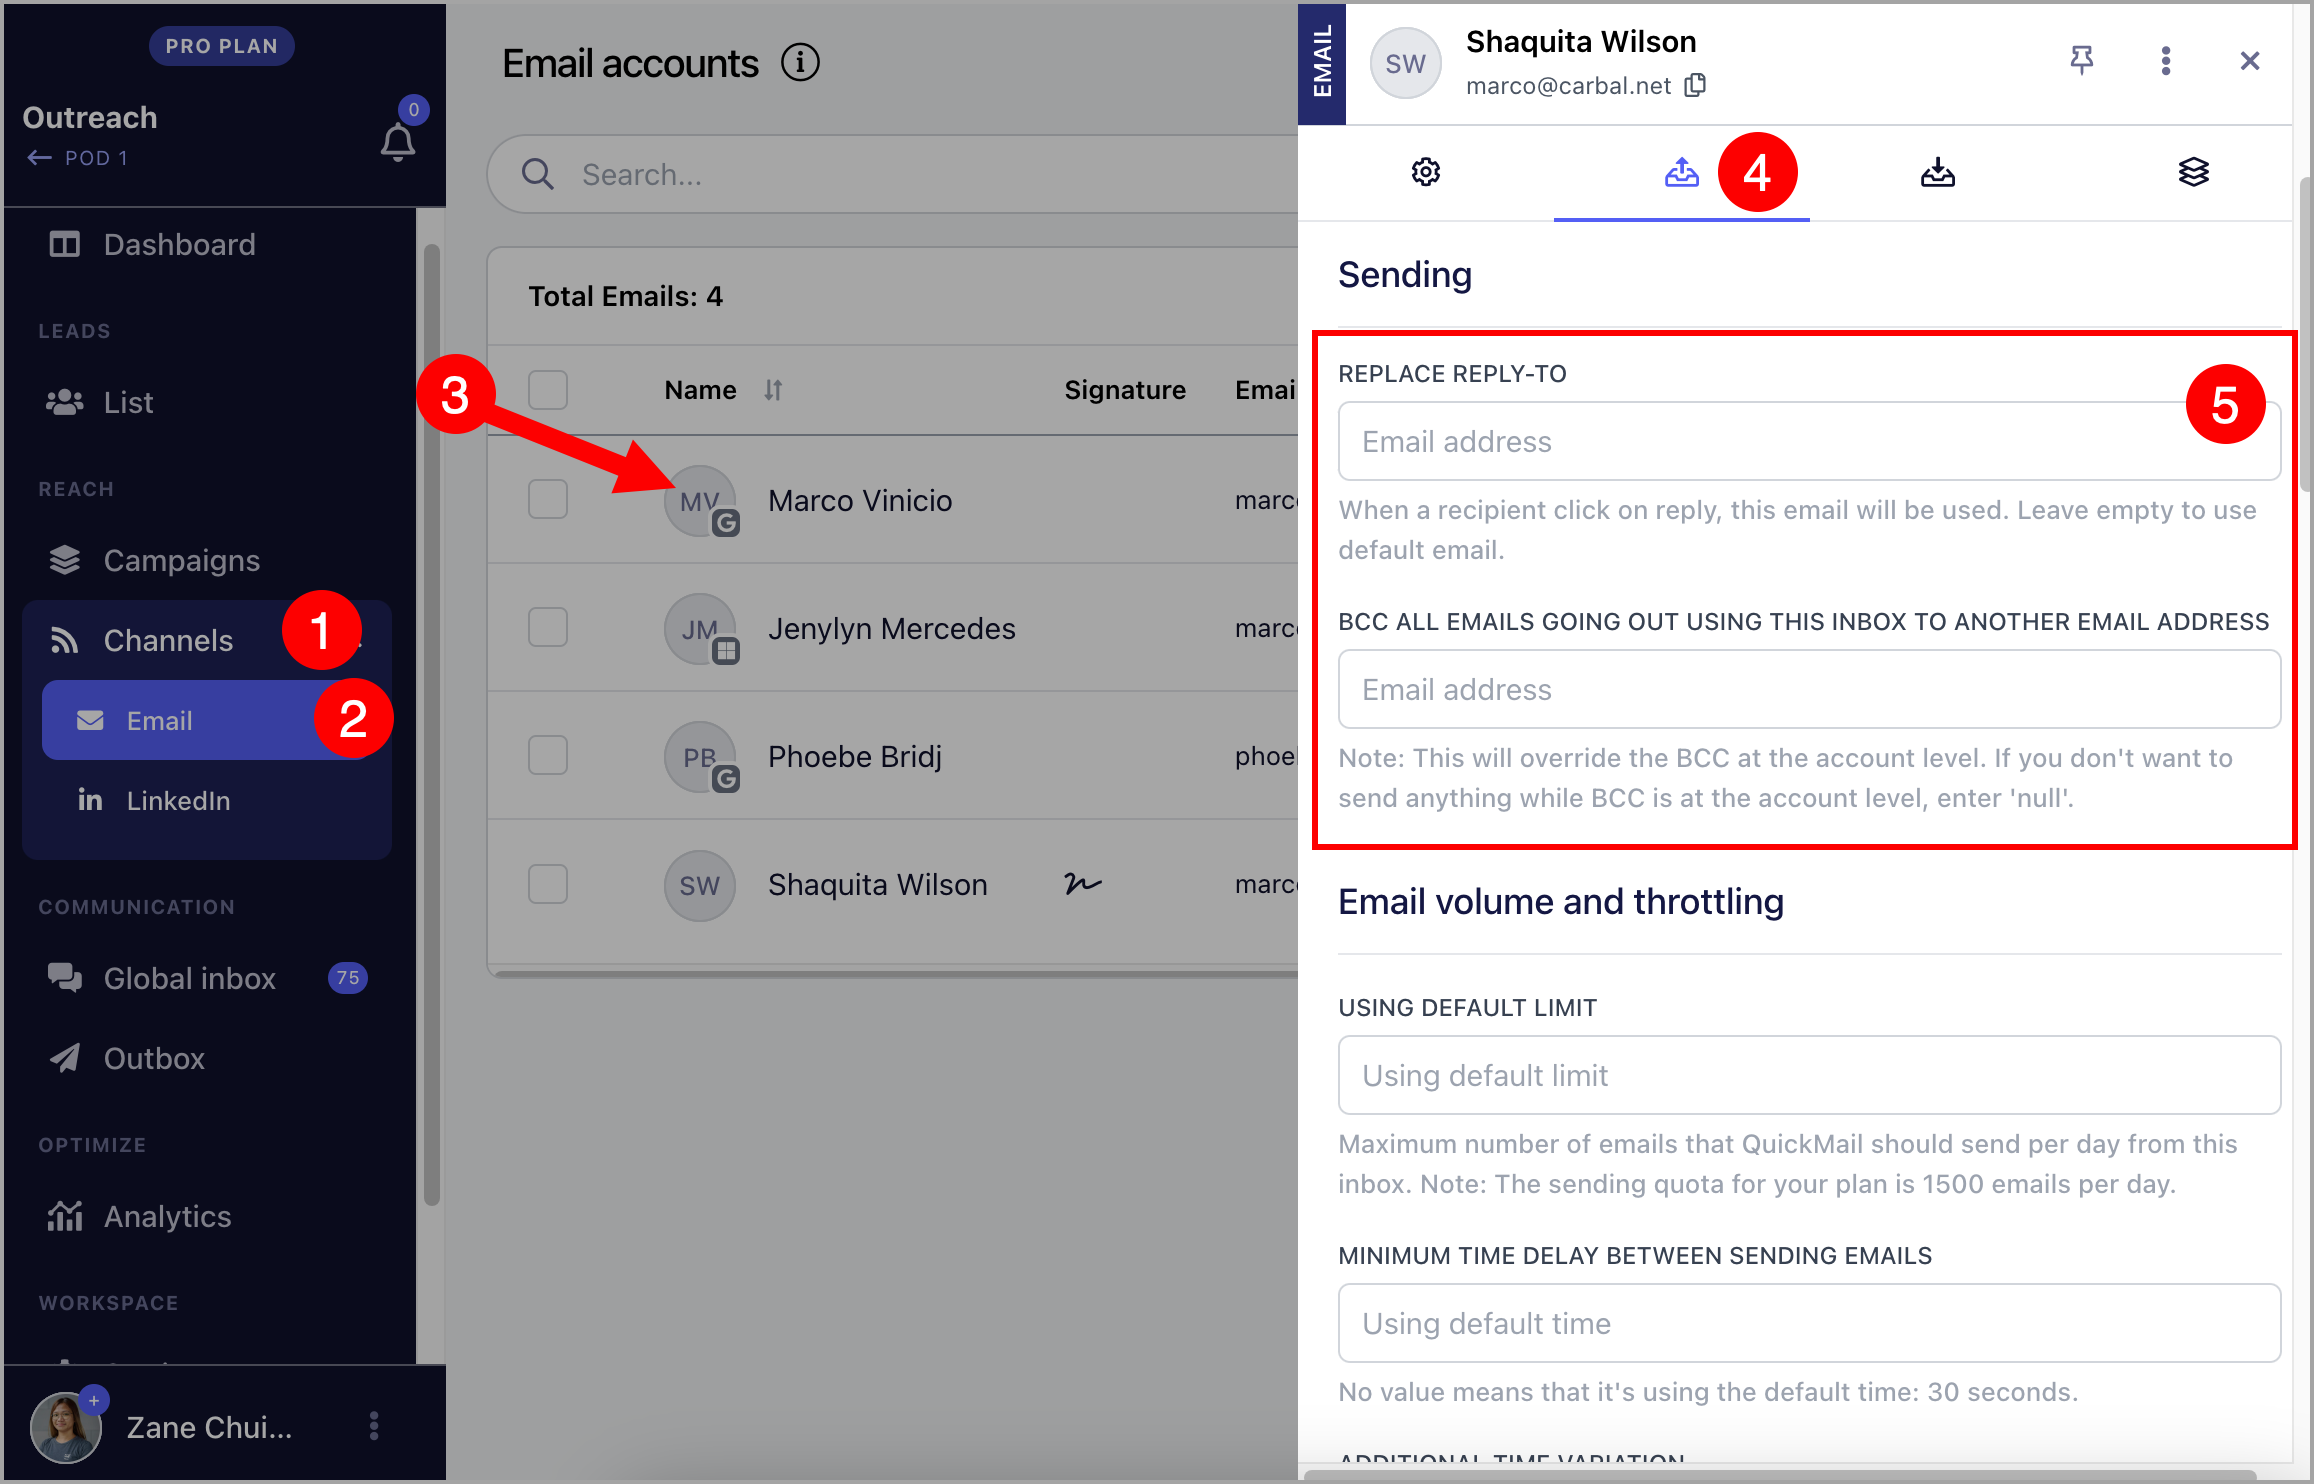
Step 2. Go to Email → click on the email account → Sending tab → add your preferred address under Send-From or Reply-To.
How to Use an Alias with a Microsoft Inbox?
Step 1. Set up an alias directly in your Microsoft account. Here is a guide on how to do this.
Step 2. Go to Email → click on the email account → Sending tab → add your preferred address under Send-From or Reply-To.
How to Use an Alias with a Custom Inbox?
Step 1. Set up an alias directly in your email account. Here are guides for custom inboxes commonly used with QuickMail:
Zoho Mail — make sure to also set up the address as a sent-from email address in Zoho.
Step 2. Go to Email → click on the email account → Sending tab → add your preferred address under Send-From or Reply-To.