Adding New Leads
Adding New Leads
IMPORTANT: When leads are imported to a campaign in QuickMail, they are also added to your main lead list. Leads can be filtered by engagement, tags, and more to narrow down targeted follow-up lists for further outreach or export.
In this article:
What are leads?
Creating leads manually
Importing leads from CSV
Importing leads from Google Drive
Importing leads from Sales Navigator
Importing leads from a LinkedIn post
Auto-importing via Google Sheet
Auto-importing via Sales Navigator
Importing leads from emails received
Importing leads who viewed your LinkedIn profile
FAQs
What Are Leads?
Leads are the people you will send emails or LinkedIn messages to. An email address is required to add a lead in QuickMail.
Creating Leads Manually
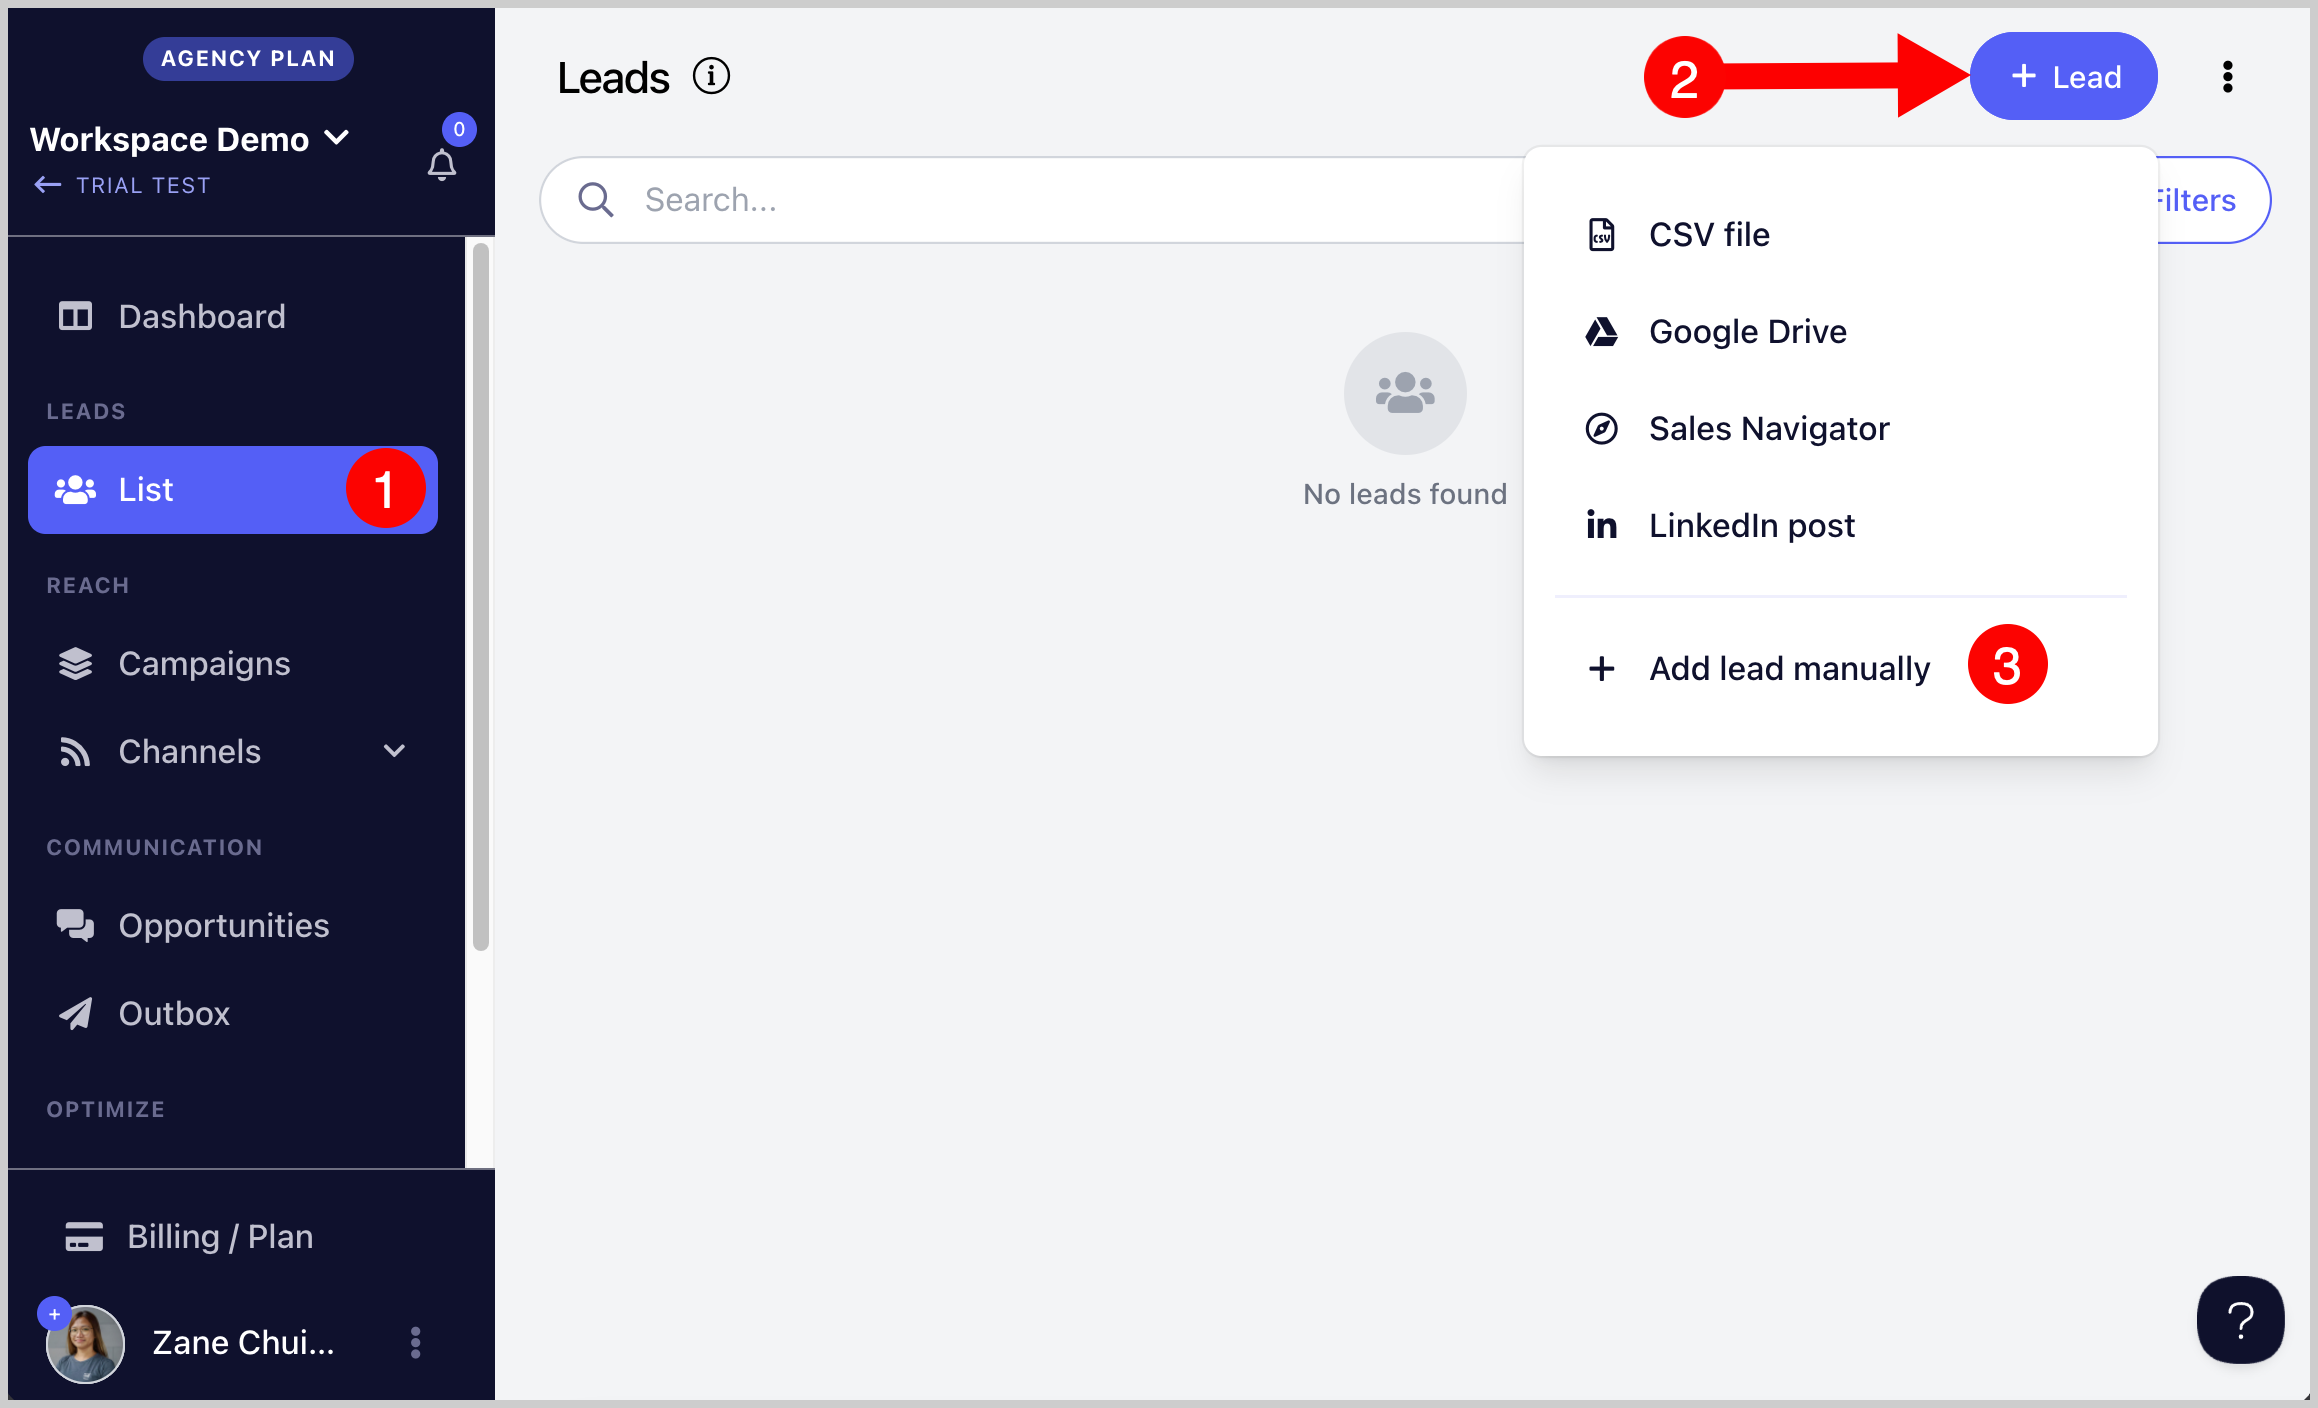
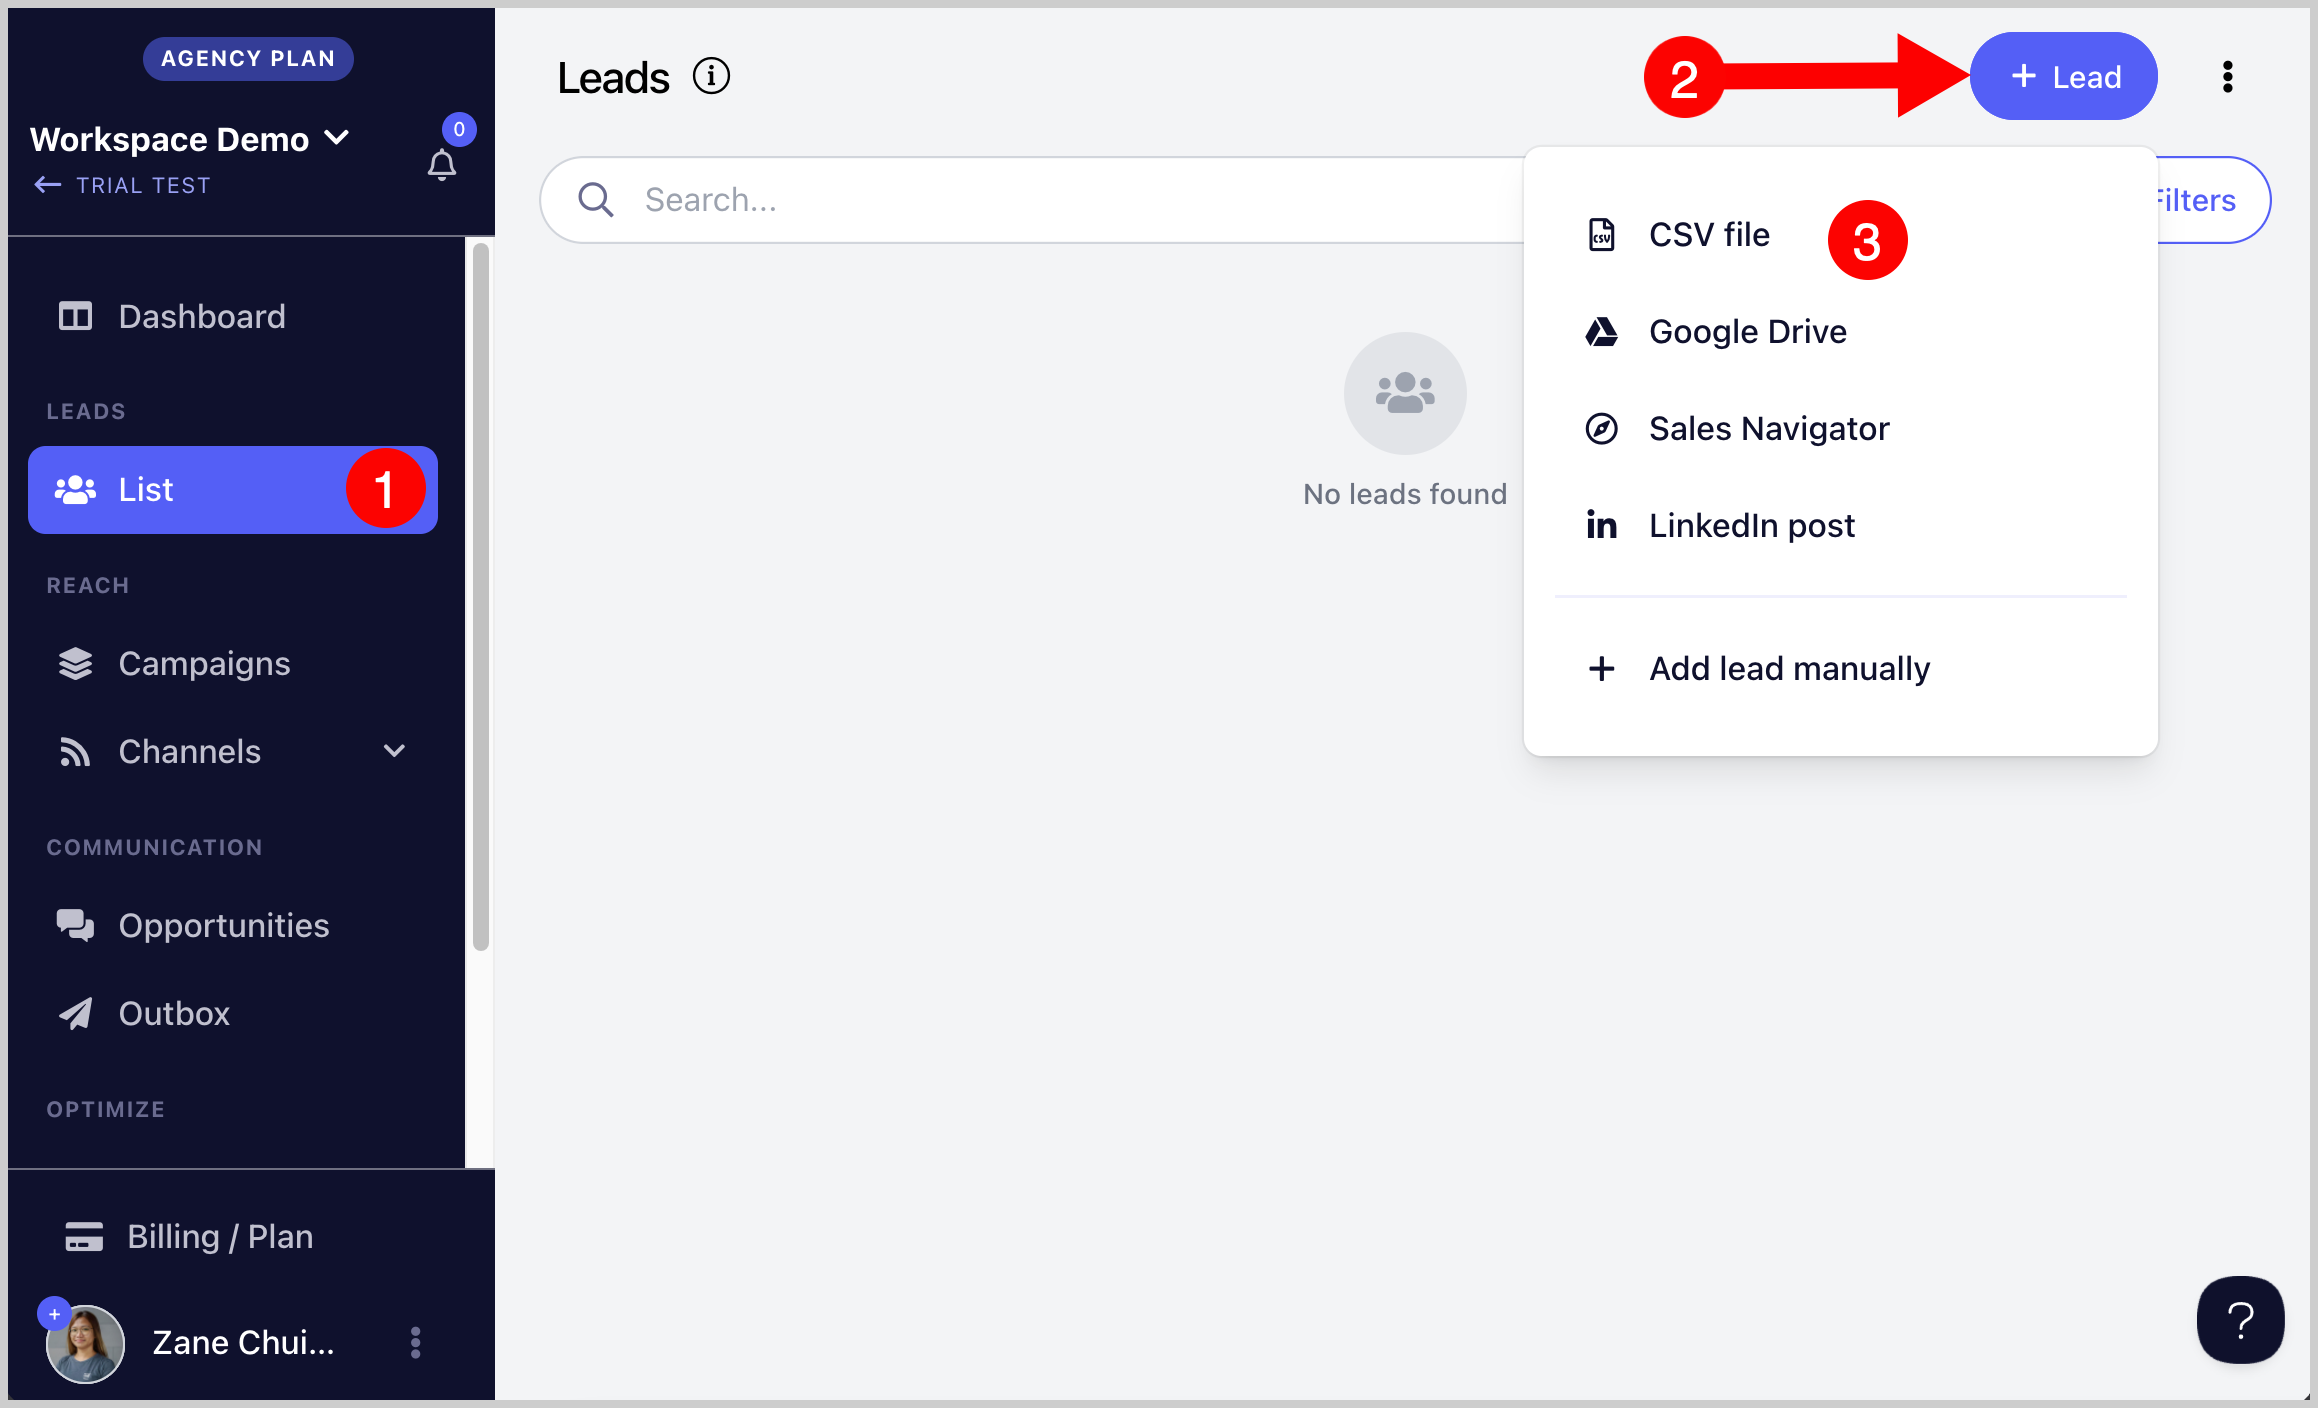
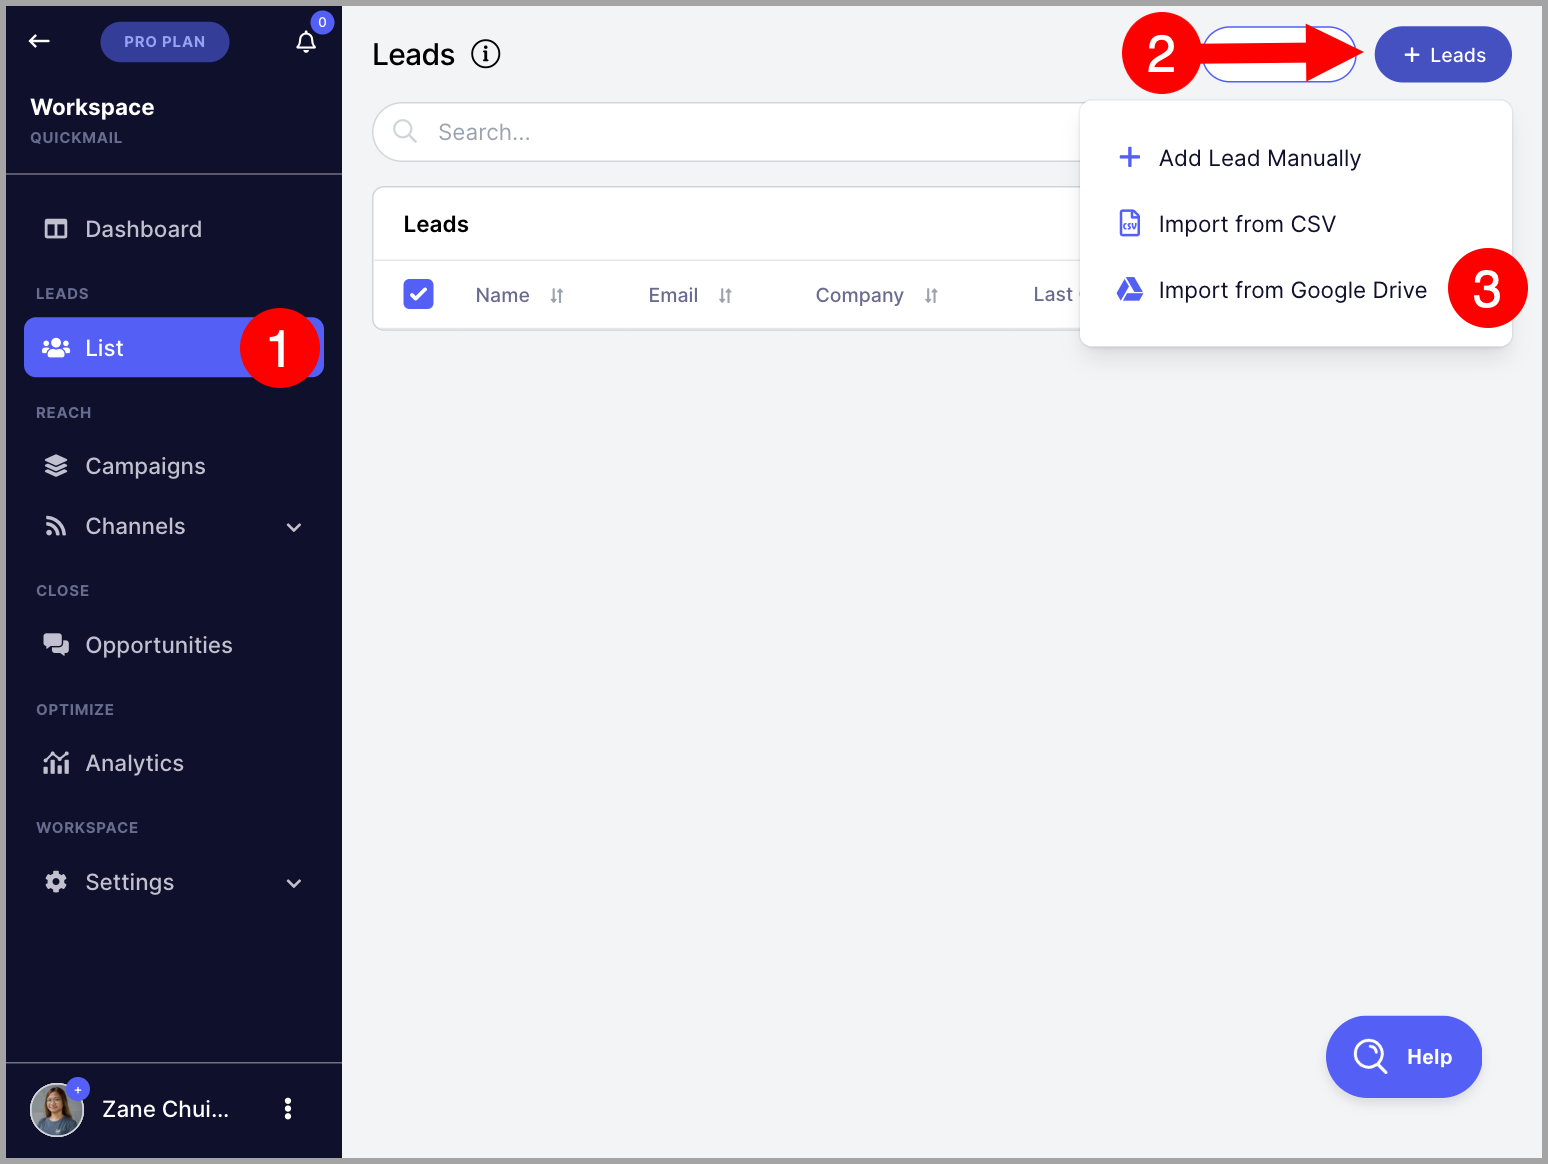
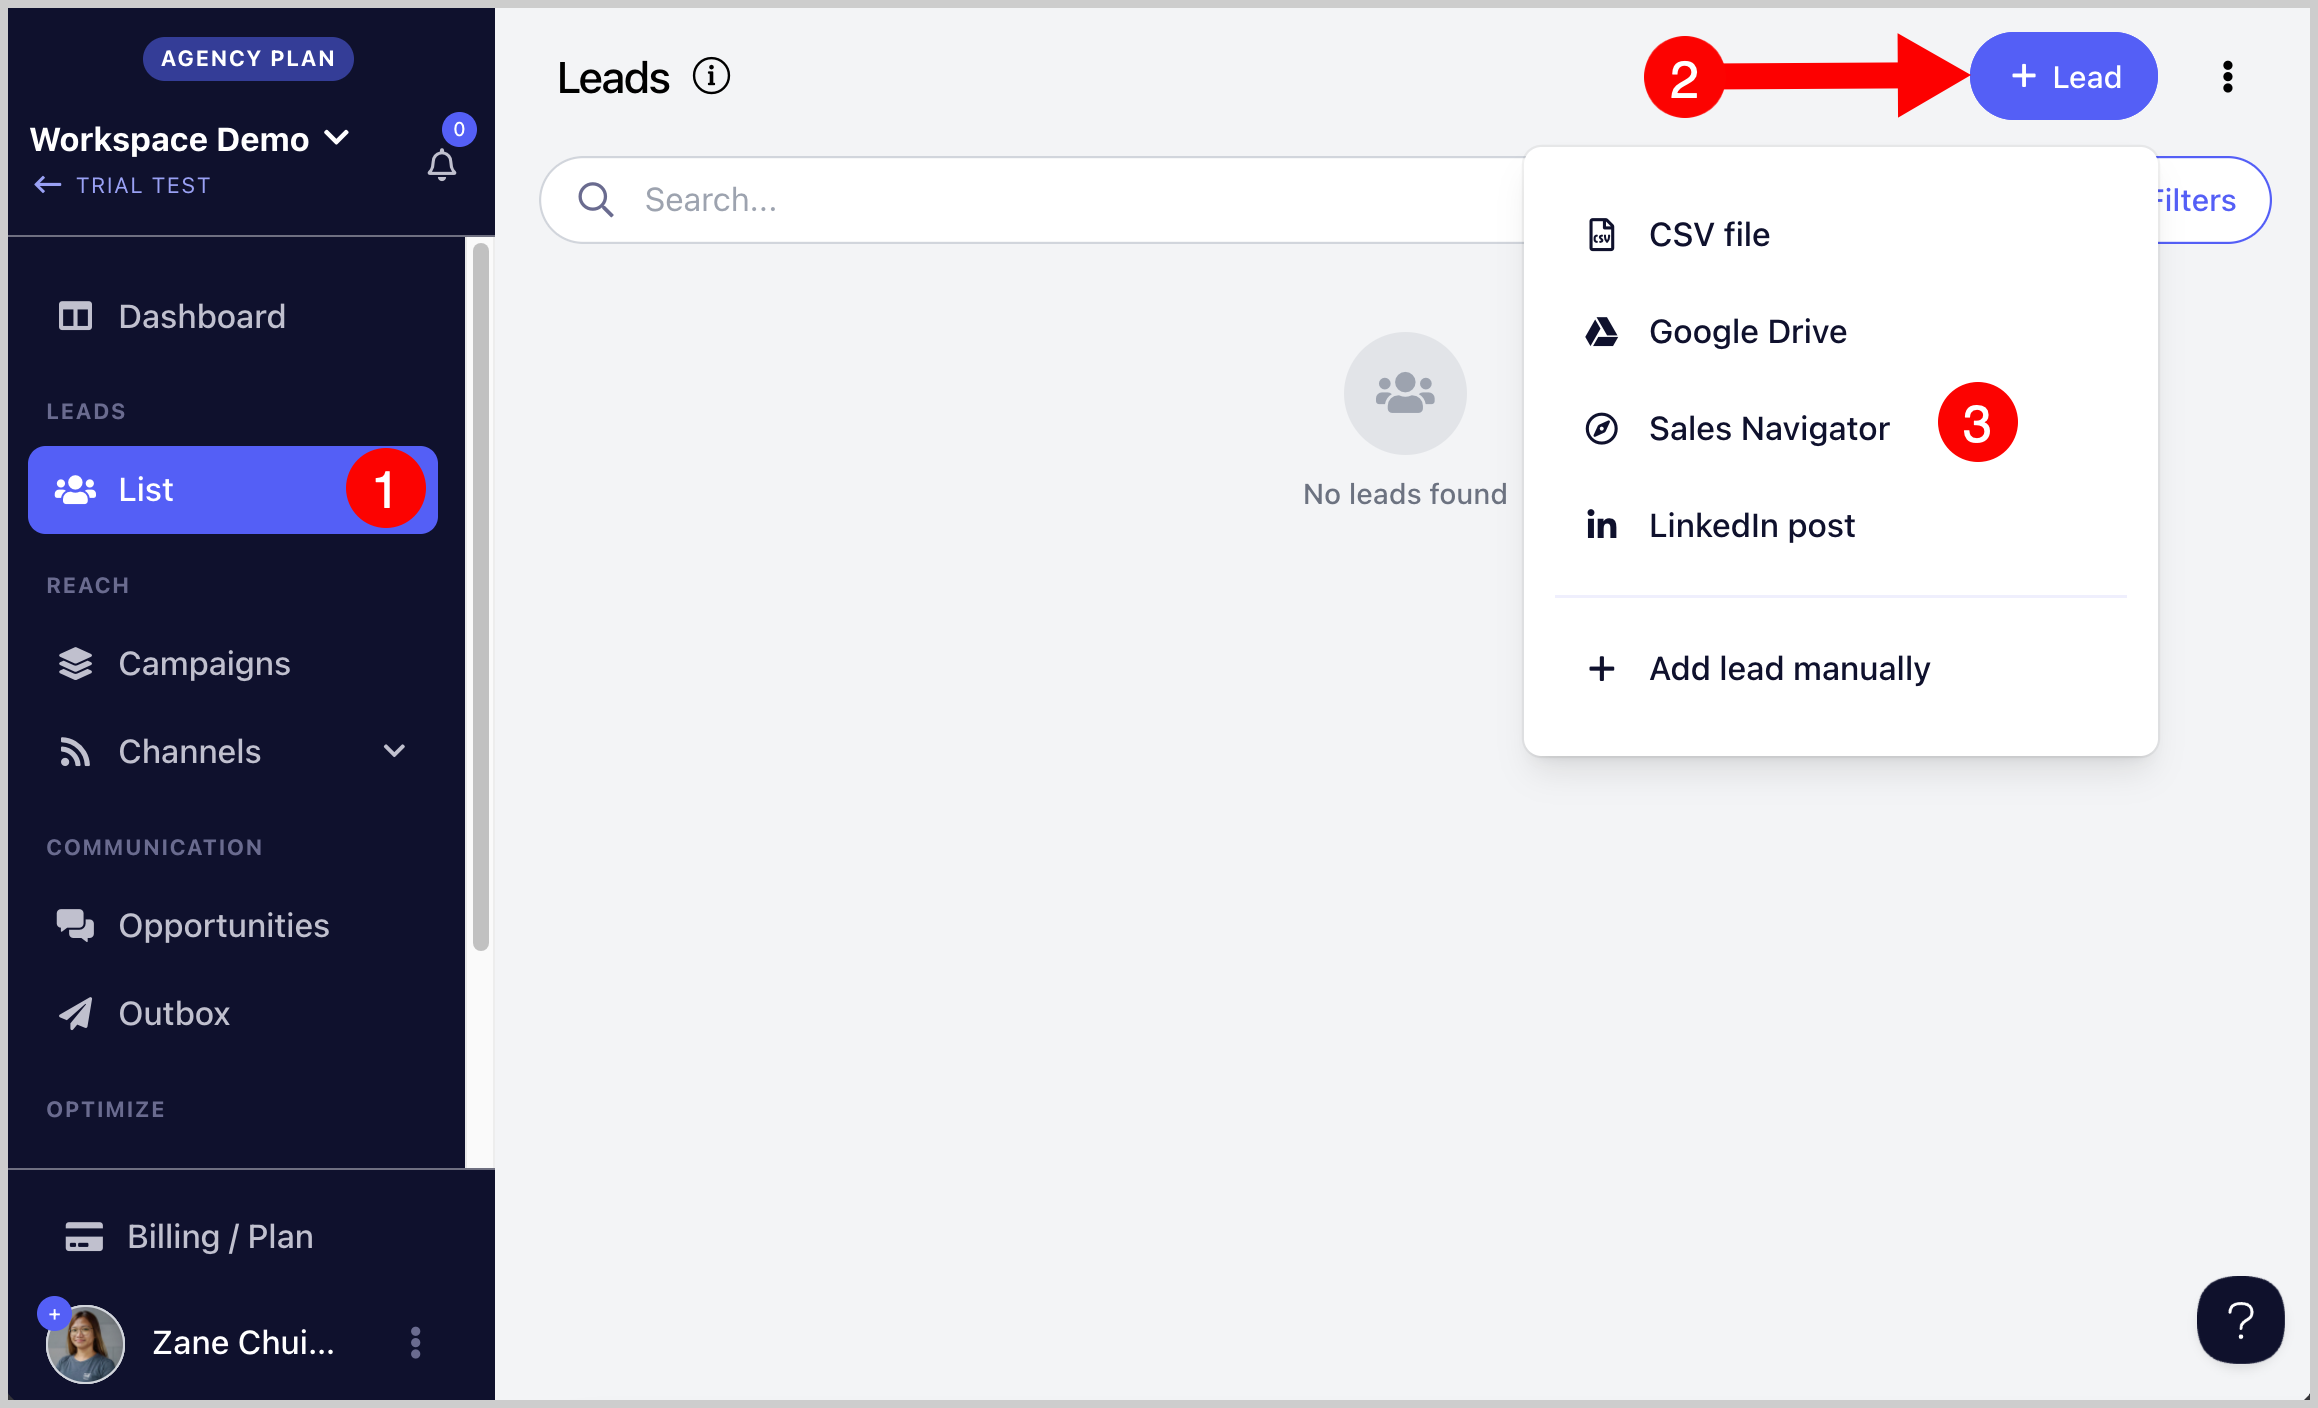
Step 1. Go to List → + Leads → Add Lead Manually.
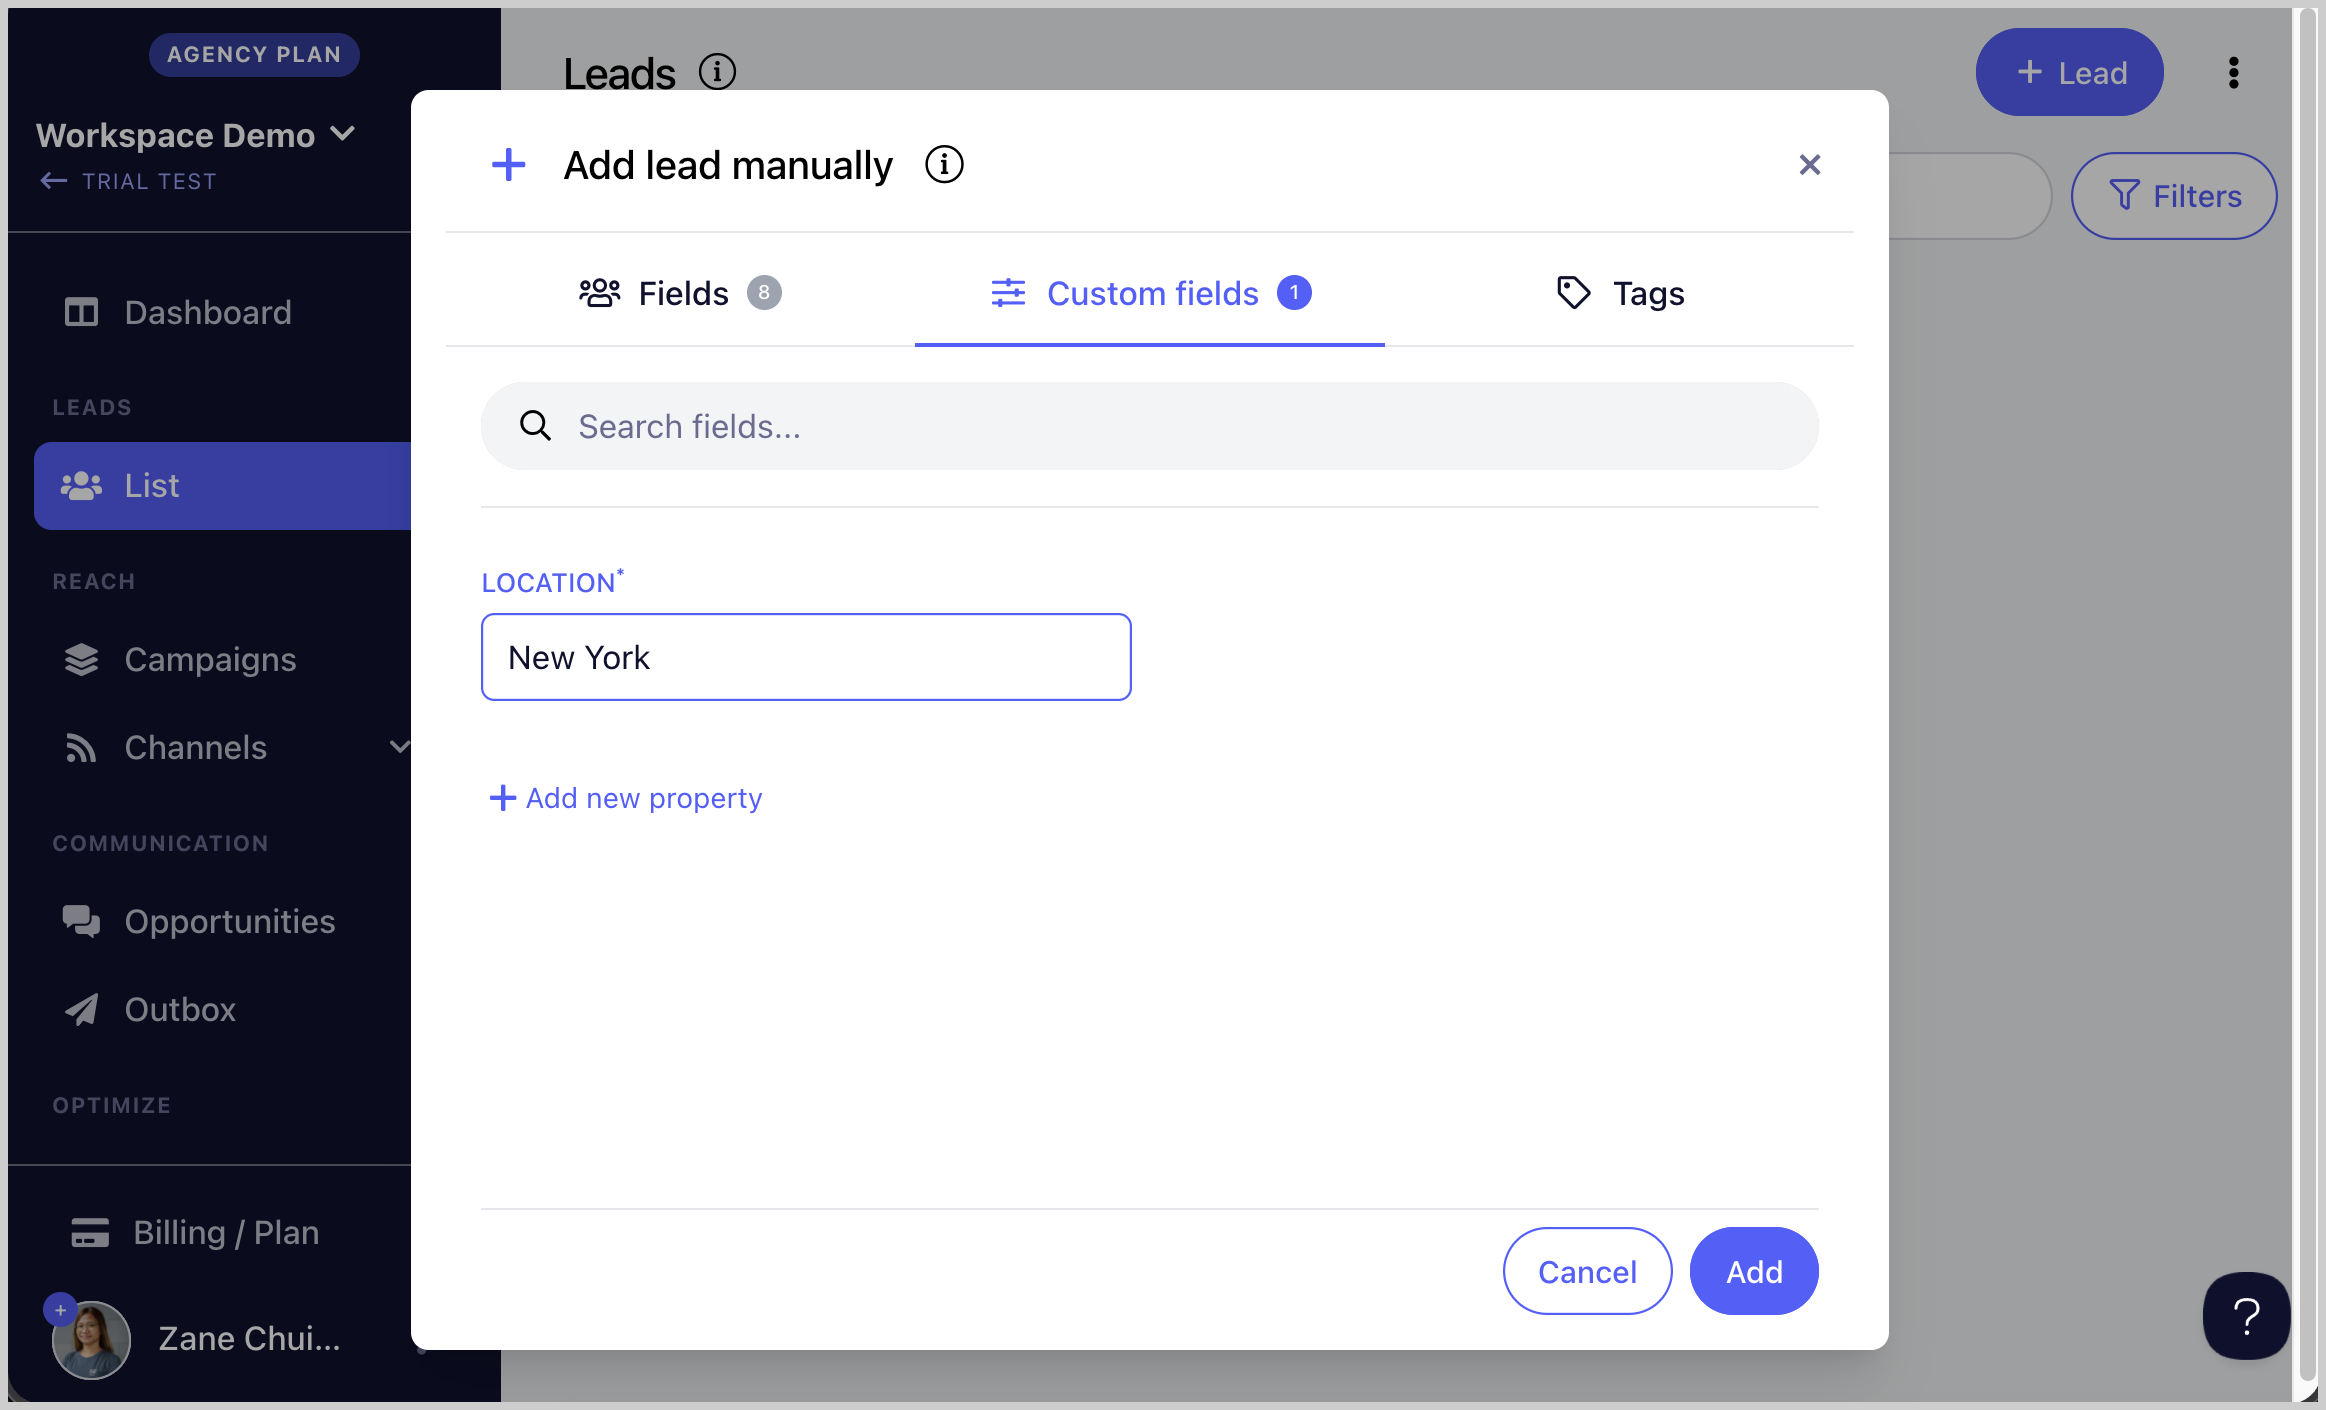
Step 2. Enter the lead's information including their email address.

Step 3. (Optional) To add custom properties such as location or custom notes, click the Custom Properties section → add the property name and default value.
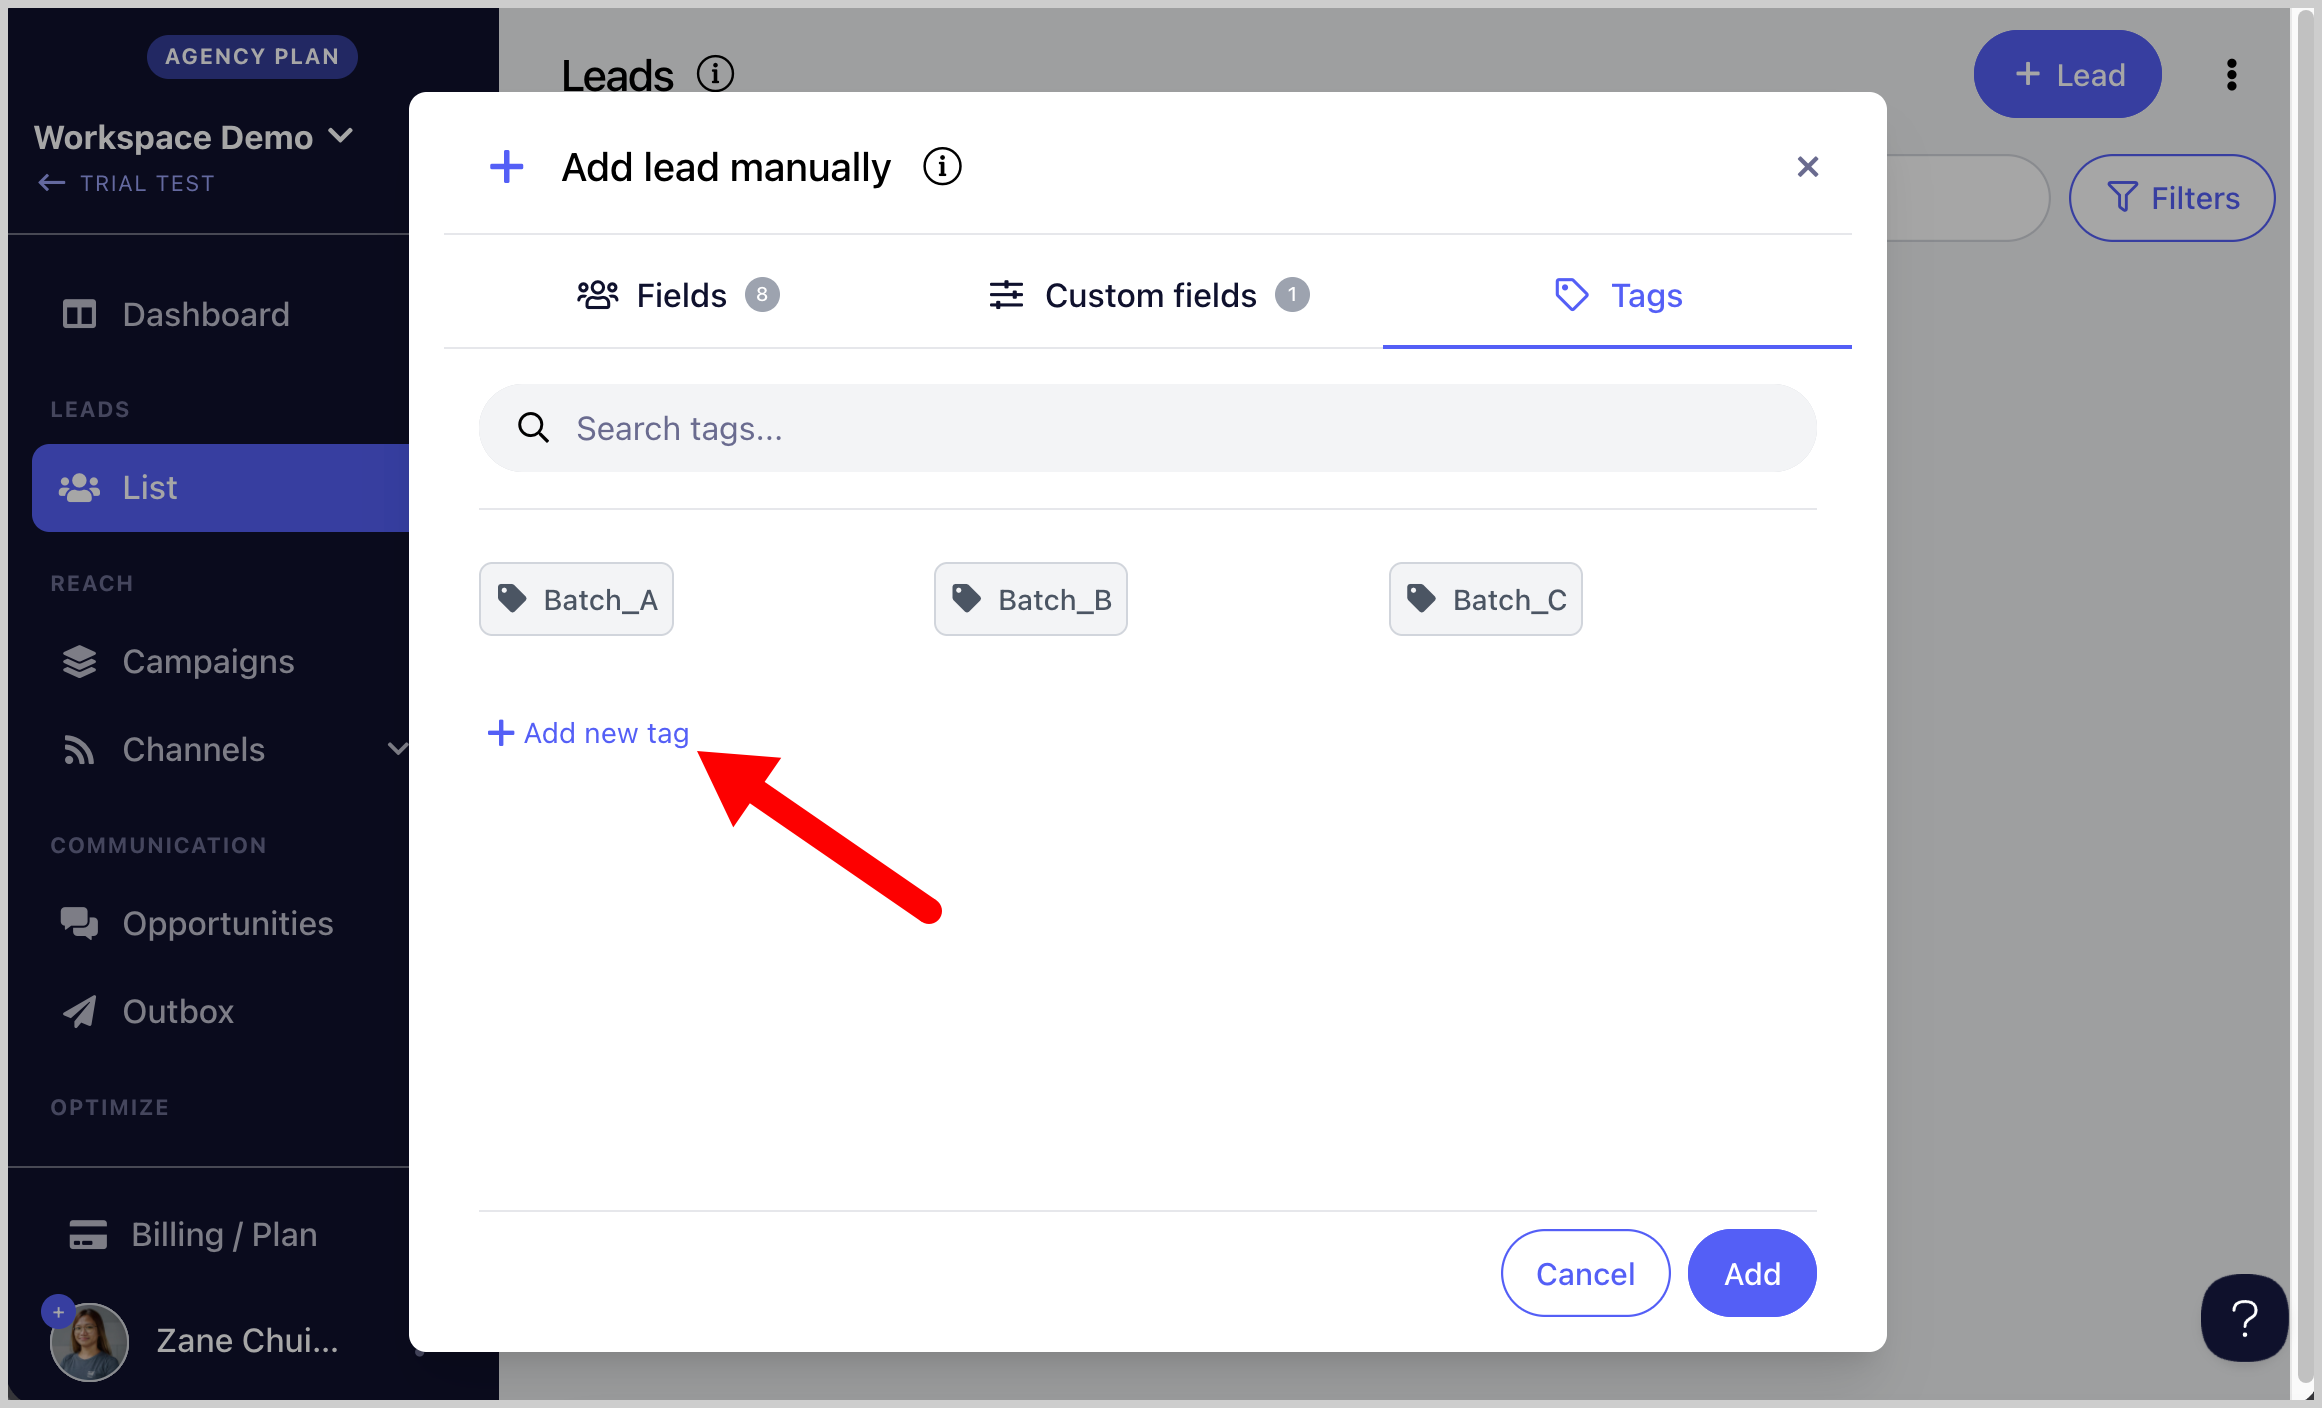
Step 4. (Optional) To add tags, click the Tags section → type the name of the tag you would like to create.
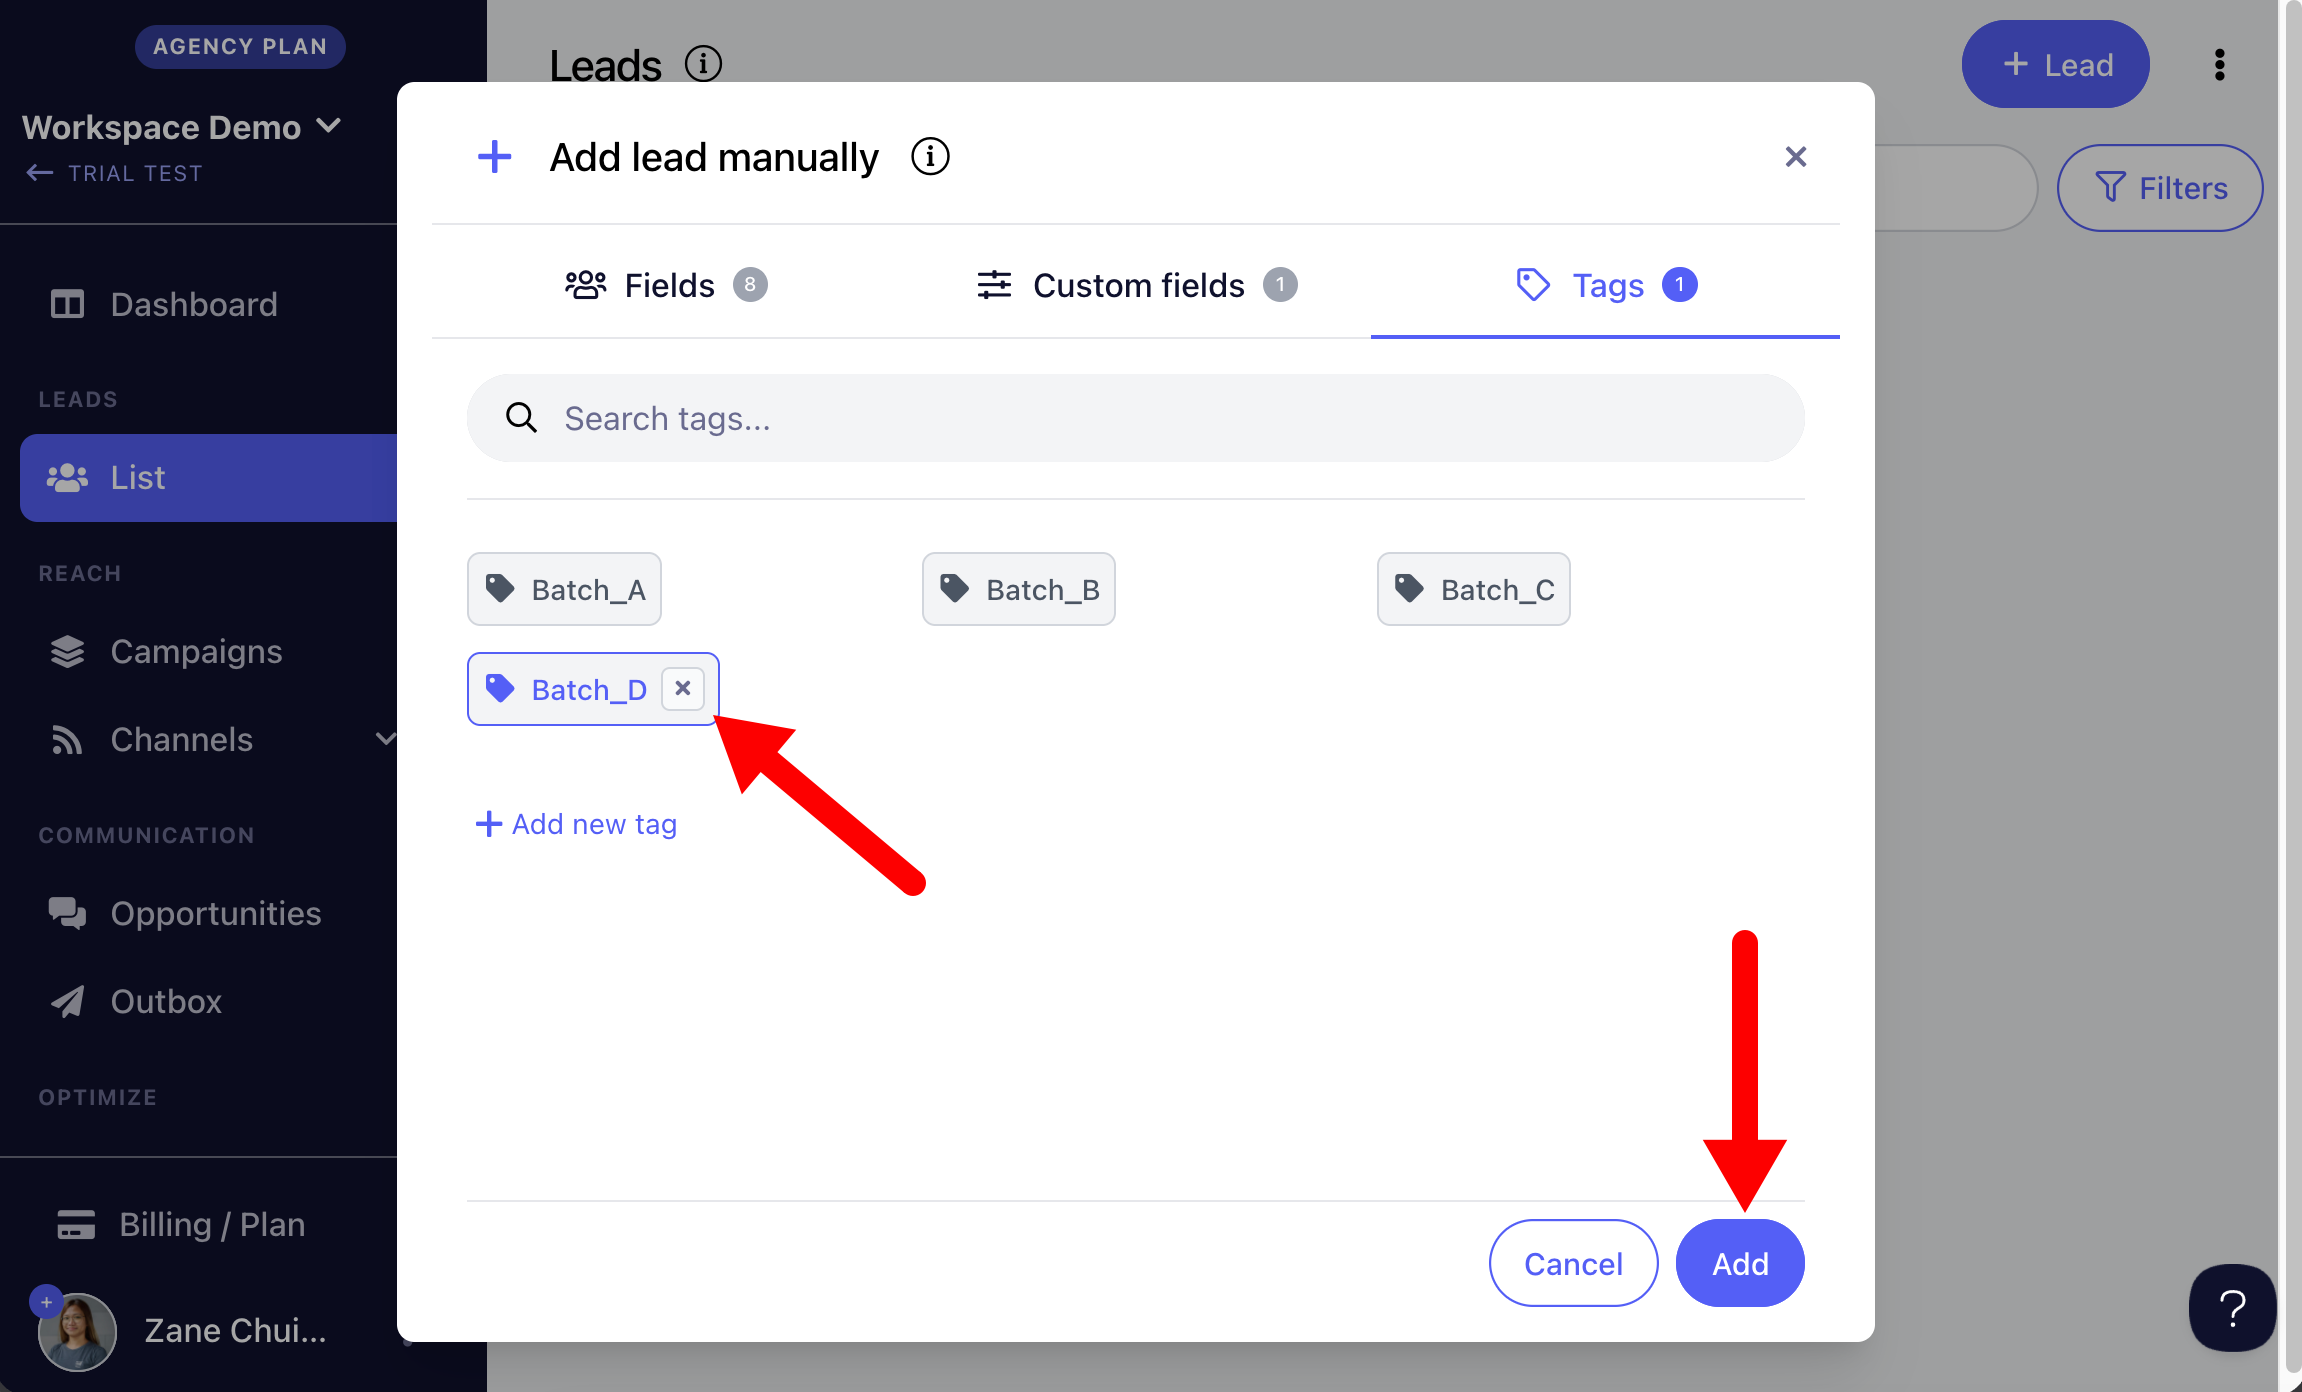
Step 5. Select the tags you would like to add → once all information is entered, click Add.
Importing Leads from CSV
Leads can be imported from a CSV file directly into your lead list or a campaign.
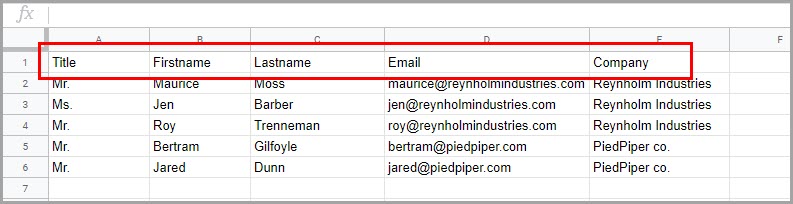
CSV specifications:
The file must be comma-delimited. Other delimiters such as semicolons are not supported.
File size must not exceed 20 MB.
Number of rows must not exceed 49,999. For large files, you can use this free tool.
Each lead must have a unique email address.
The file must contain a header row.
Step 1. Go to List → + Leads → Import from CSV.
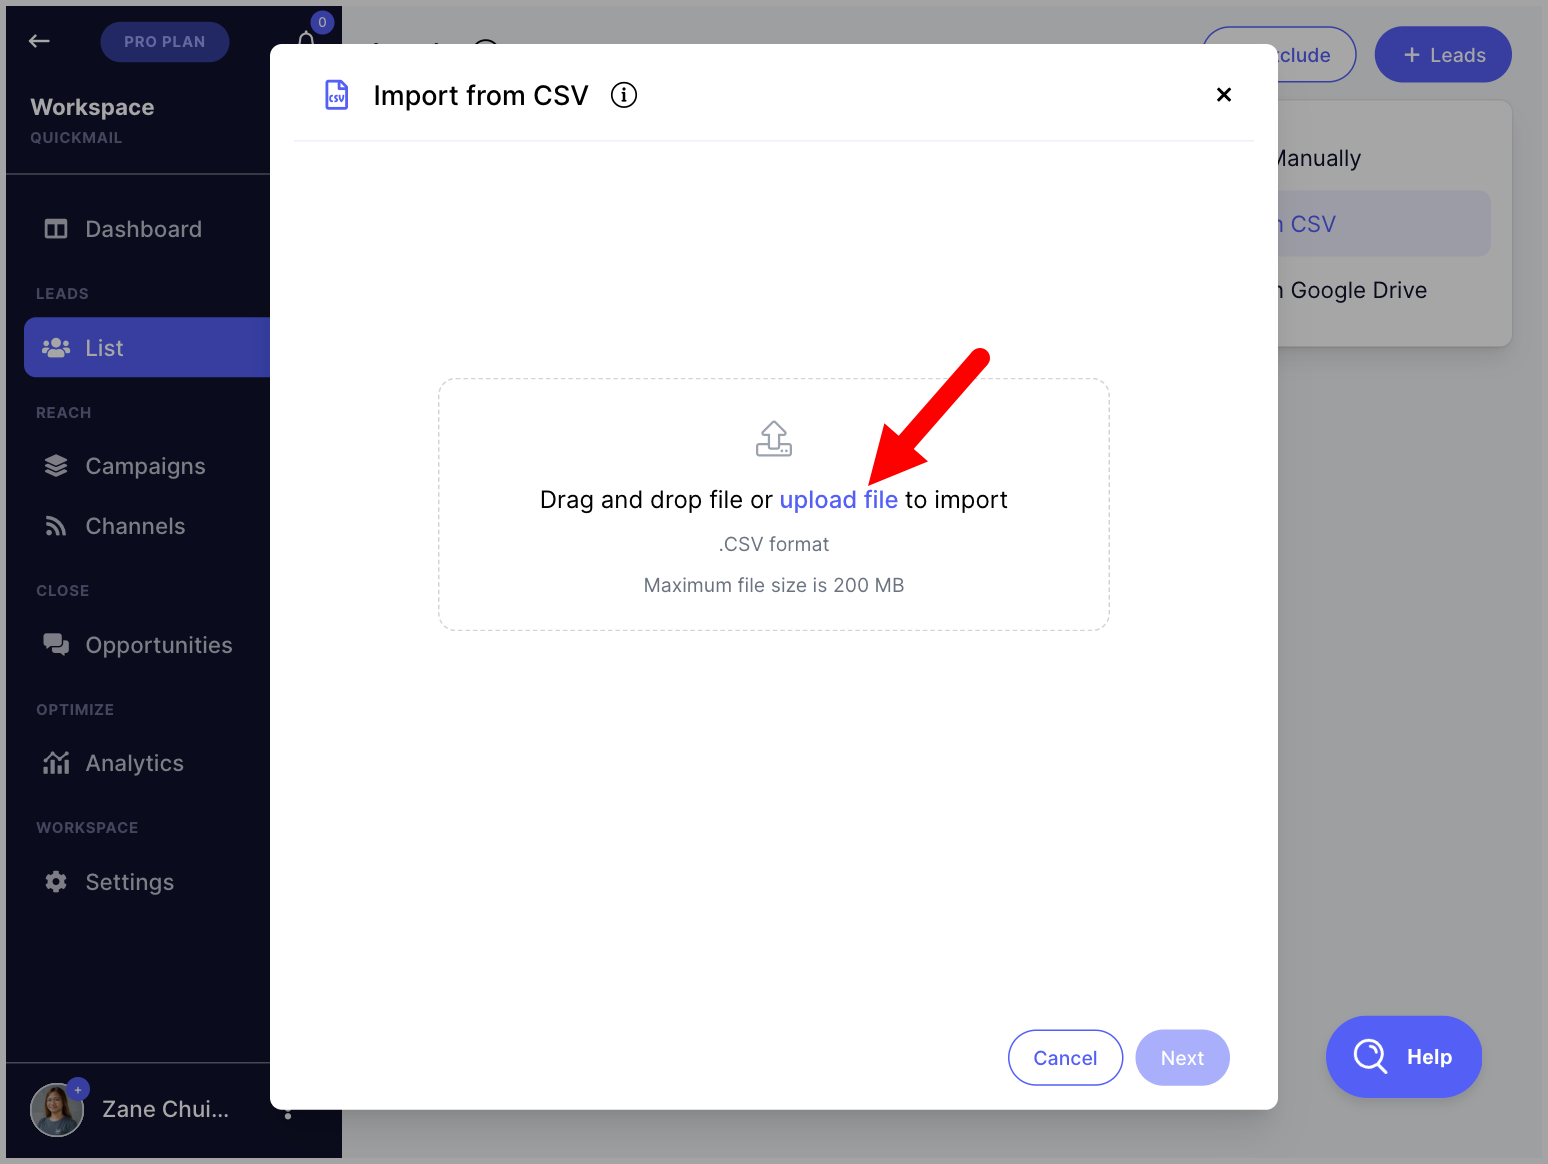
Step 2. Drag and drop the CSV file into the box or click Load File.
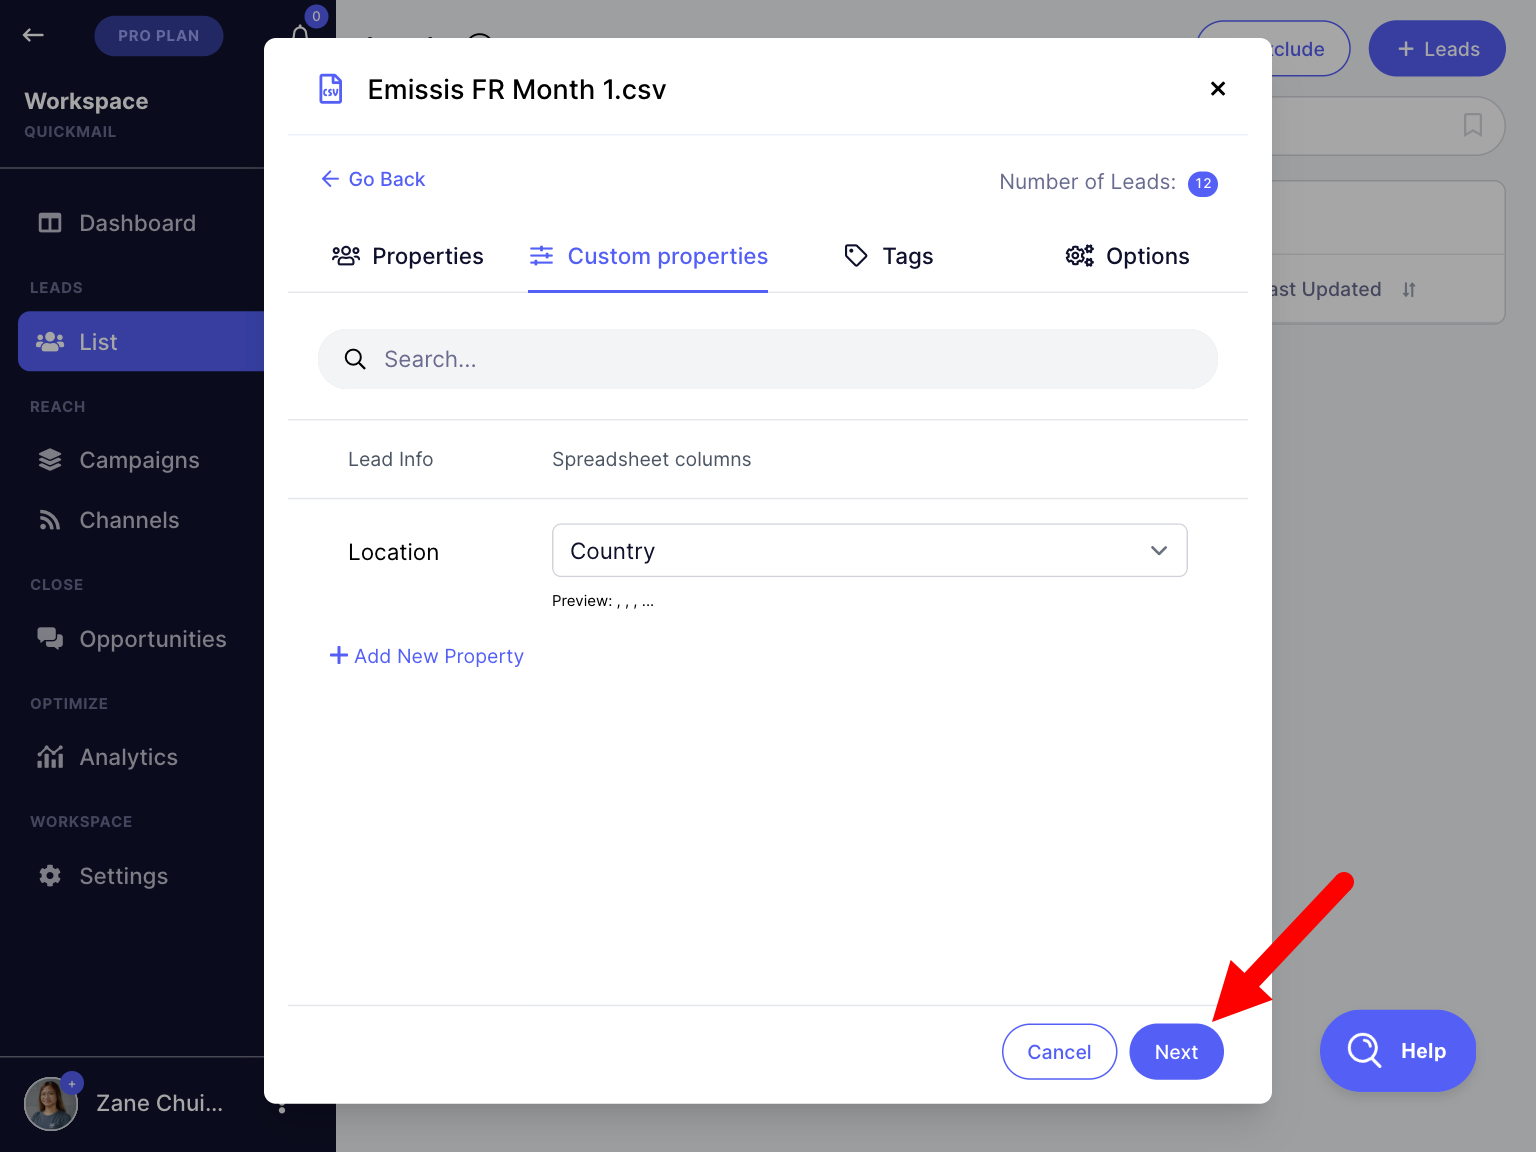
Step 3. Use the dropdown menu to map the CSV headers to the correct properties in QuickMail → click Next.

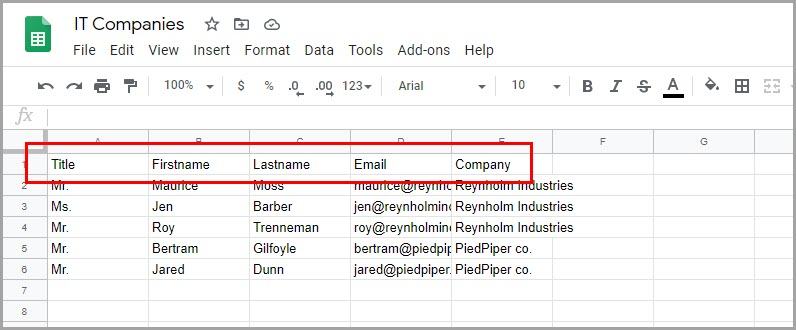
Tip: Naming your CSV headers to match lead properties exactly (e.g. Email, Firstname, Lastname) will allow them to be mapped automatically on import.
Step 4. (Optional) In the Custom Properties section, create custom properties and map the relevant CSV columns → click Next.
Step 5. (Optional) In the Tags section, create tags and map the relevant CSV columns → click Next.
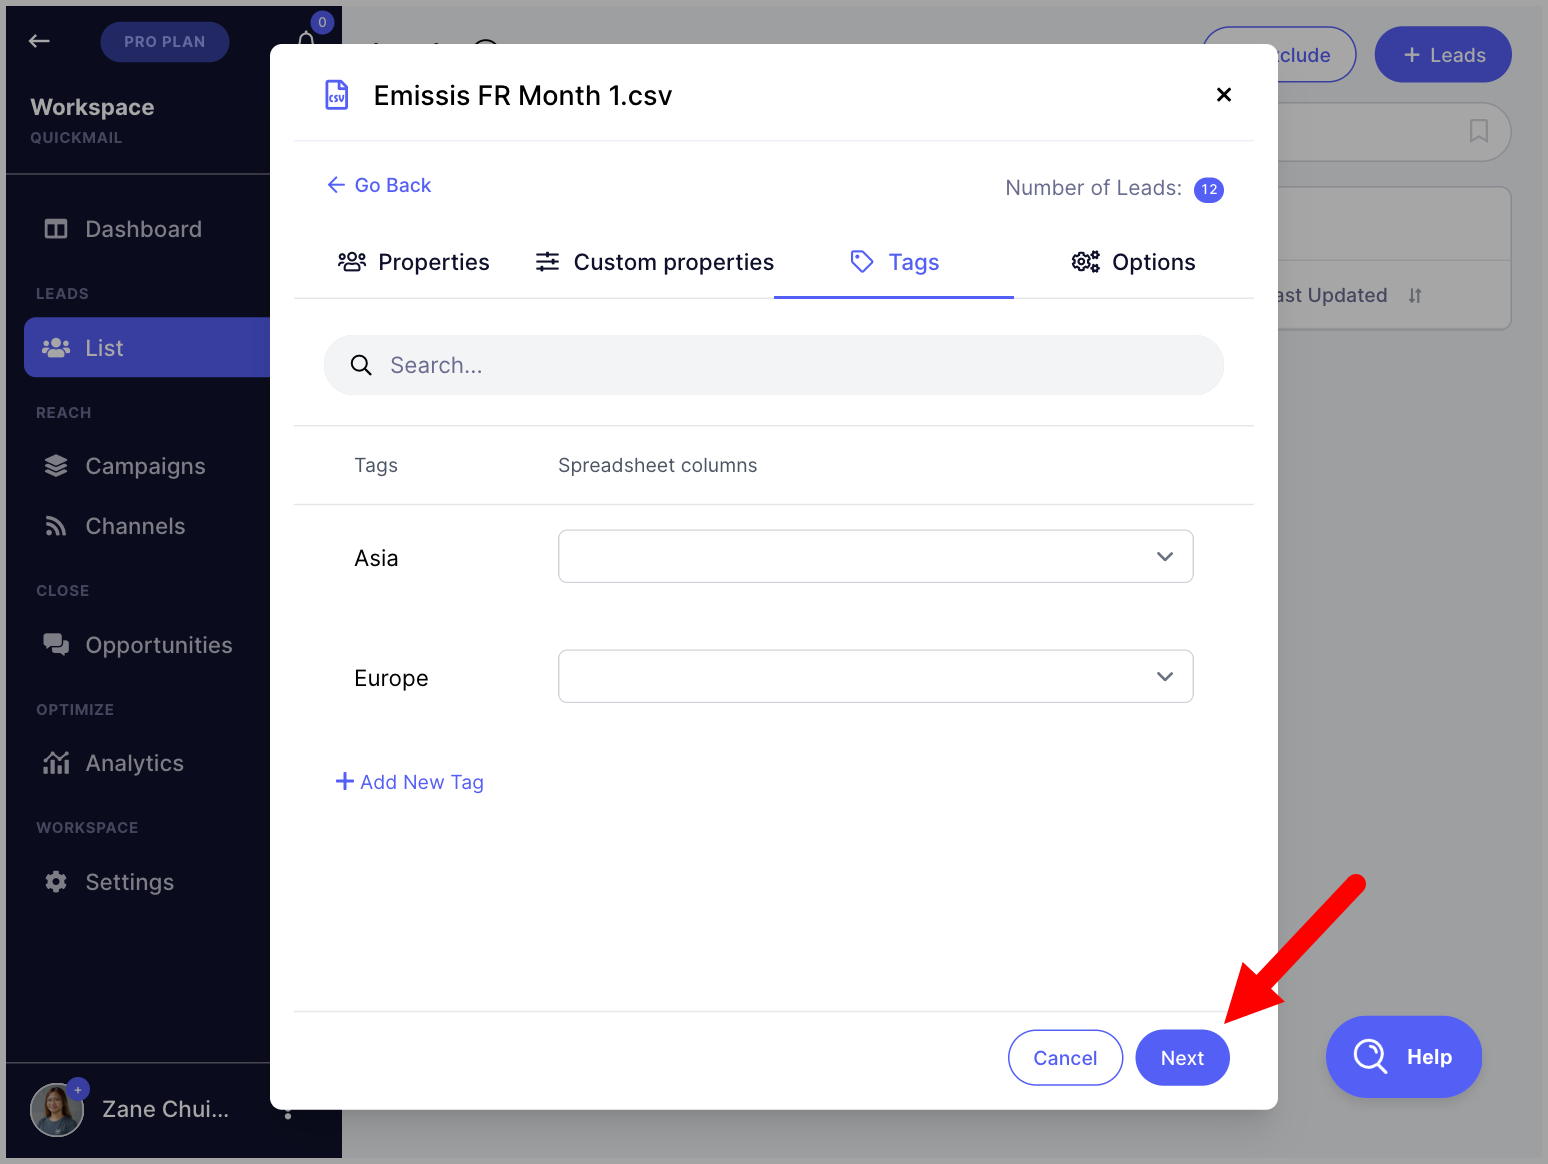
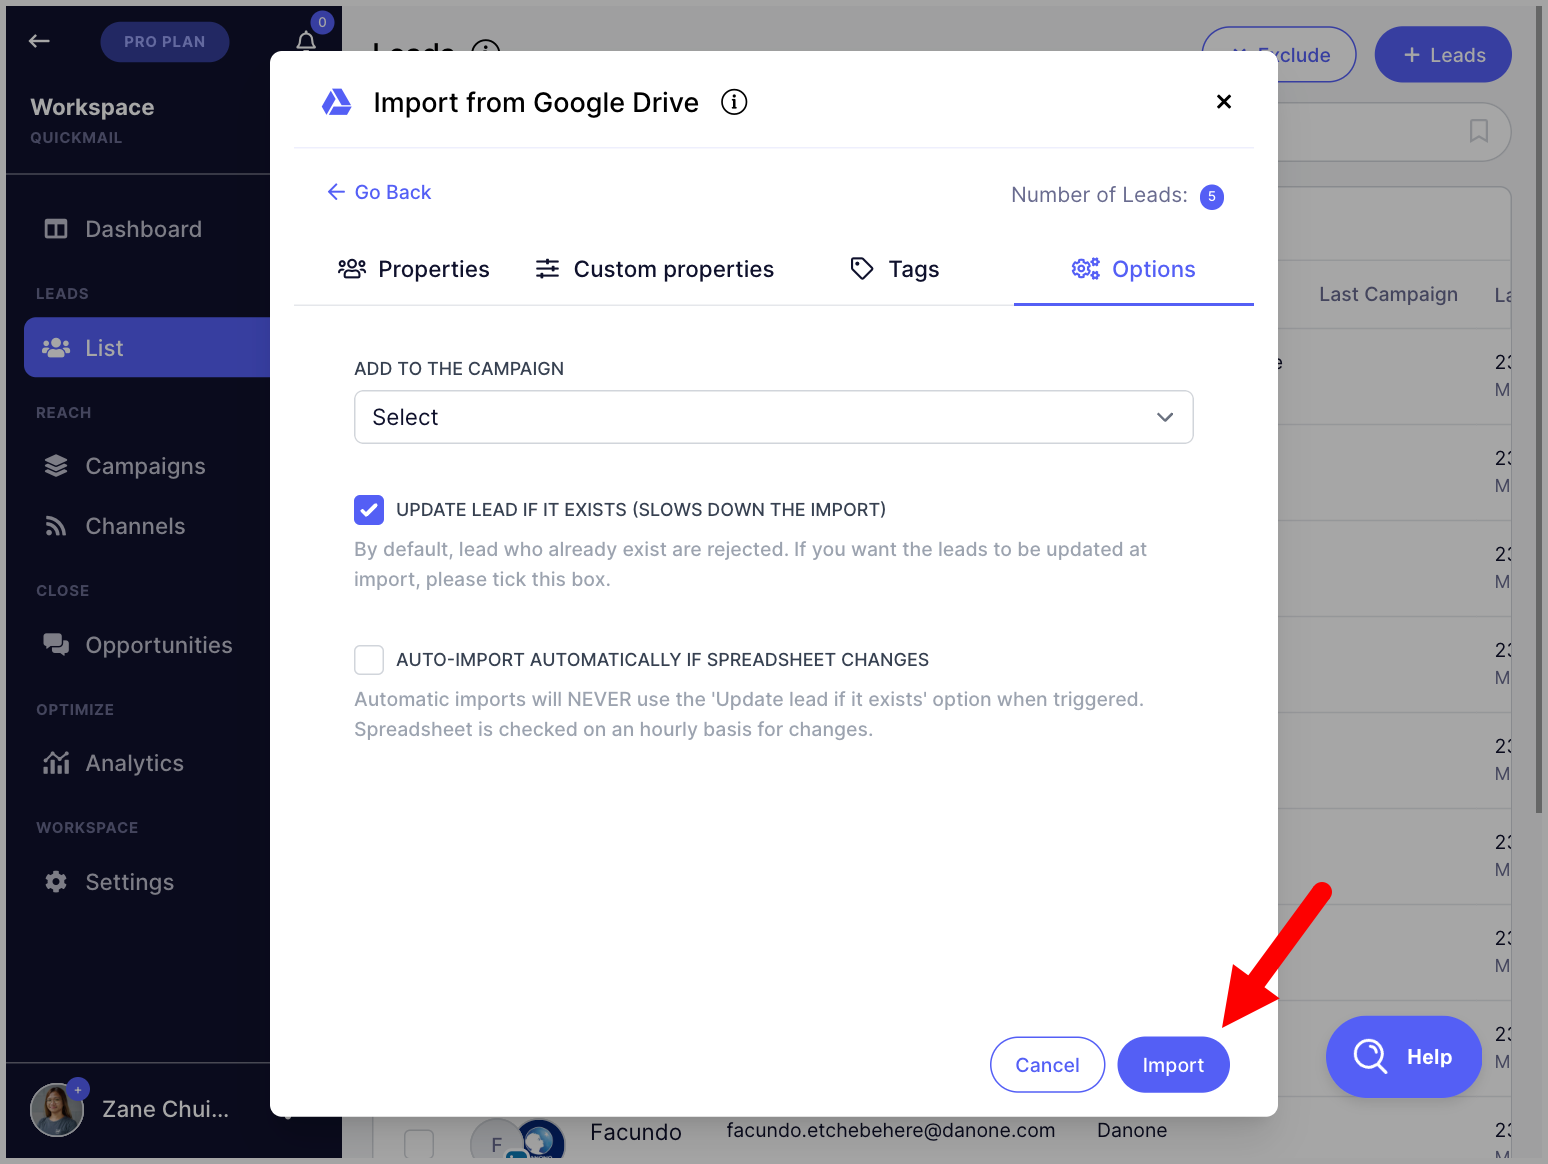
Step 6. (Optional) In the Options section, select a campaign if you would like to add the leads directly to it → click Import.
Tip: Check Update Lead if it exists if you are re-importing a list to update existing lead information. Without this, the import will be rejected for existing leads.

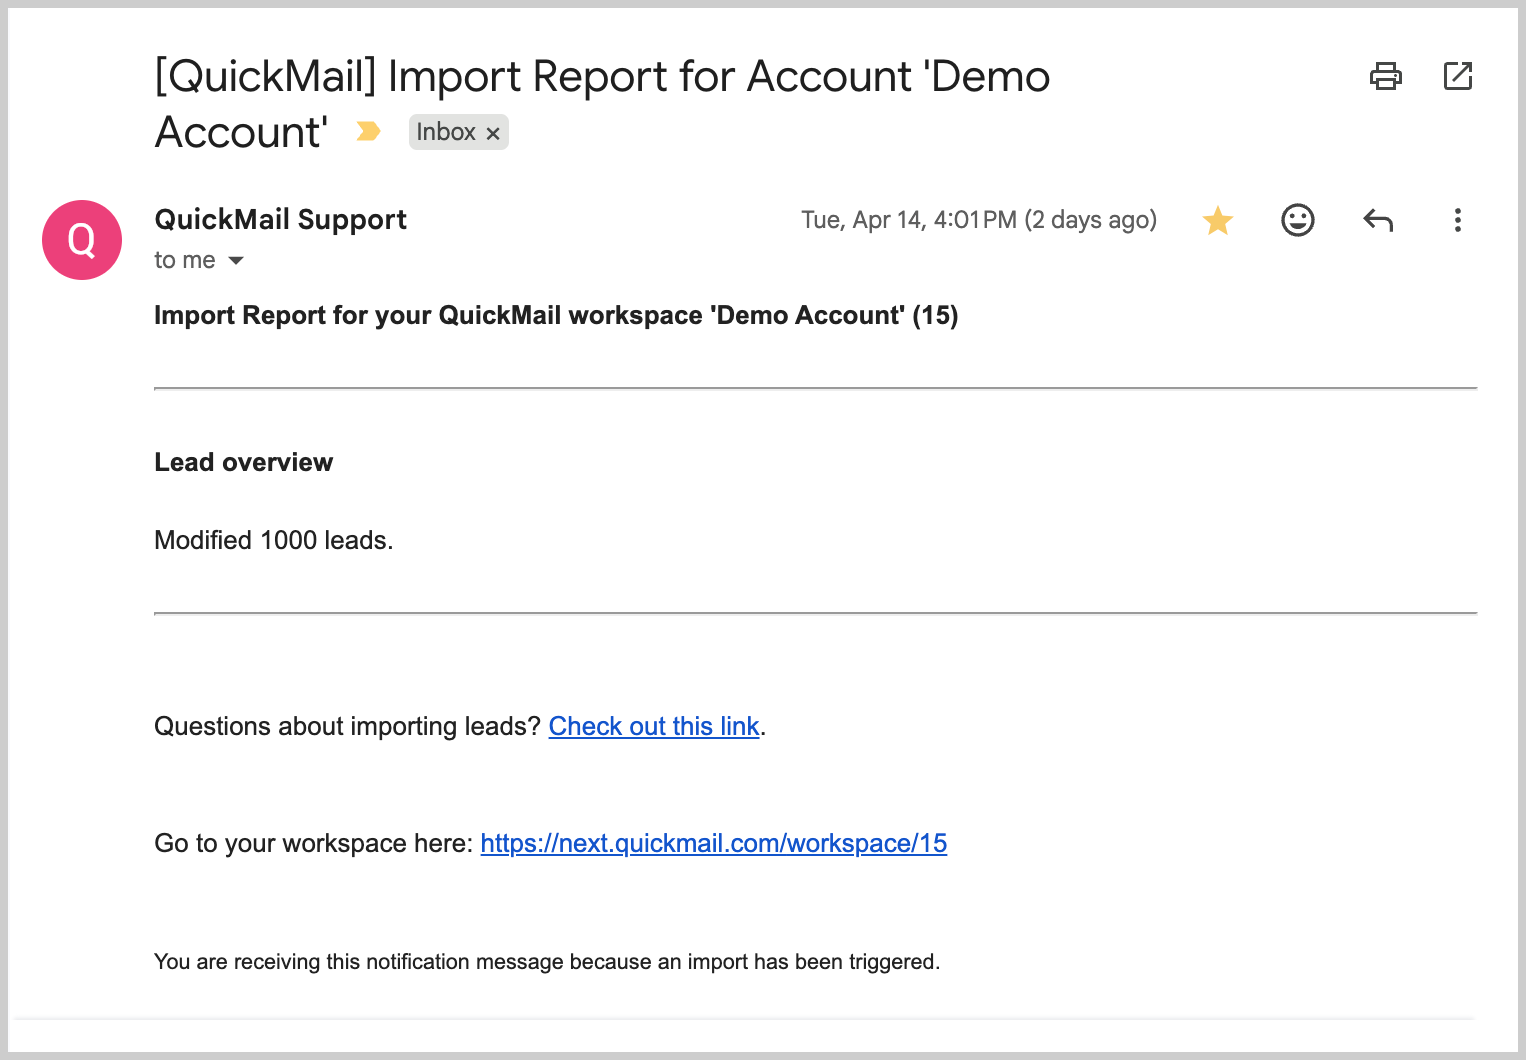
Once the import is complete, an import report will be sent to the email address you use to log in.

Tip: For troubleshooting import issues, check out this guide: Understanding Import Report.
Importing Leads from Google Drive
Leads can be imported from a Google Sheet linked to a Google Drive account. The leads can be imported directly into a campaign.
Google Sheet specifications:
Each lead must have a unique email address.
The sheet must contain a header row.
The sheet must be in a Google Drive or shared Google Drive folder that you have access to.
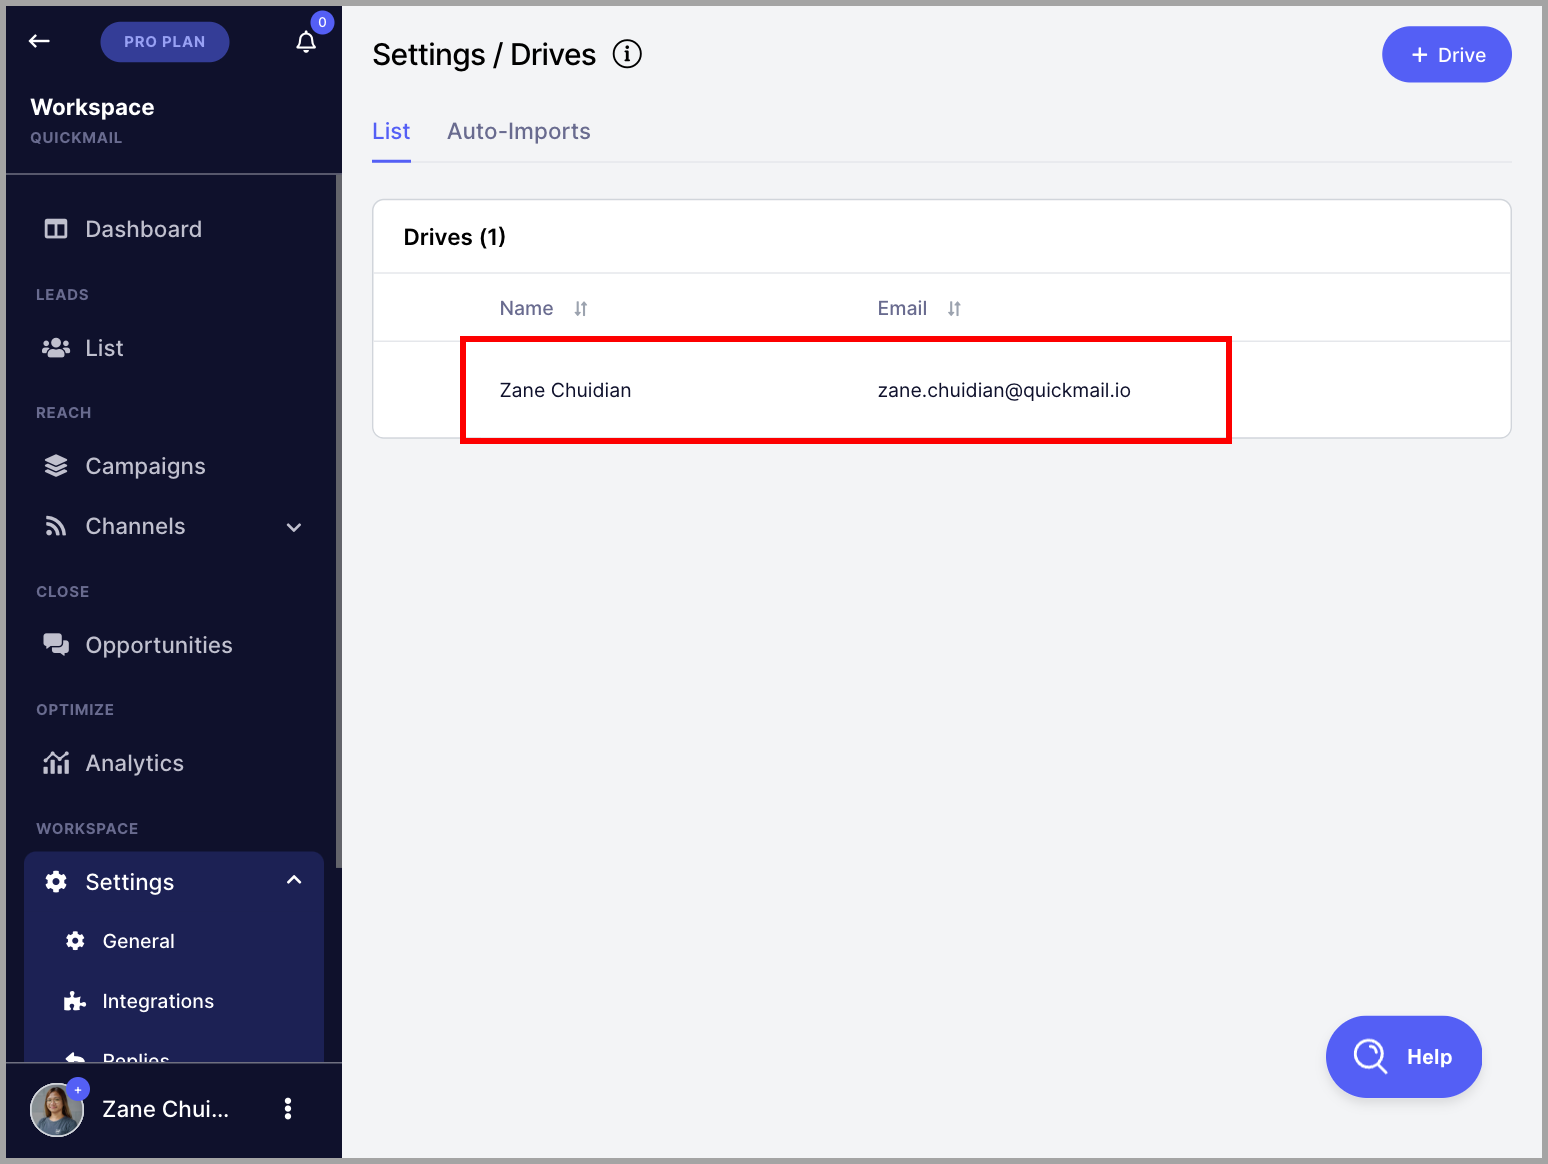
Step 1. Add the Google Drive to QuickMail. Go to Settings → Google Drive → + Drive.

Step 2. Log in with the Google account associated with the Google Drive. Once added, it will appear in the list of available drives.
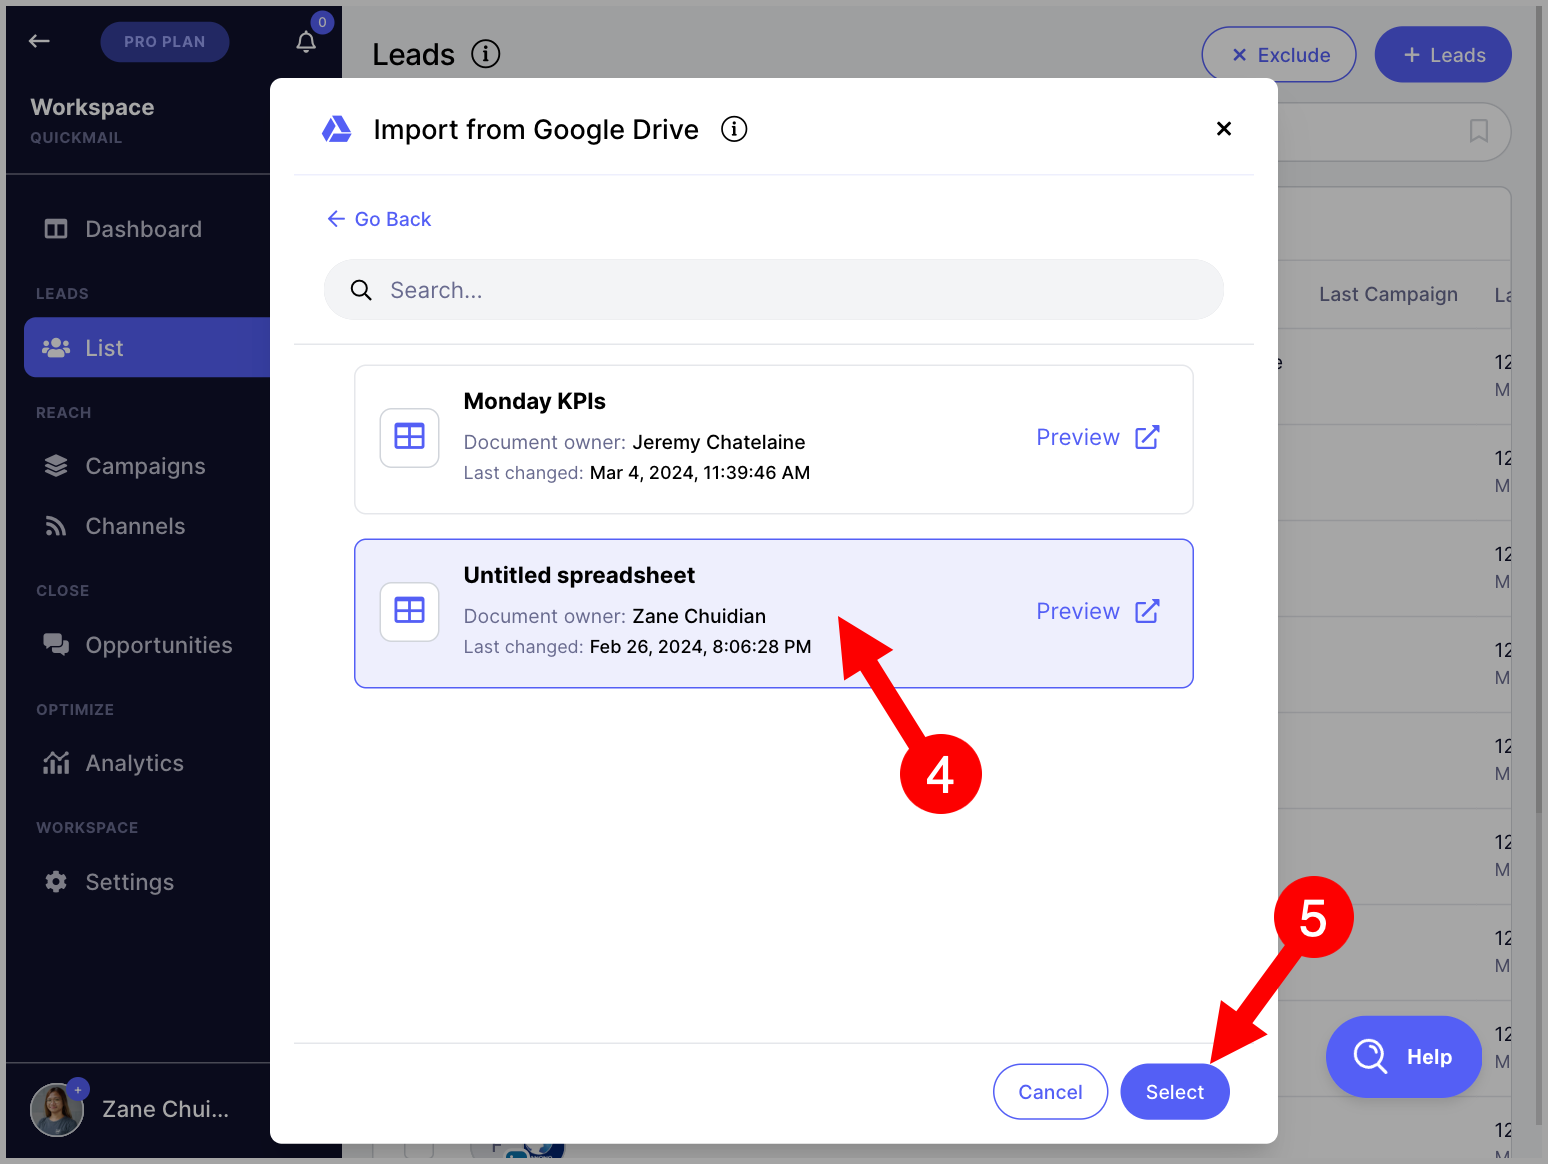
Step 3. Go to List → + Leads → Import from Google Drive.
Step 4. Select the Google Sheet you would like to import from → use the dropdown menu to map the sheet headers to the correct properties in QuickMail → click Next.
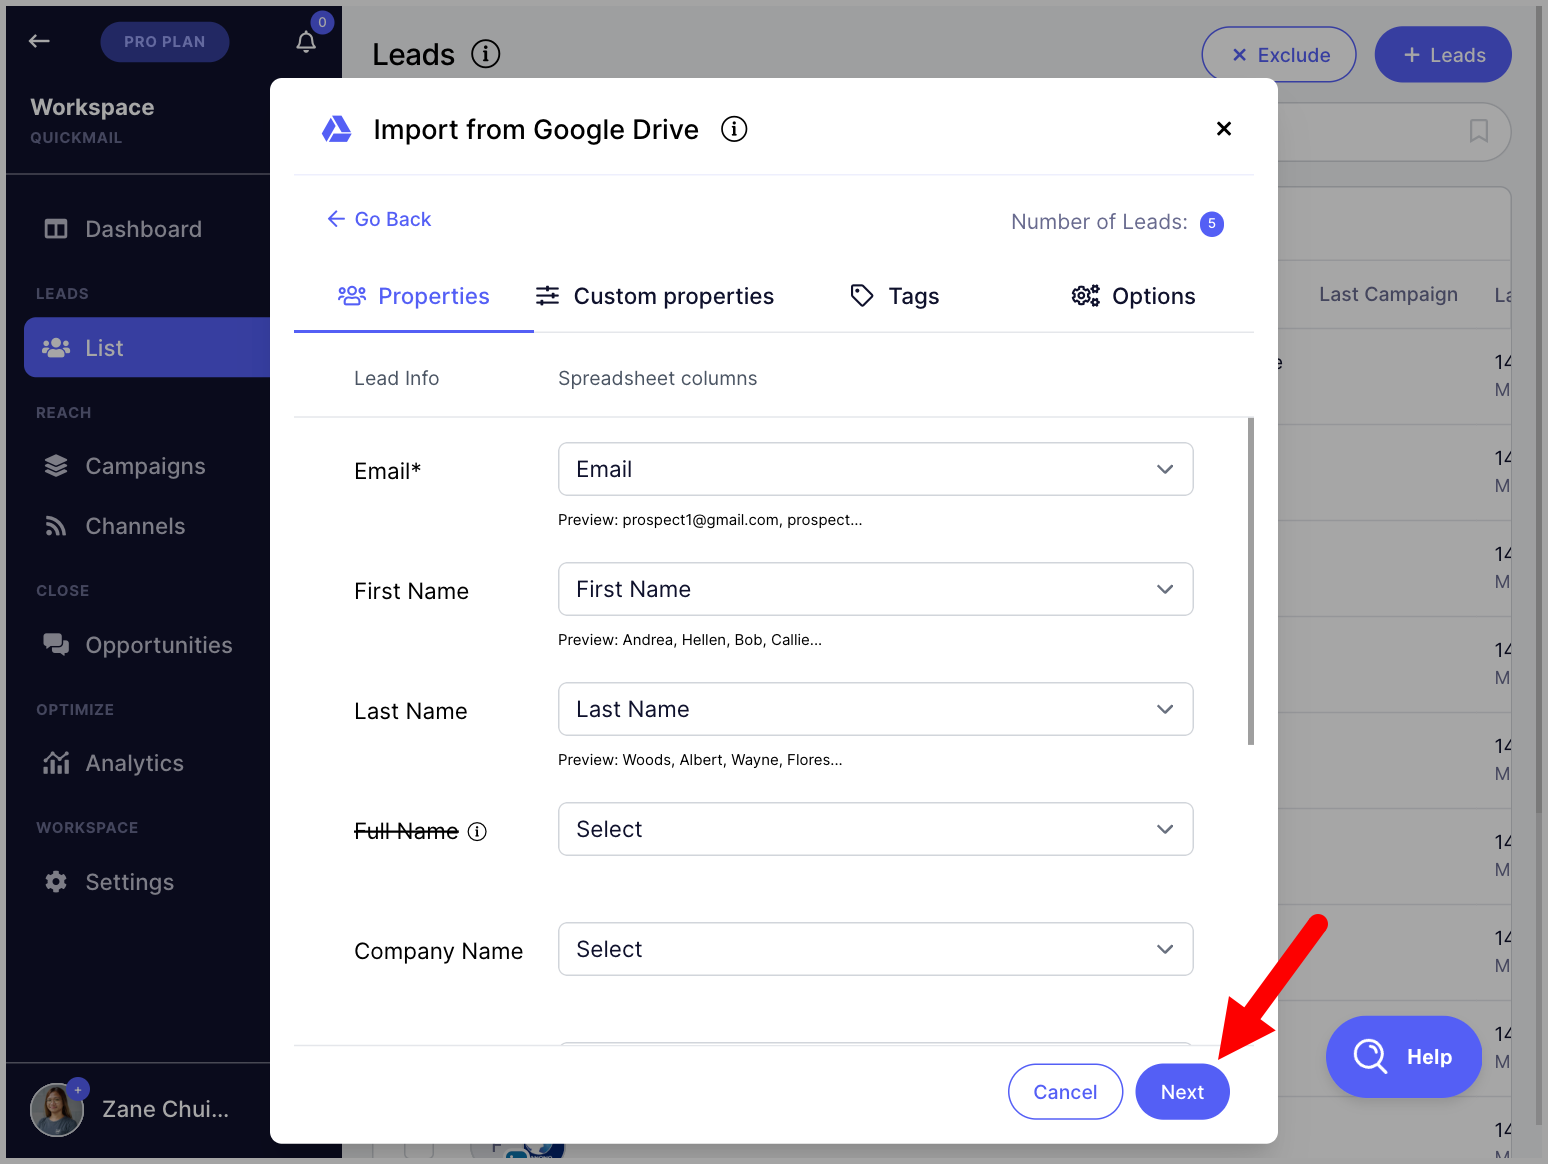
Step 5. (Optional) In the Custom Properties section, create custom properties and map the relevant columns → click Next.
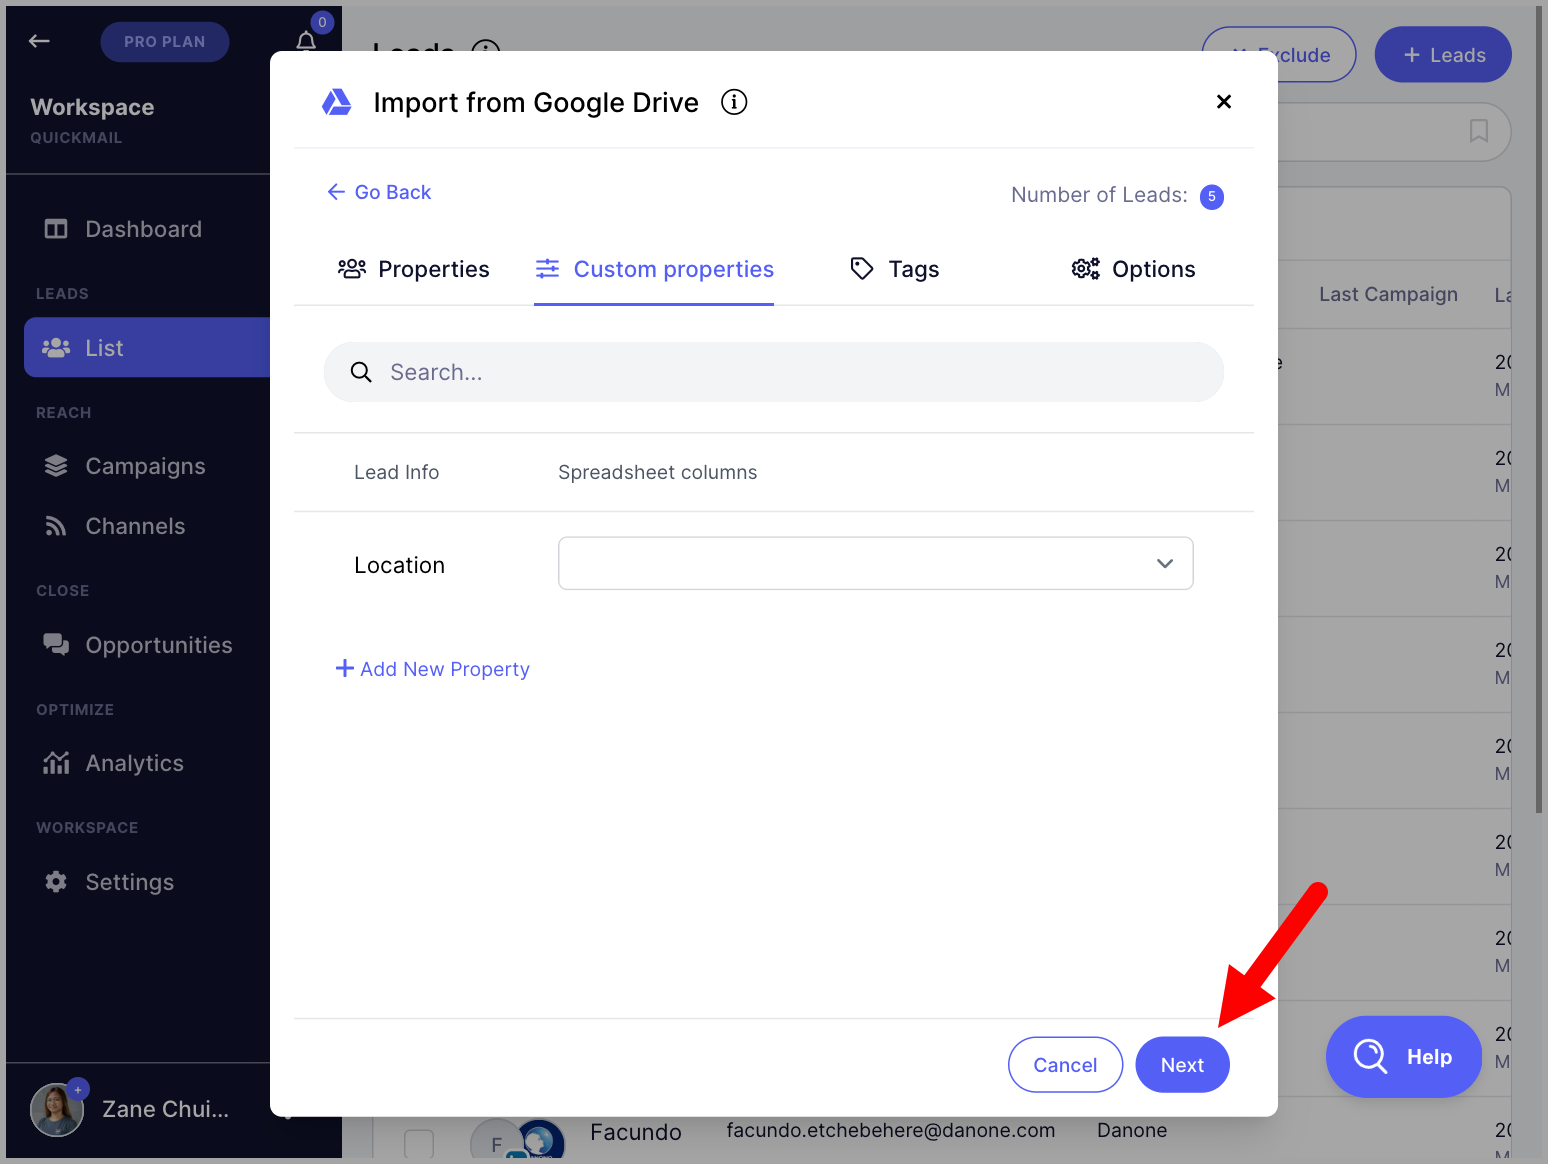
Step 6. (Optional) In the Tags section, create tags and map the relevant columns → click Next.
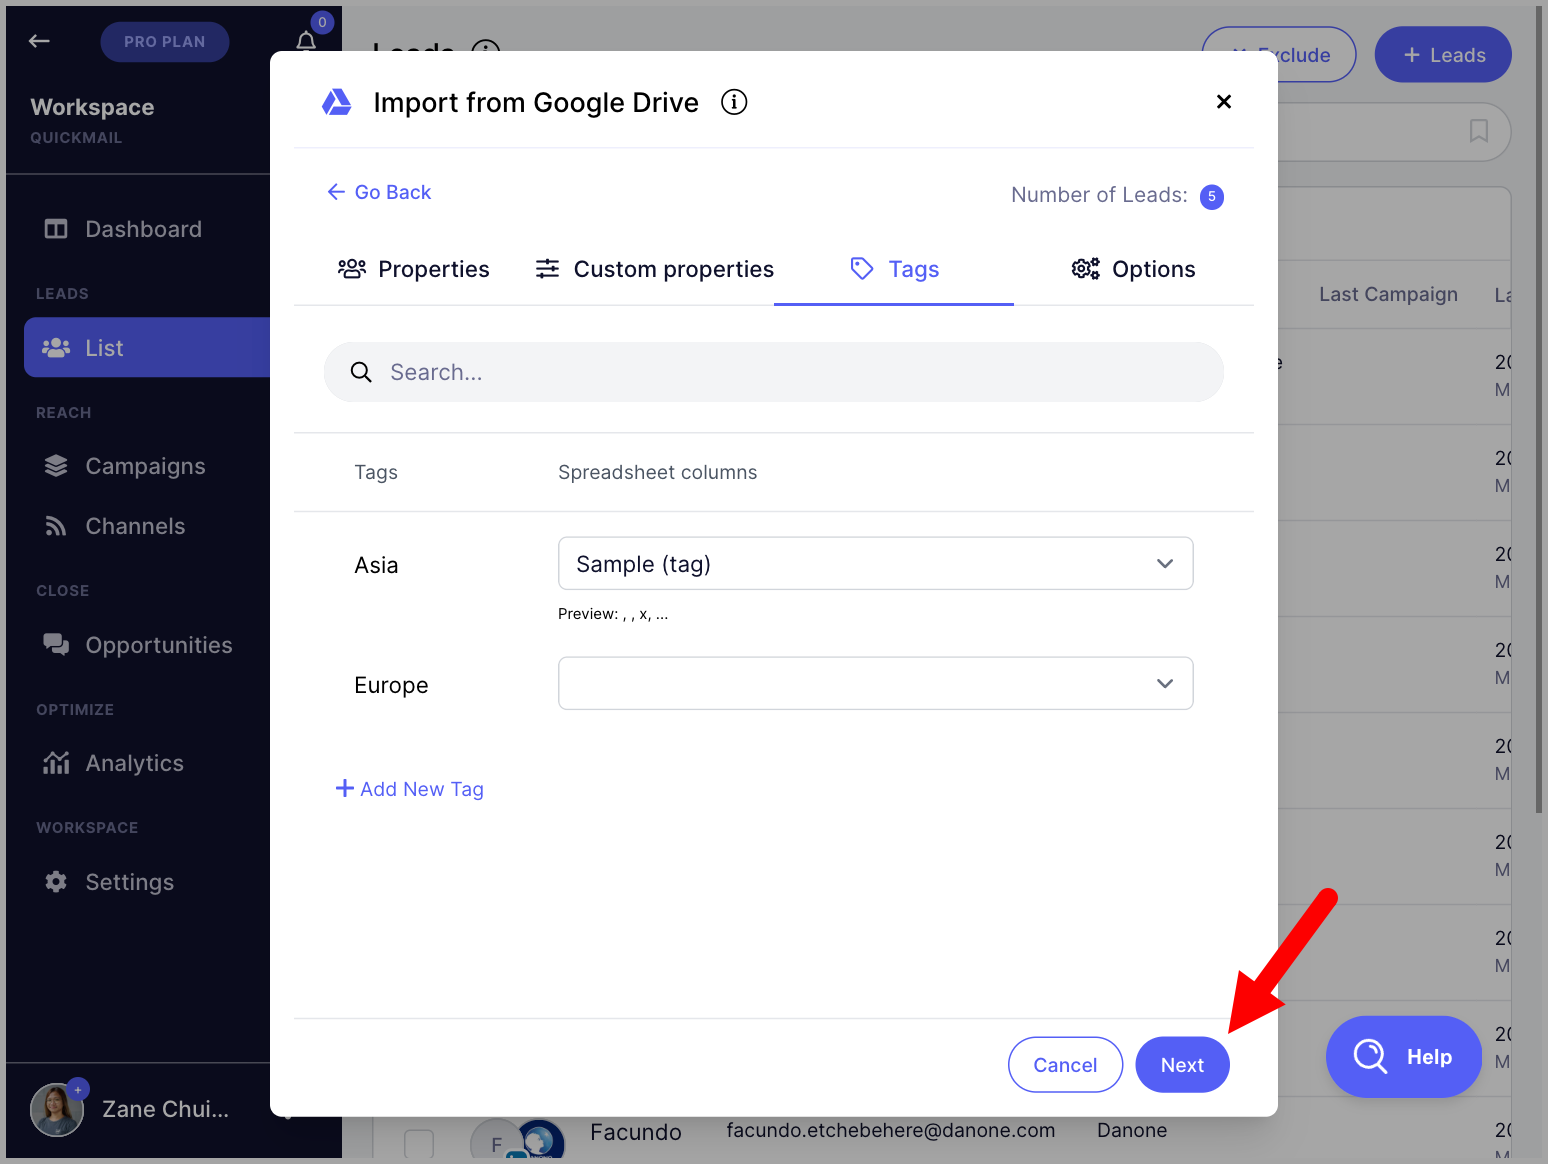
Step 7. (Optional) In the Options section, select a campaign if you would like to add the leads directly to it → click Import.
Tip: Check Update Lead if it exists if you are re-importing a list to update existing lead information. Without this, the import will be rejected for existing leads.
Step 8. Once the import is complete, an import report will be sent to the email address you use to log in.
Importing Leads from Sales Navigator
QuickMail's integration with LinkedIn Sales Navigator allows you to import selected leads directly into QuickMail. This is especially useful for LinkedIn outreach.
Note: While LinkedIn profile URLs and other lead details are imported, email addresses are not included.
Step 1. Add a LinkedIn account that has a Sales Navigator subscription. Go to LinkedIn → + LinkedIn. This guide on adding LinkedIn accounts might come in handy.
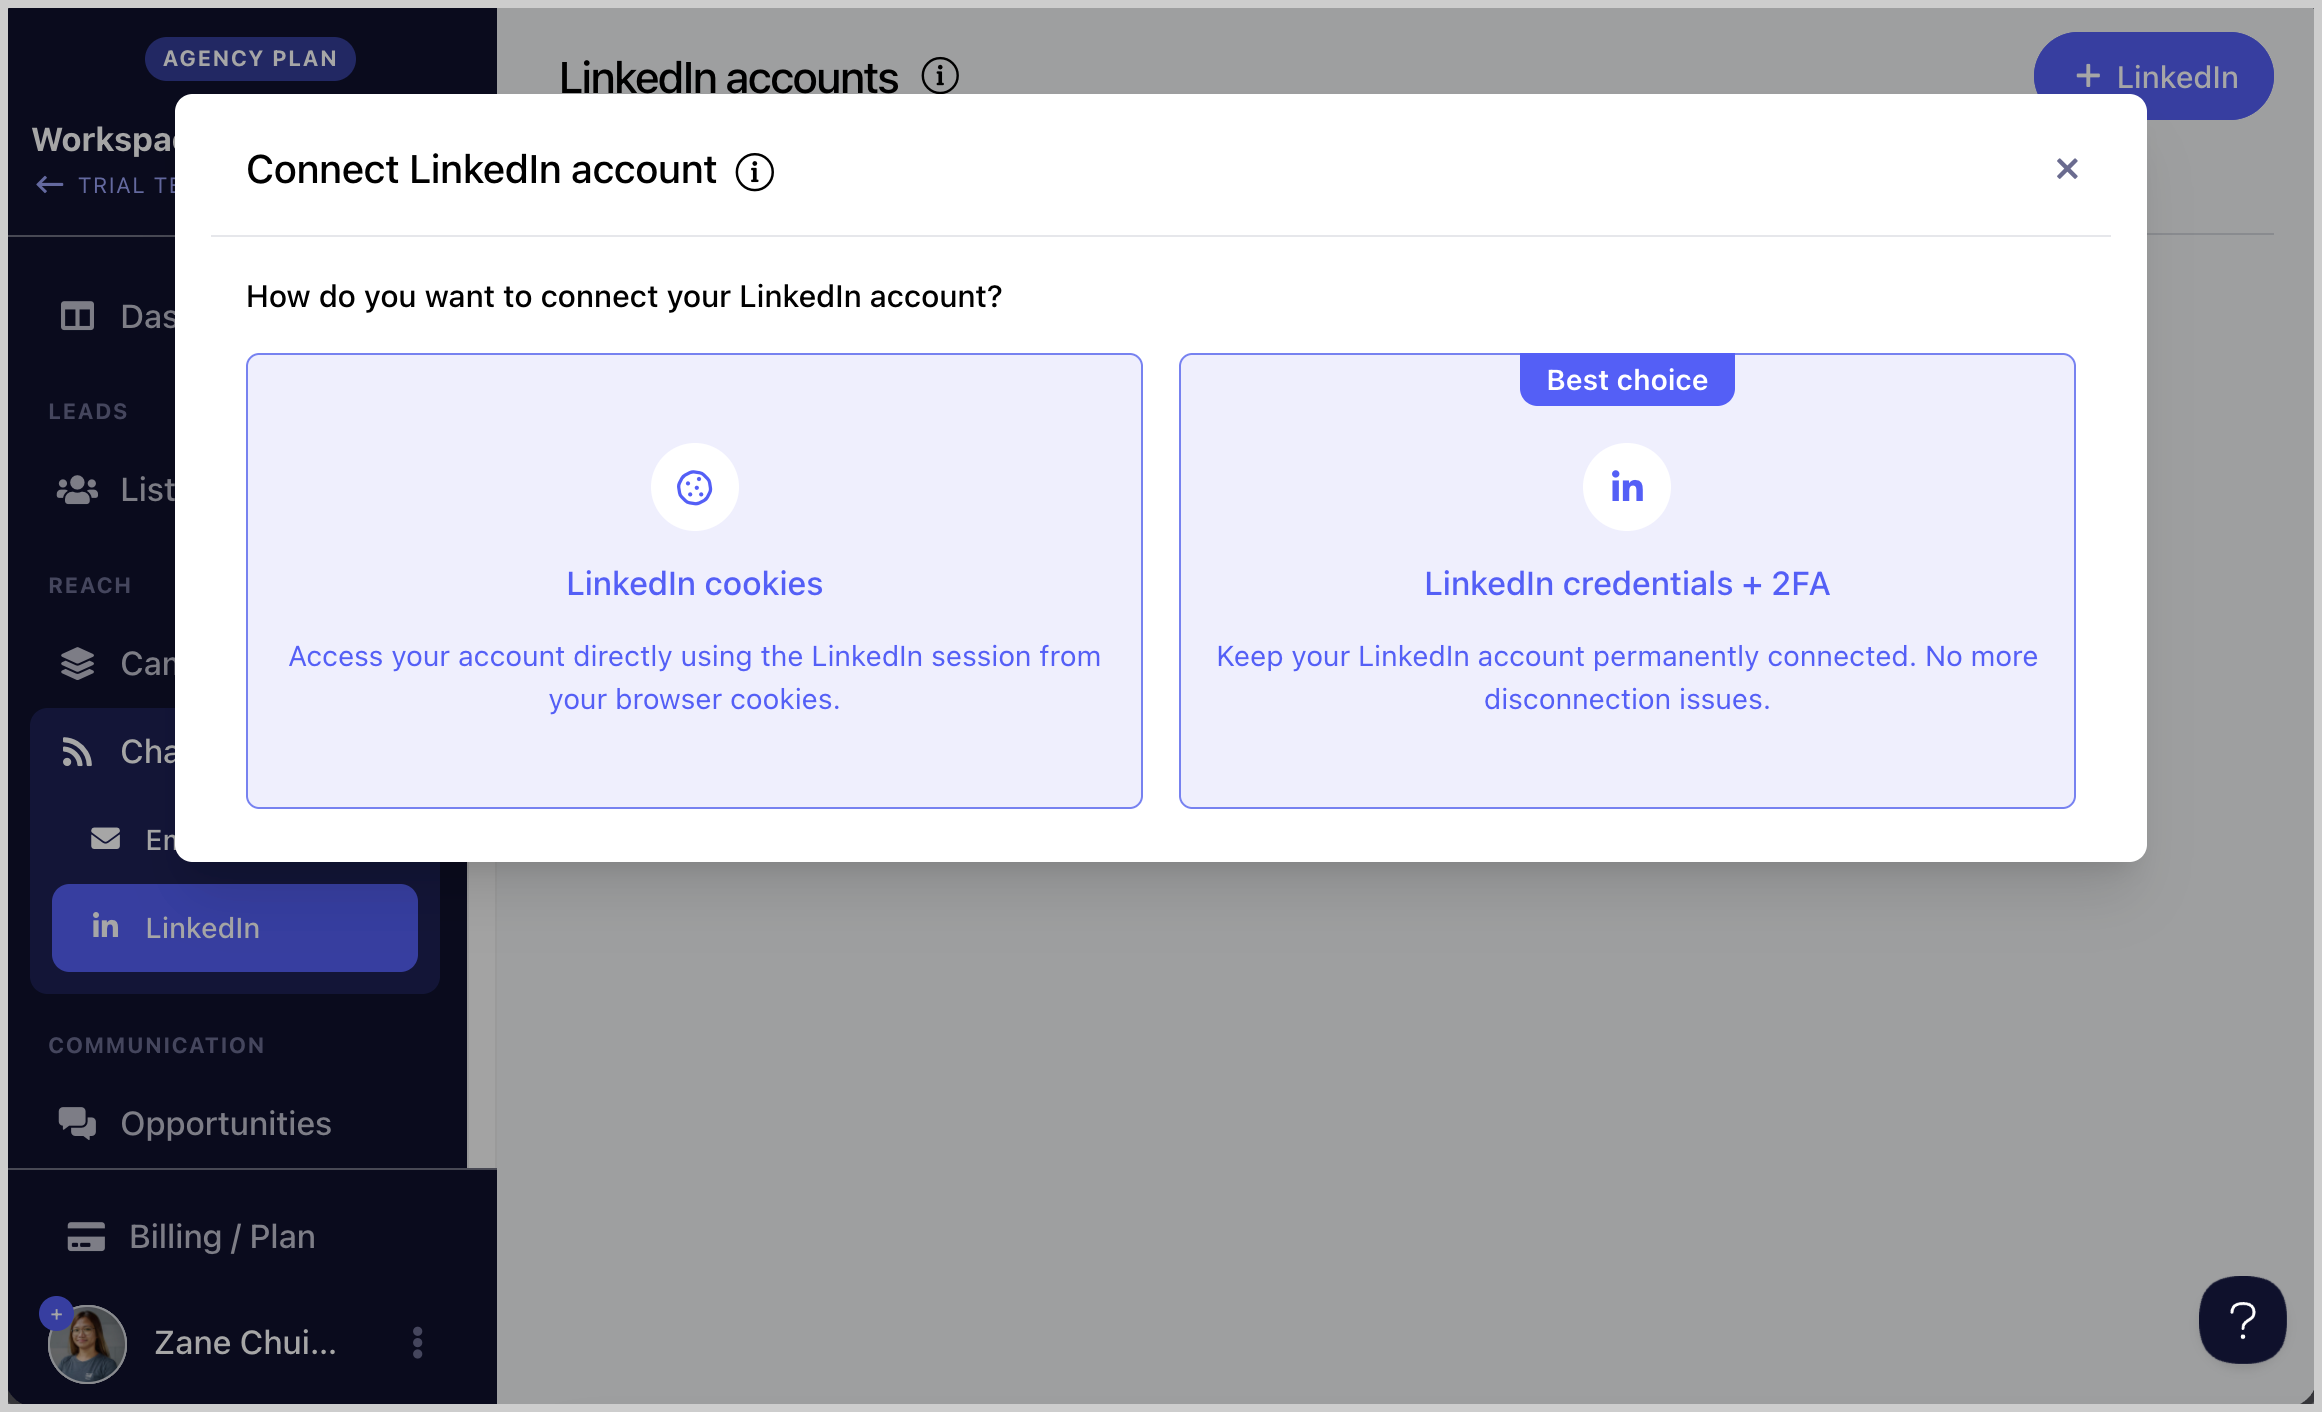
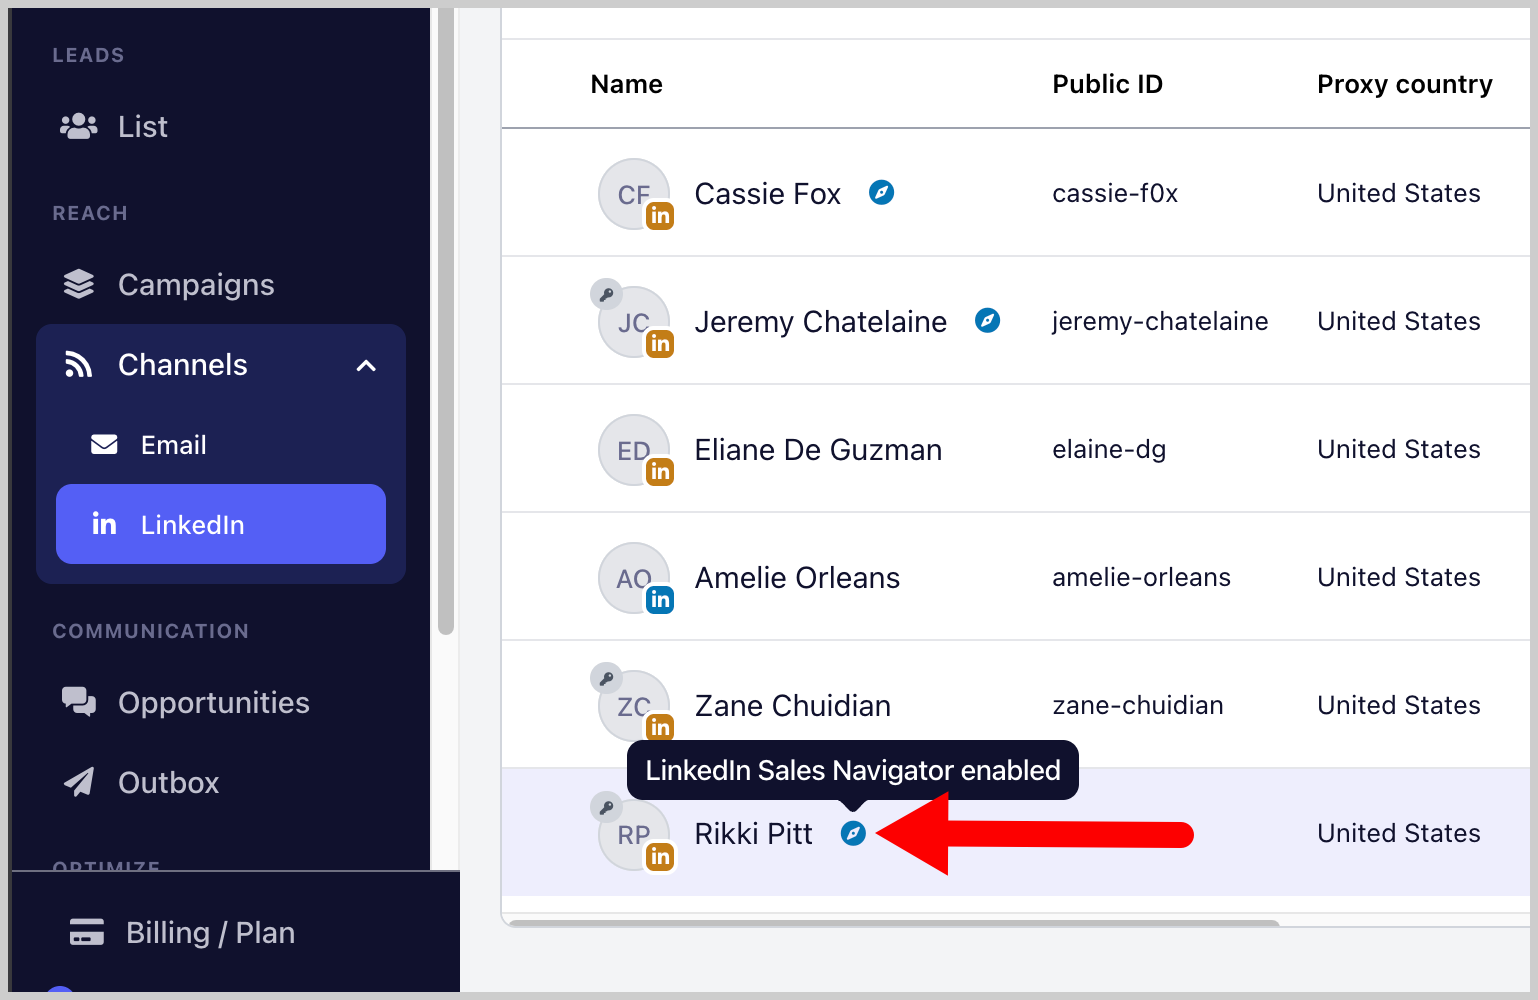
Note: LinkedIn accounts showing a Sales Navigator icon are supported. If there is no Sales Navigator icon, the account is not compatible.
Step 2. Go to Sales Navigator → search for the leads you would like to import → use filters to narrow down your search if needed → copy the URL.
Note: Recent Search links are not yet supported. The URL must start with https://www.linkedin.com/sales/search/people?query= from a fresh search.
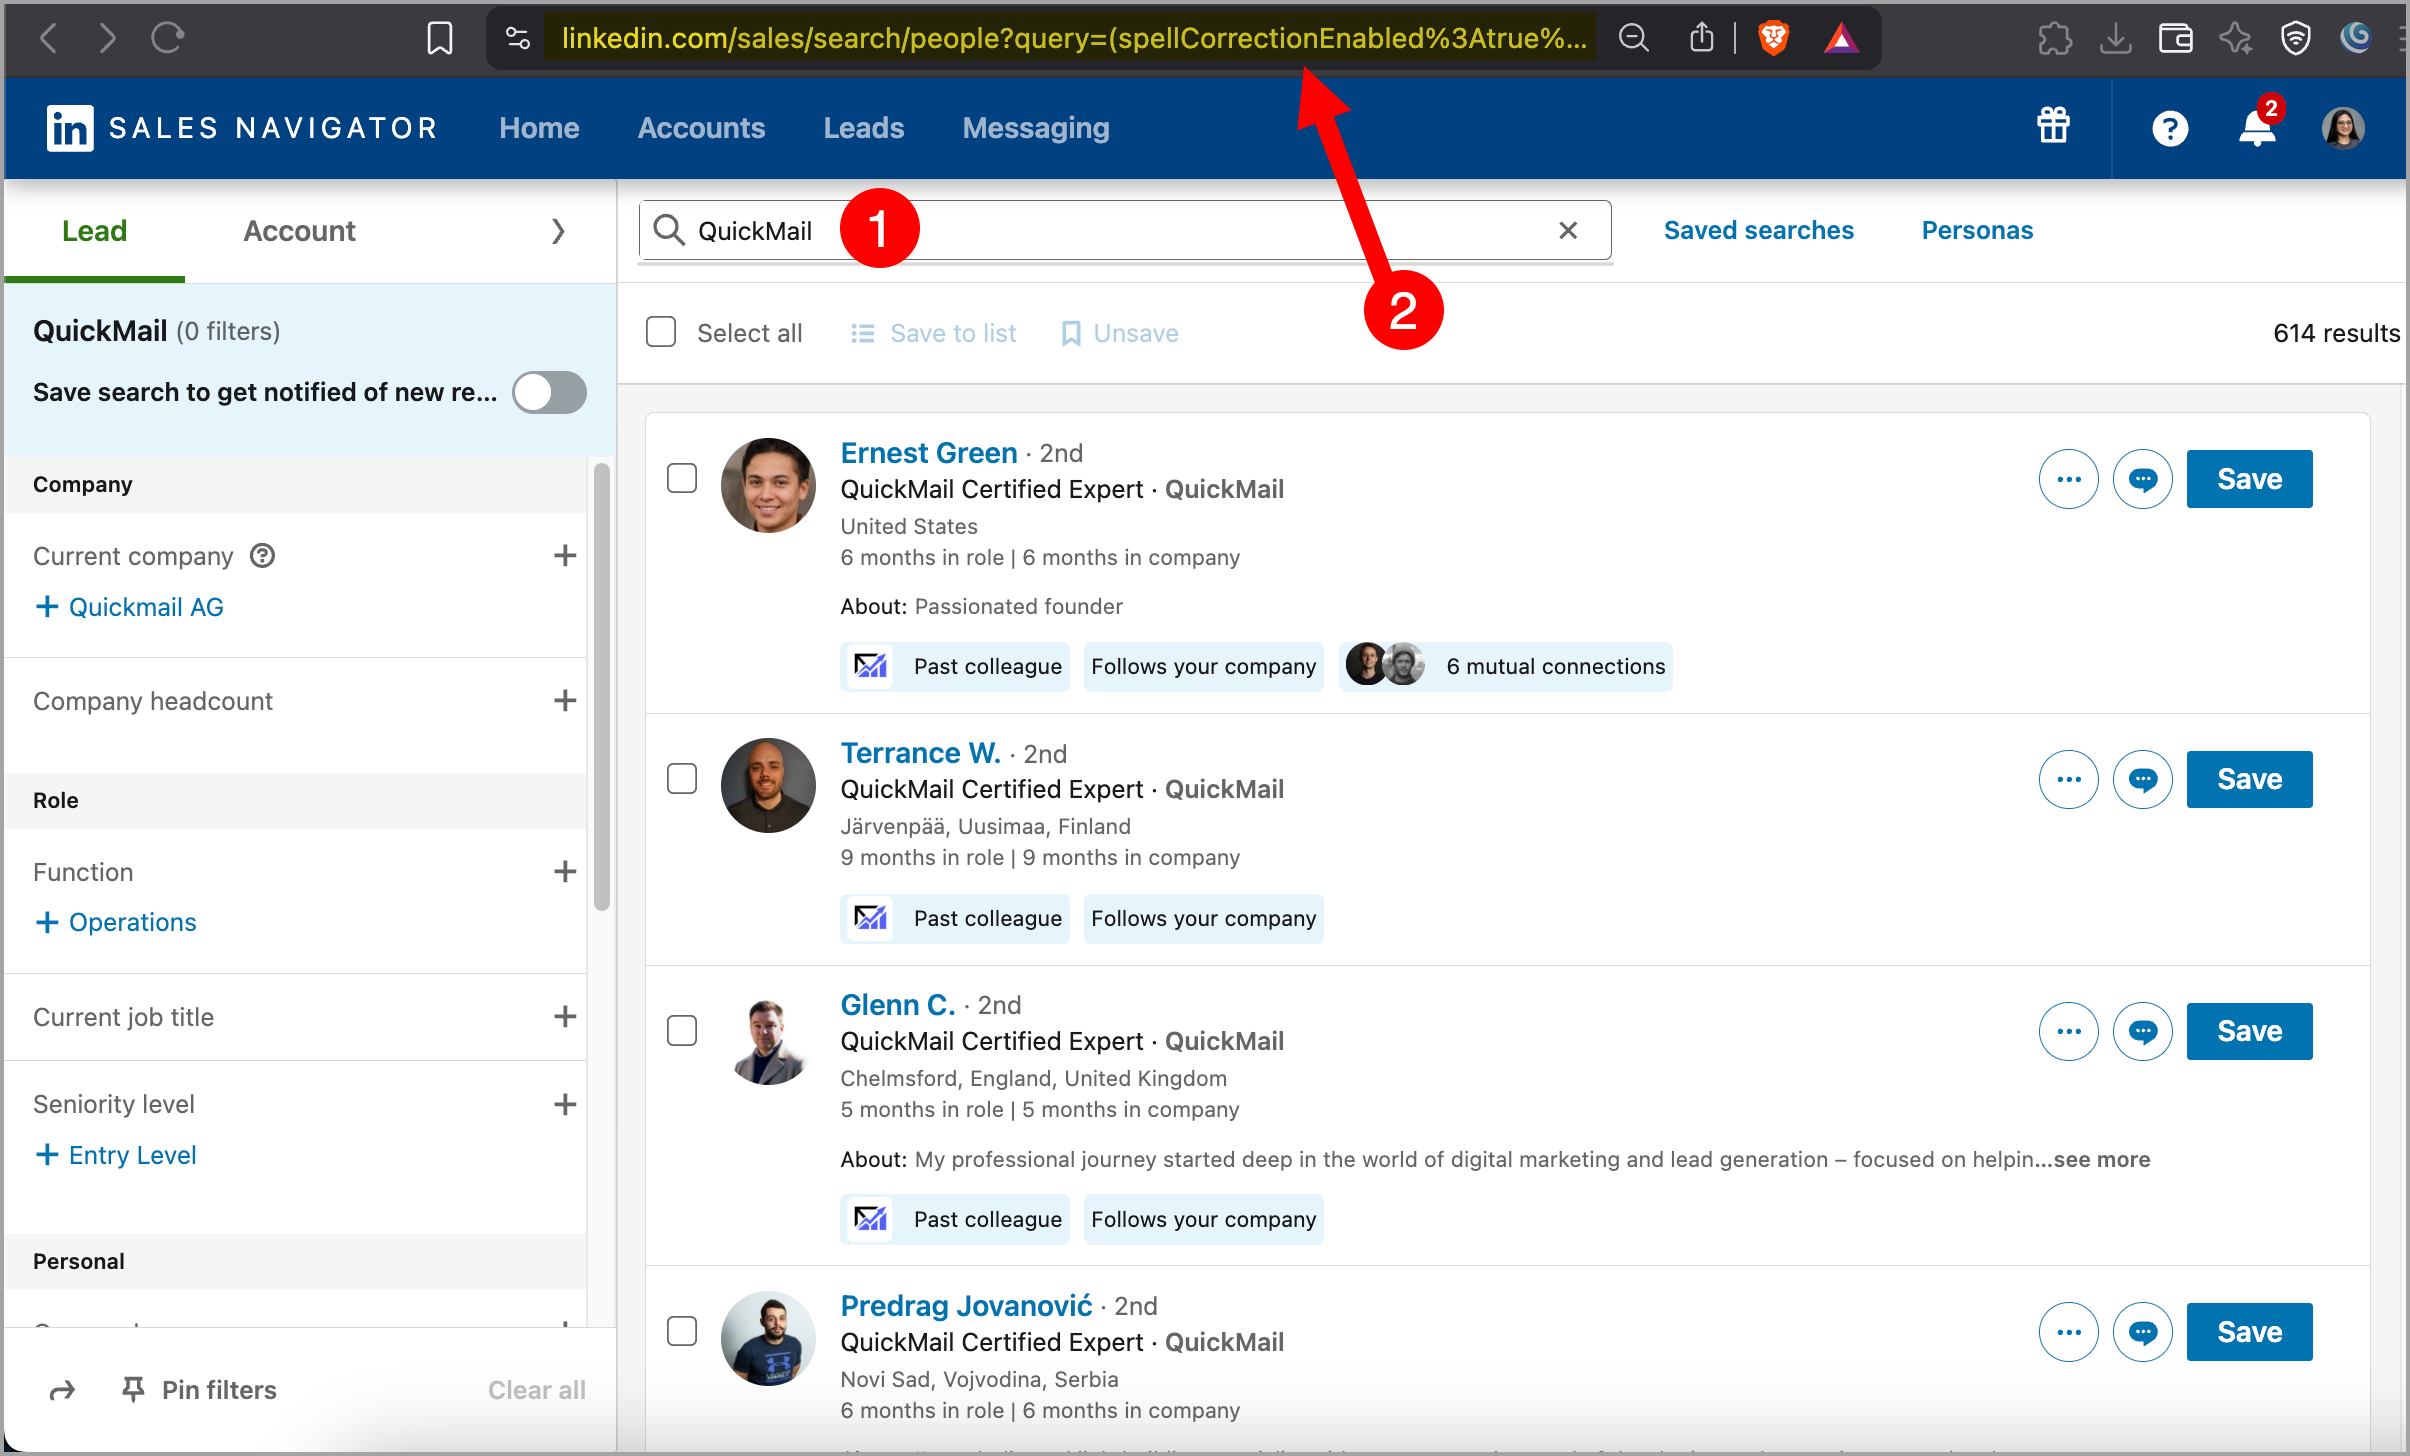
Step 3. Go to List → + Add Leads → Import from Sales Navigator.
Step 4. Paste the URL copied from Sales Navigator → follow the on-screen instructions to set up the import.

Step 5. An import report will be sent via email showing how many leads were imported or rejected.
Importing Leads from a LinkedIn Post
Tip: You can also import leads from another person's LinkedIn post.
Step 1. Add a LinkedIn account. Go to LinkedIn → + LinkedIn. This guide on adding LinkedIn accounts might come in handy.
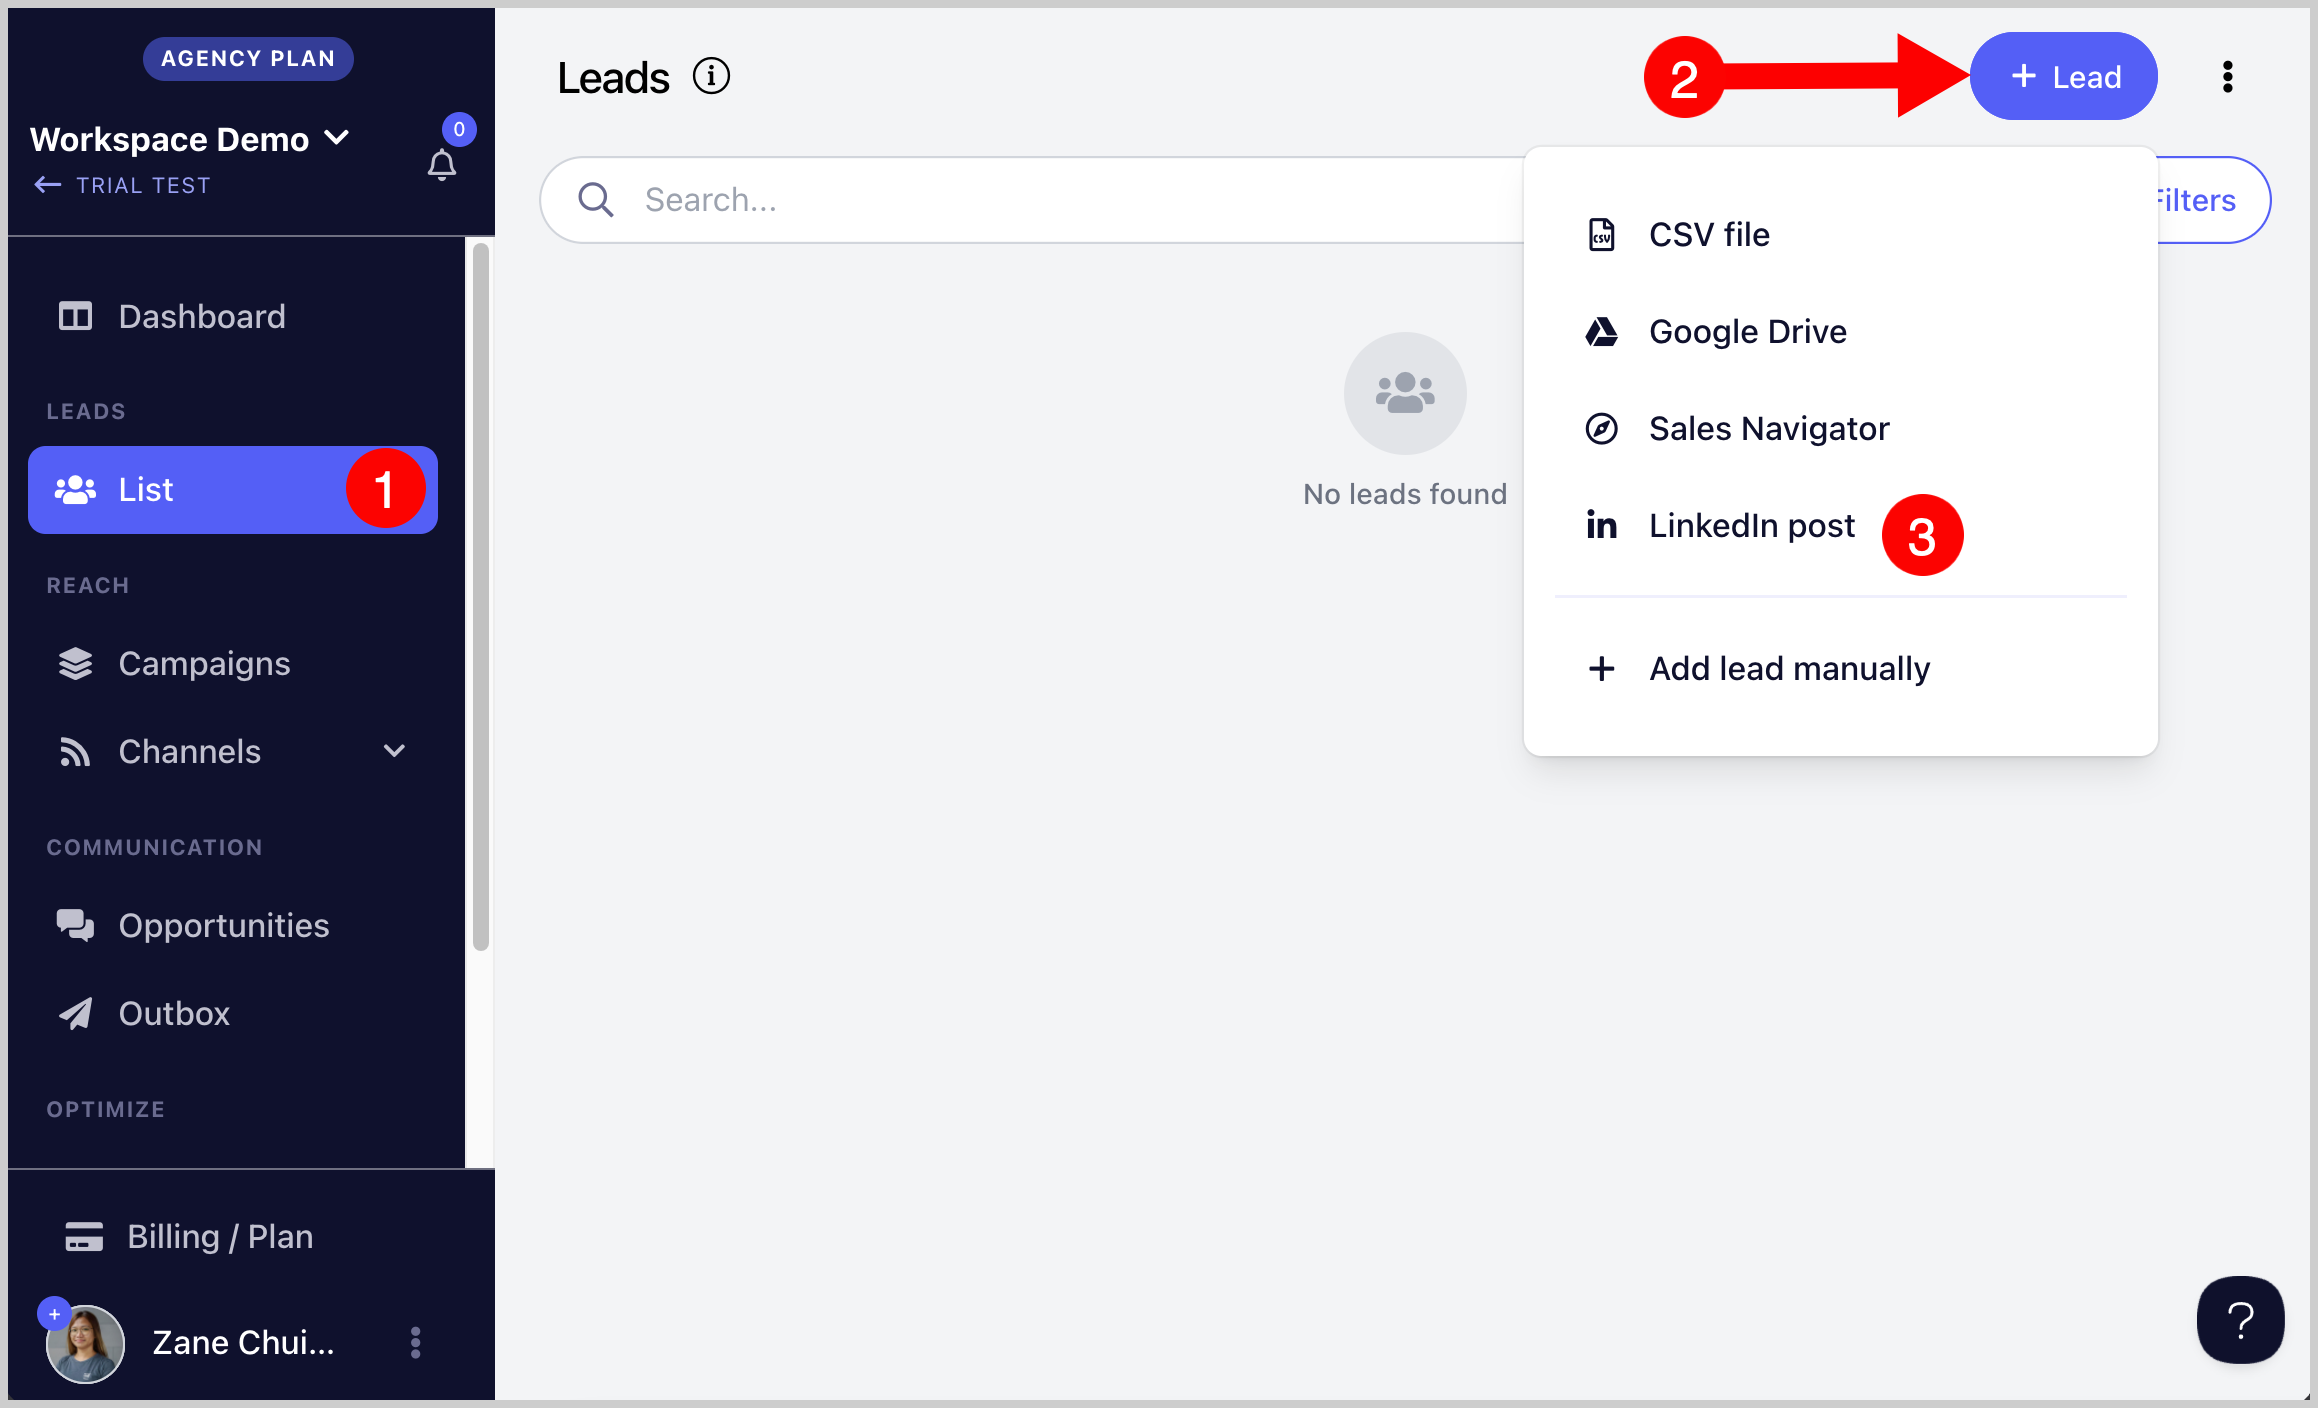
Step 2. Go to List → + Leads → Import from LinkedIn Post → paste the LinkedIn post link.

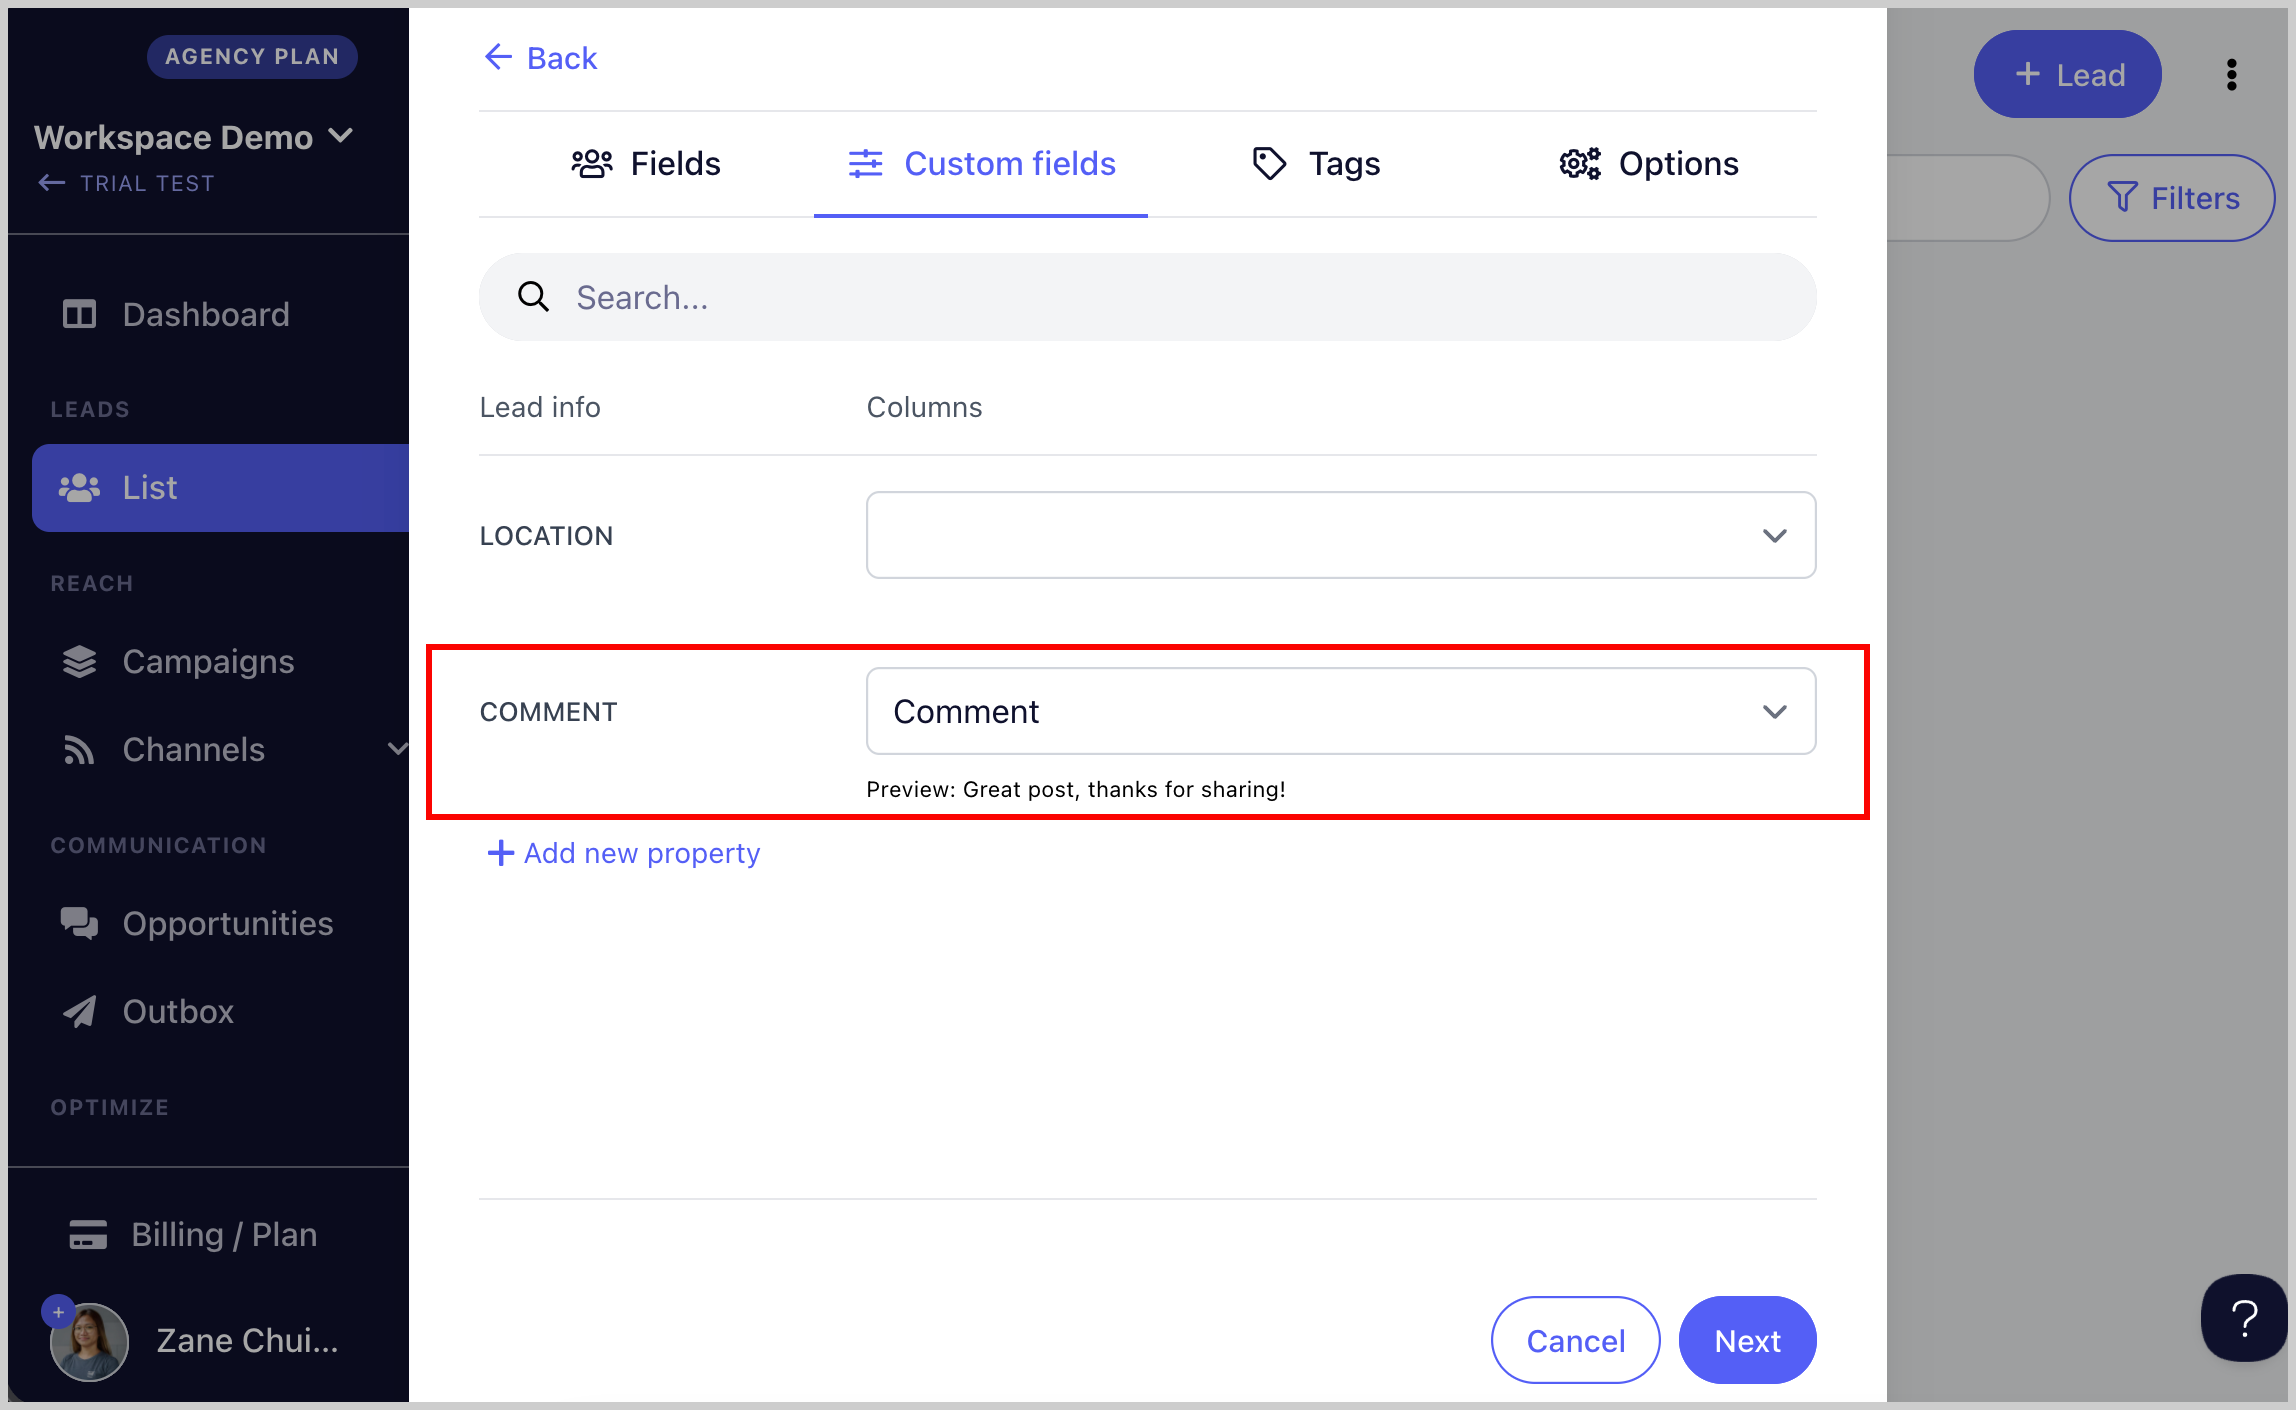
Step 3. Map the lead properties and add custom properties or tags if needed.
Step 4. (Optional) Select the campaign where you would like to add the leads → click Import.
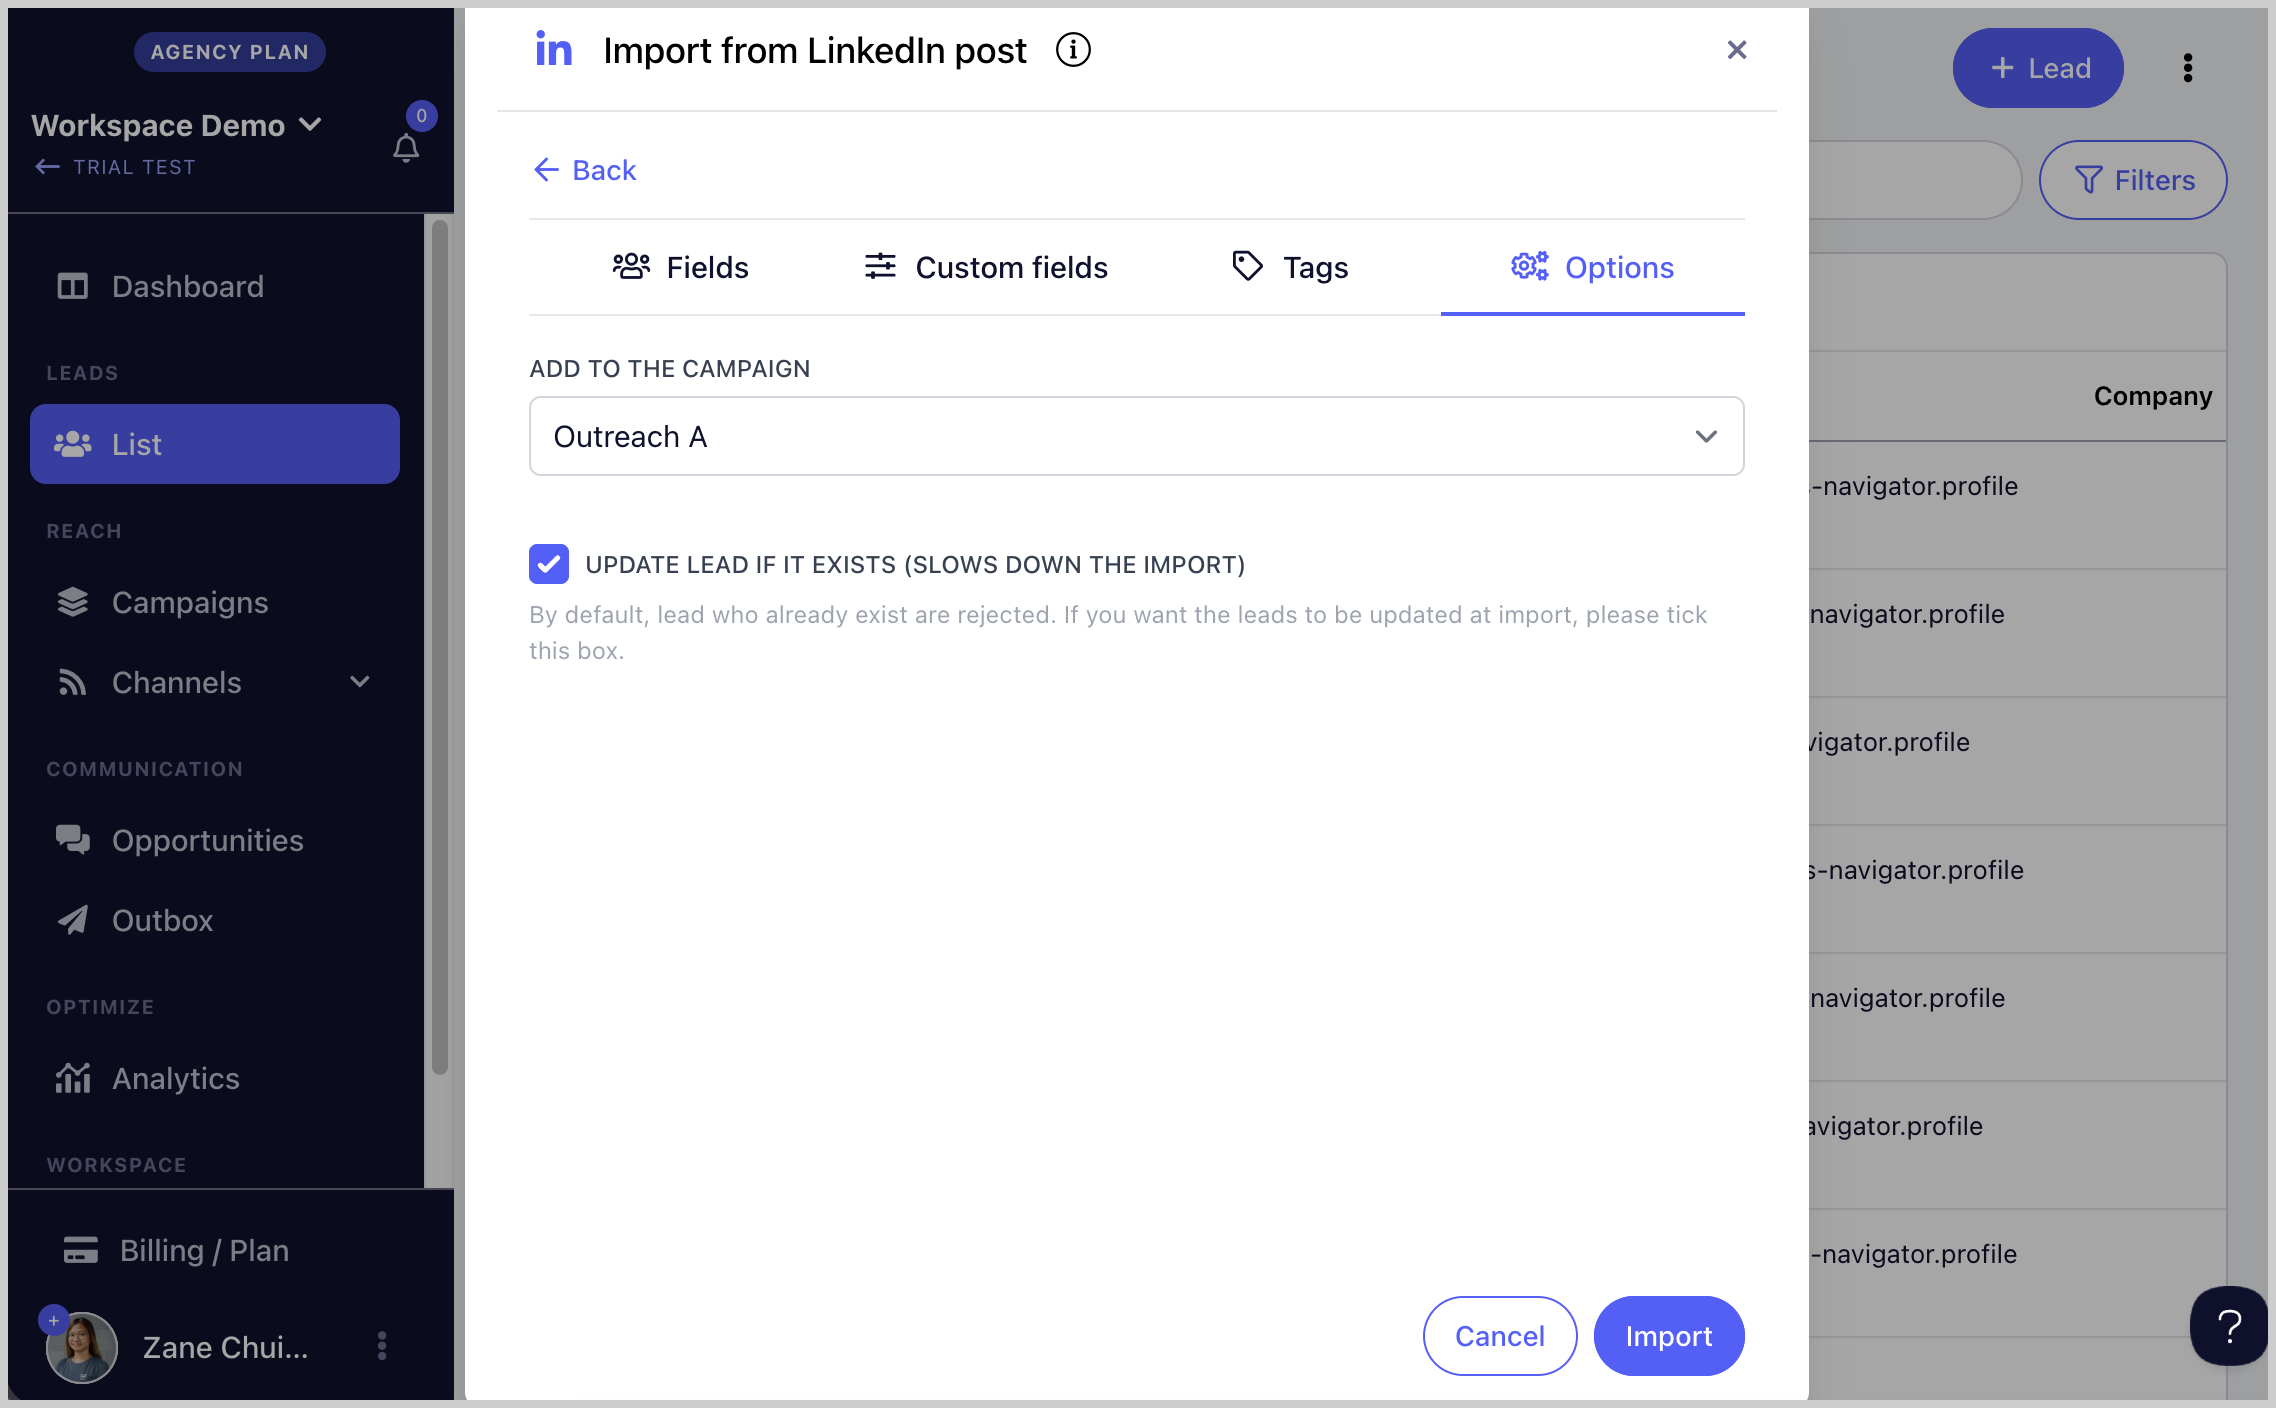
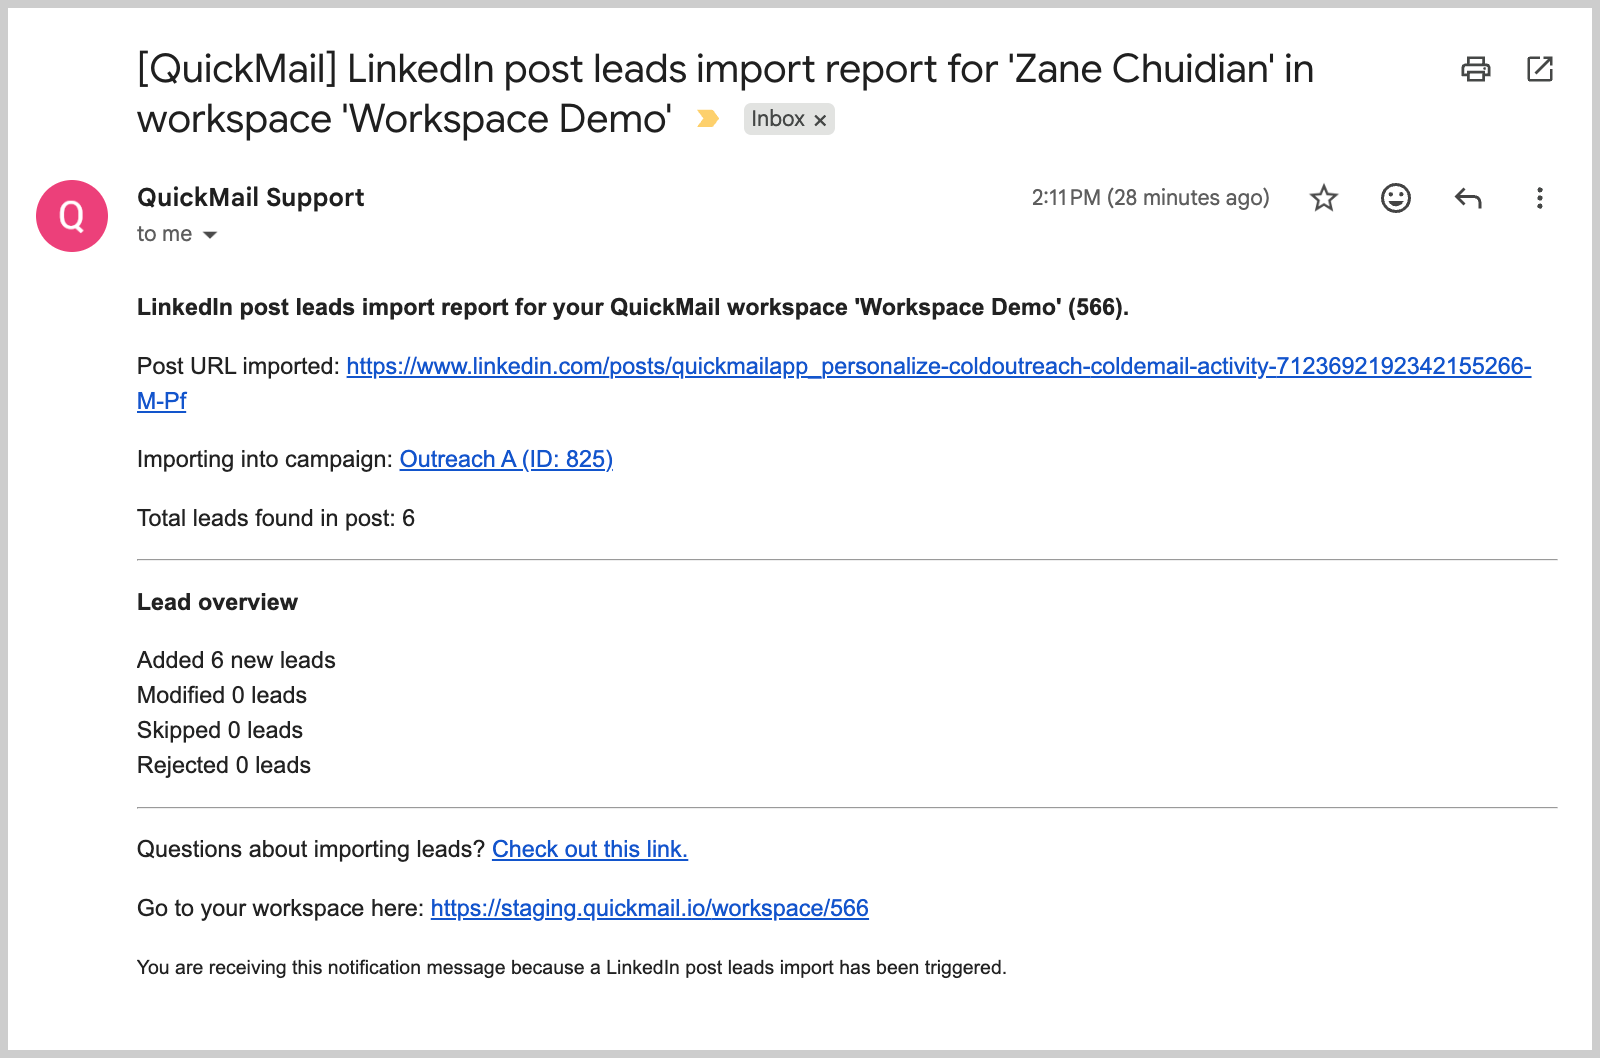
Step 5. An import report will be sent via email showing how many leads were imported or rejected.
Auto-Import with Google Sheet
Important: Make sure the sharing settings of the Google Sheet are set to Shared and that it is not saved in a Shared Drive. Otherwise, permission issues may occur and auto-import may not work.
Every time you add a new lead to your Google Sheet, they will be automatically added to your list or campaign.
Step 1. Add a Google Drive. Go to Settings → Google Drive → + Drive.

Step 2. Go to List → + Leads → Google Drive → tick the box Auto-import automatically if spreadsheet changes.
Note: Auto-import will only import new leads added to the Google Sheet after it is set up. Existing leads in the sheet must be imported separately.
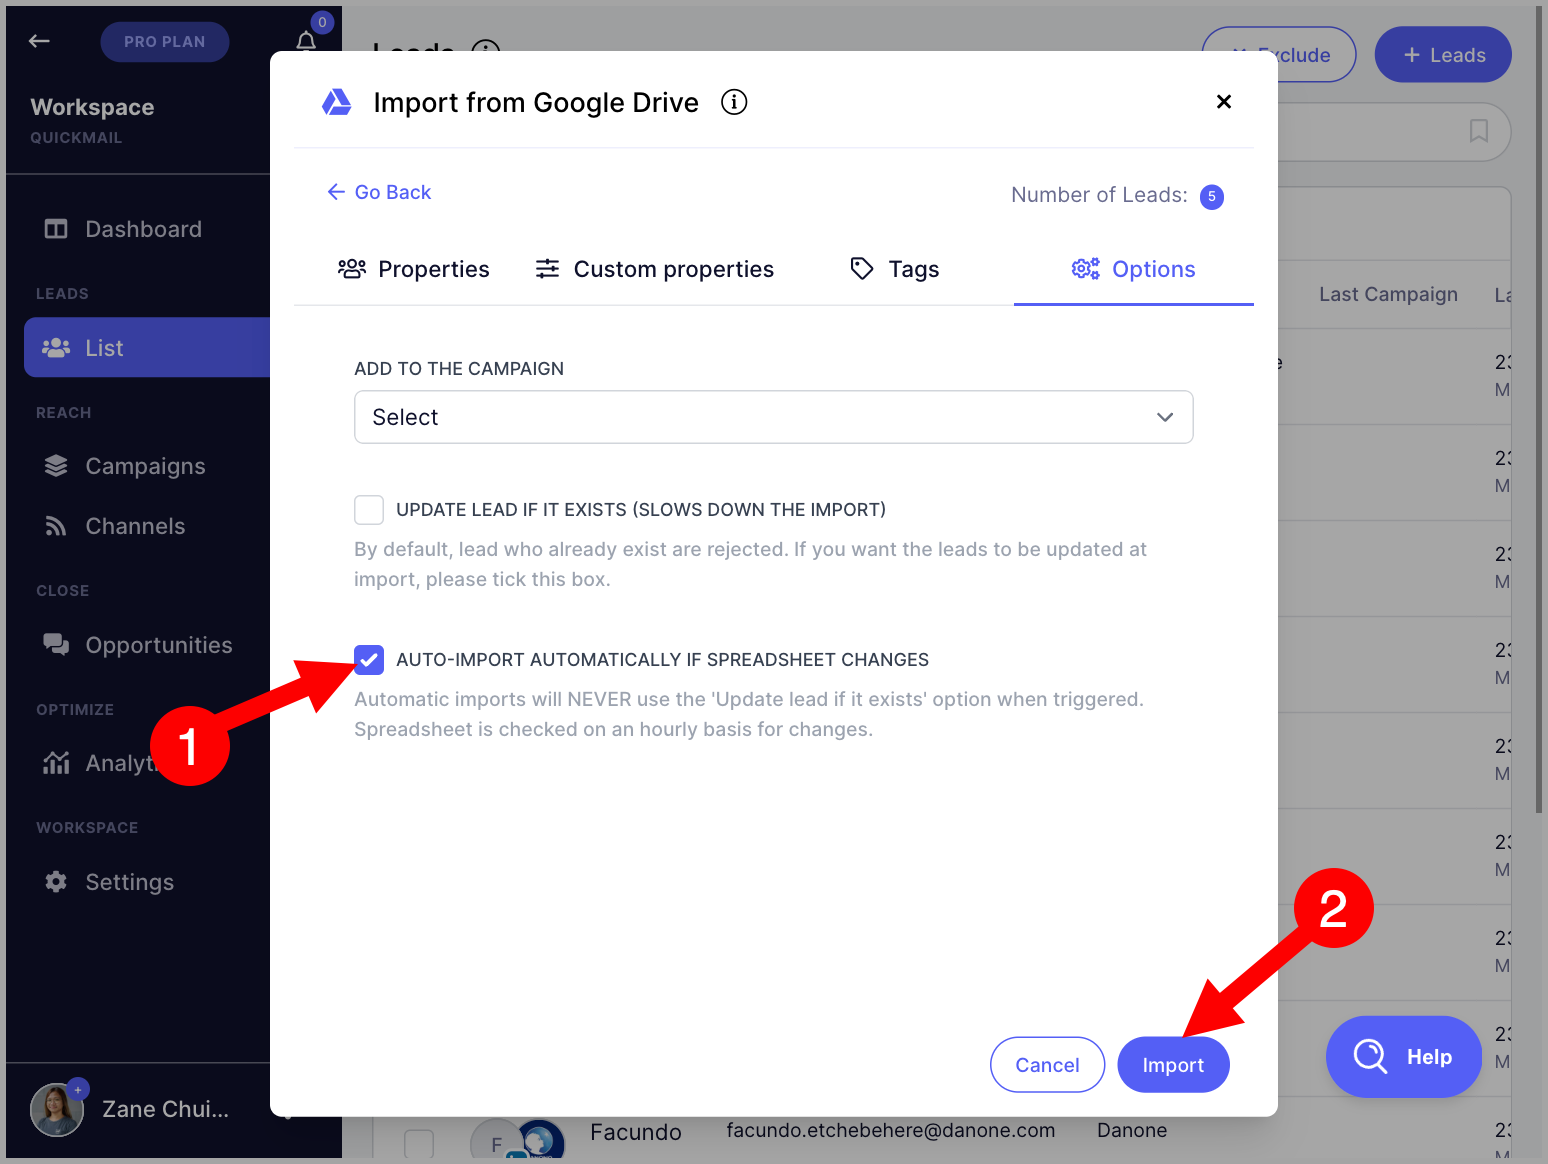
QuickMail scans the Google Sheet for changes every hour. If new leads are detected, they will be imported automatically.
Note: There is a limit to the number of auto-import sheets that can be added: 1 for the Basic plan, 10 for the Pro plan, and 30 for the Expert plan.
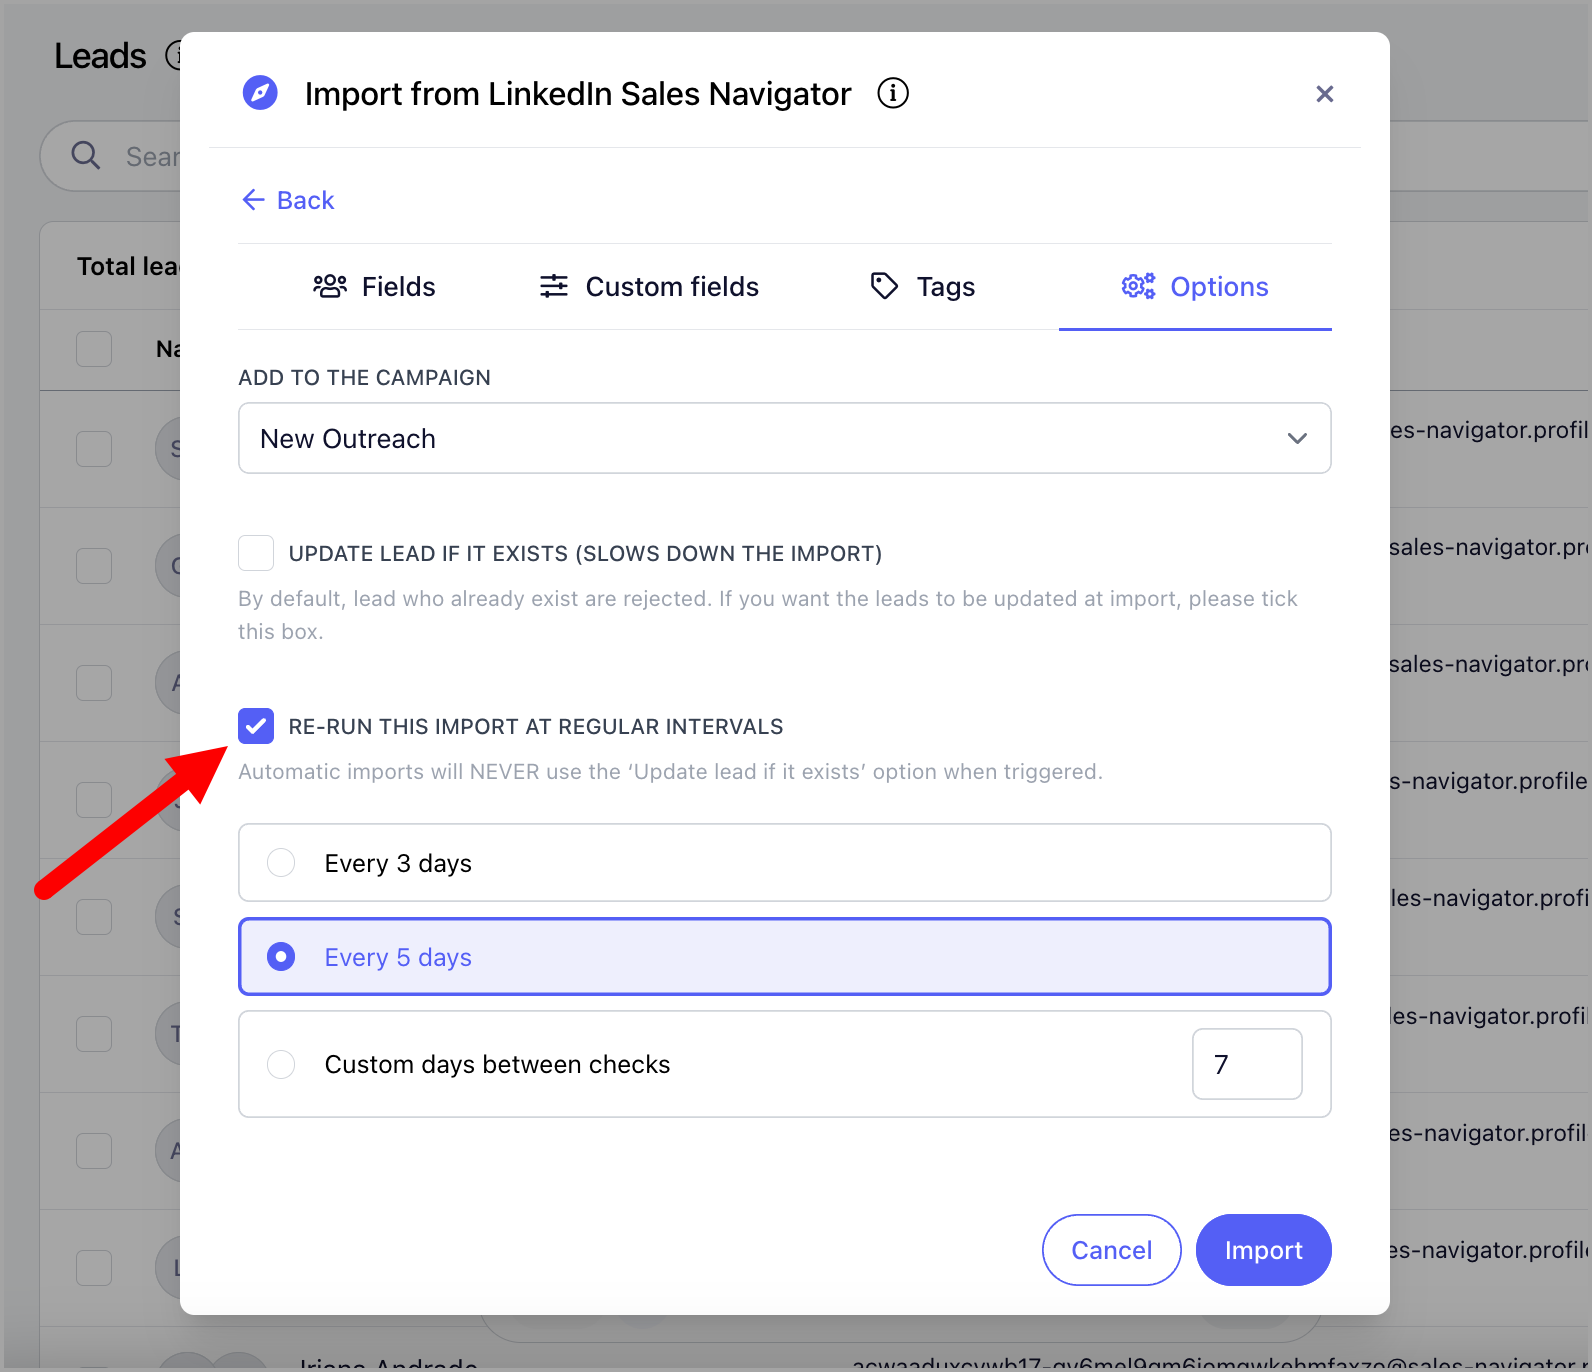
Auto-Import via Sales Navigator
Auto-Import continuously monitors your saved Sales Navigator search. When a new lead appears, it is automatically added to your list or campaign.
Step 1. Add a LinkedIn account that has a Sales Navigator subscription. Go to LinkedIn → + LinkedIn.
Note: LinkedIn accounts showing a Sales Navigator icon are supported. If there is no Sales Navigator icon, the account is not compatible.
Step 2. Go to Sales Navigator → search for the leads you would like to import → use filters to narrow down your search if needed → copy the URL.
Note: Recent Search links are not yet supported. The URL must start with https://www.linkedin.com/sales/search/people?query= from a fresh search.

Step 3. Go to List → + Add Leads → Import from Sales Navigator.

Step 4. Paste the URL copied from Sales Navigator → follow the on-screen instructions to set up the import.

Step 5. Under Options, check the box Re-run this import at regular intervals → select your preferred interval.
Tip: You can select a campaign in the Add to Campaign dropdown to automatically add new leads from Auto-Import to a campaign.
Importing Leads from Emails Received
You can automatically import email addresses of people who have sent you emails. Note that this may include personal or marketing email addresses.
To enable this, go to Email → click on an email account → Receiving tab → check Create leads from emails received → optionally select a campaign to add the leads to.
Importing Leads Who Viewed Your LinkedIn Profile
You can automatically import LinkedIn profiles of people who viewed your LinkedIn profile.
To enable this, go to LinkedIn → click on the LinkedIn account → Receiving tab → check Create leads from profile viewers → optionally select a campaign to add the leads to.
FAQs
Q: How do I know if the import has been completed?
A: You will receive an email with the import details.
Q: What happens if leads that are already on the list are imported?
A: Leads that already exist will be skipped. Each lead must have a unique email address.
If you want to update existing lead details, check Update Lead if it exists before importing. Note that this only works for manual imports — auto-imports will always skip leads that already exist.
Important: When updating leads on import, make sure to map the company information. If it is not mapped, the company name will default to the domain name, which may have unexpected capitalization (e.g. "Abc" instead of "ABC").
Q: Special characters are not showing correctly in QuickMail. How do I fix this?
A: The CSV must be formatted as UTF-8. This article may help with converting your file: https://support.meistertask.com/hc/en-us/articles/4406395262354-How-Do-I-Encode-My-CSV-File-Using-the-UTF-8-Format-
After correcting the CSV, re-import it and make sure to check Update Lead if it exists to avoid leads being rejected as duplicates.