Segmenting Leads with Tags
Segmenting Leads with Tags
In this article:
Why use tags?
How to create tags?
How to apply tags to leads?
How to bulk-apply tags via import?
How to delete tags?
Why Use Tags?
Tags are useful for categorizing leads. By tagging leads, you can quickly search for specific leads using Advanced Filters.
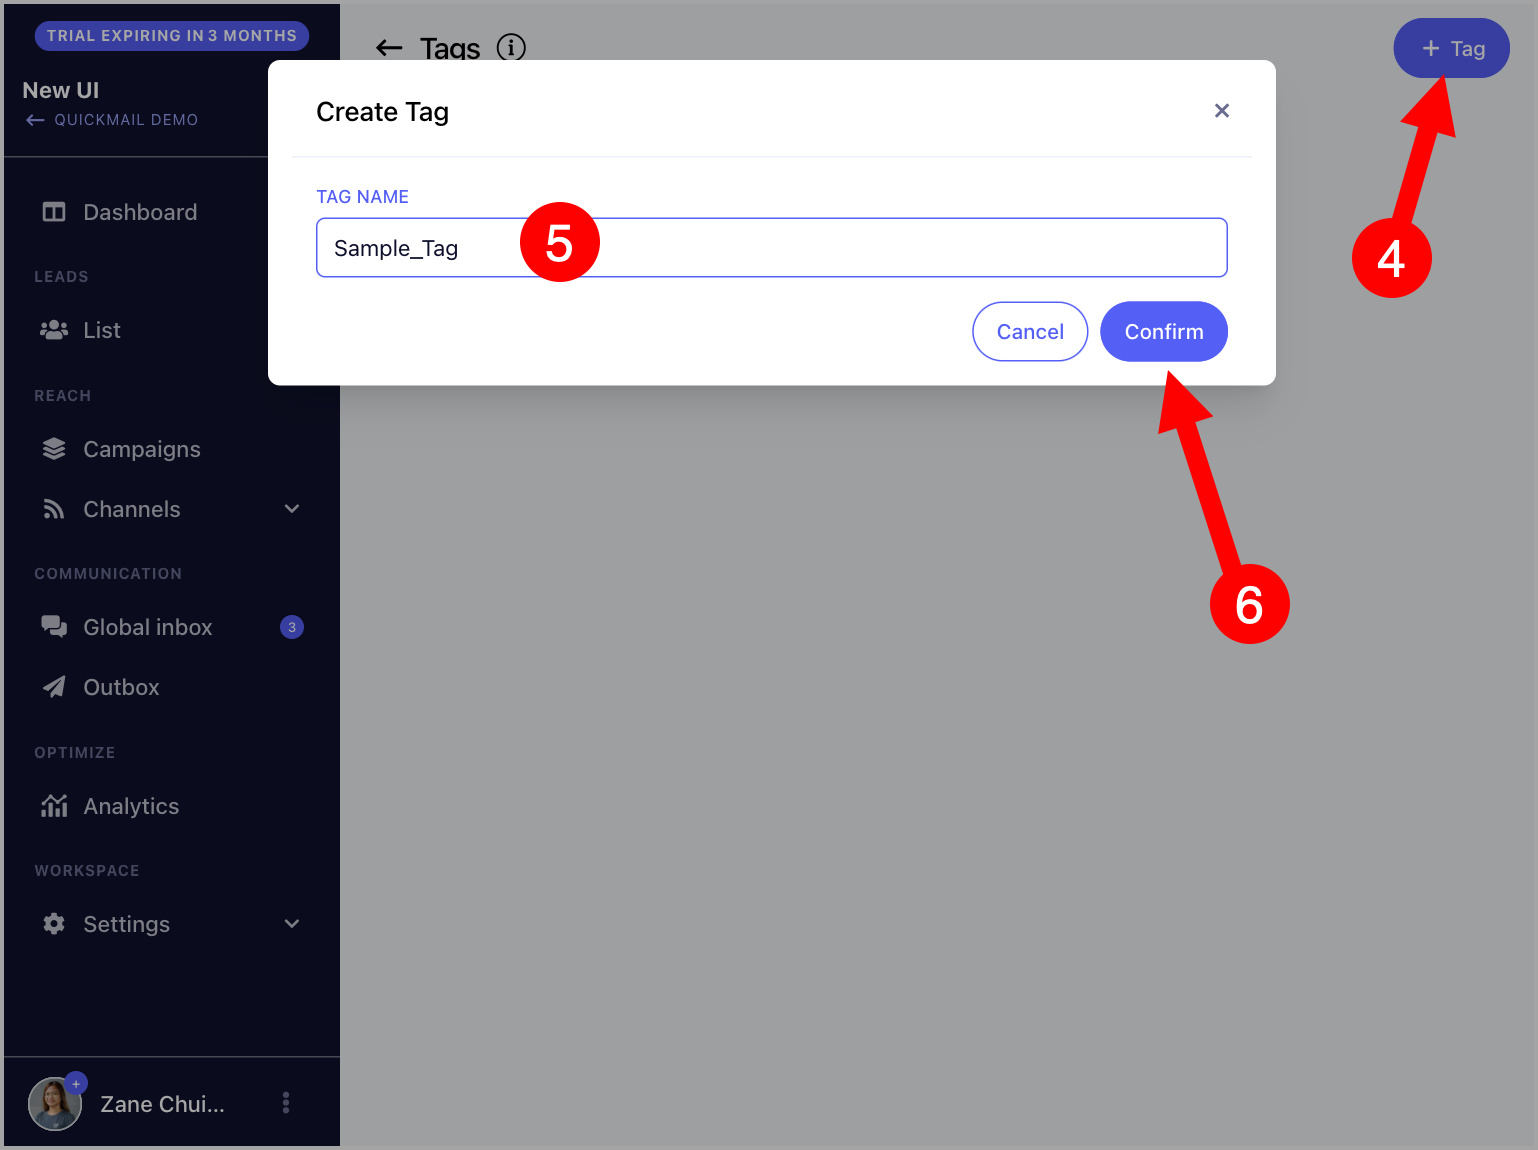
How to Create Tags?
From the List Page
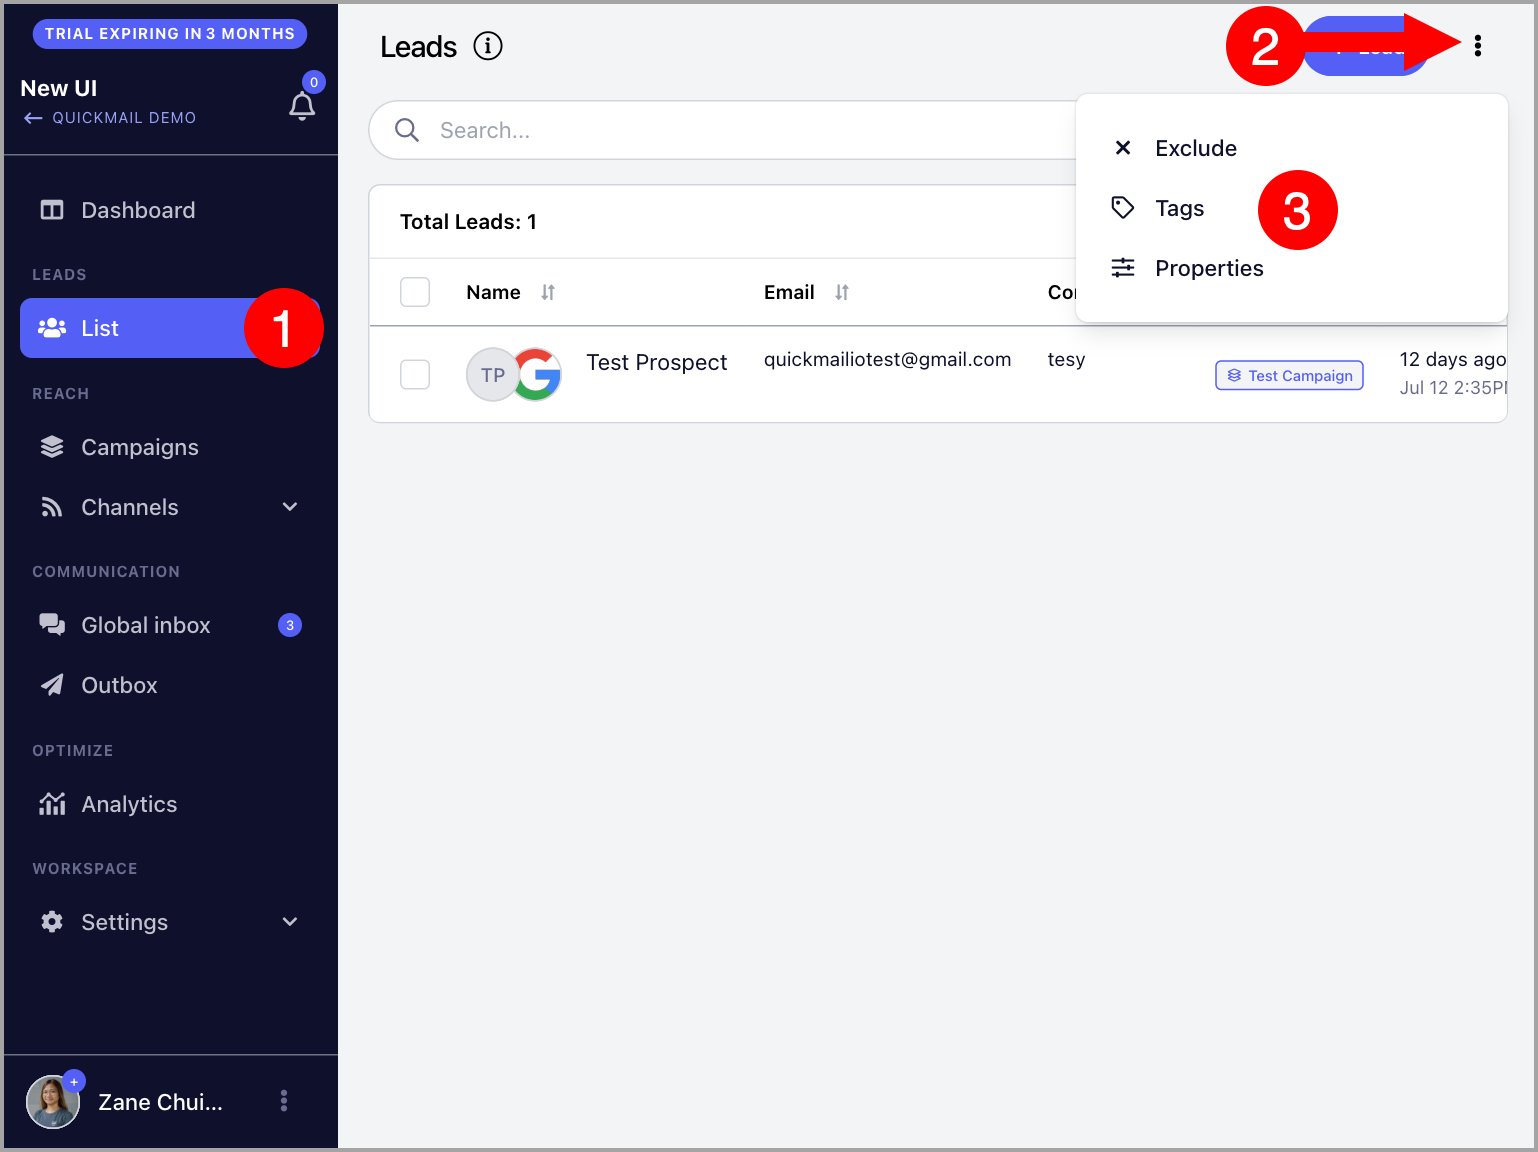
Go to List → click the menu icon (three vertical dots) in the top-right corner → Tags.

On the Tags page, click Add Tag → name the tag → Confirm.
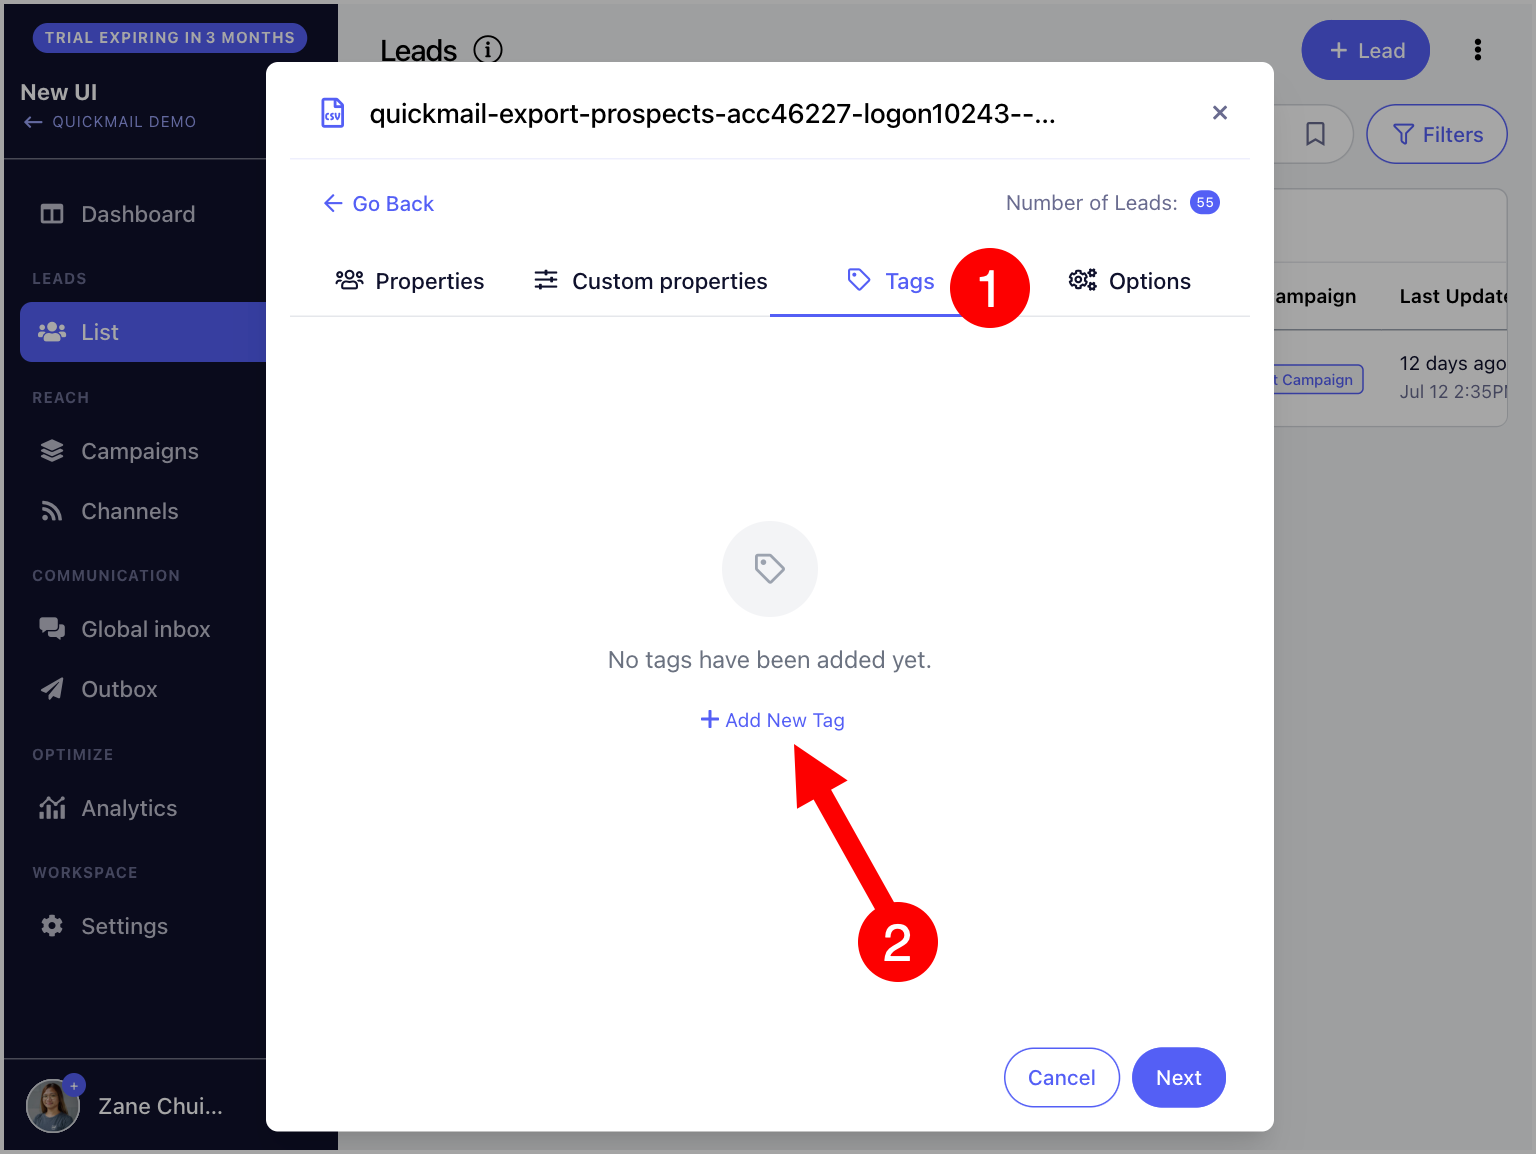
While Importing Leads
Go to the Tags tab during import → click Add New Tag.
How to Apply Tags to Leads?
There are three ways to apply tags to leads:
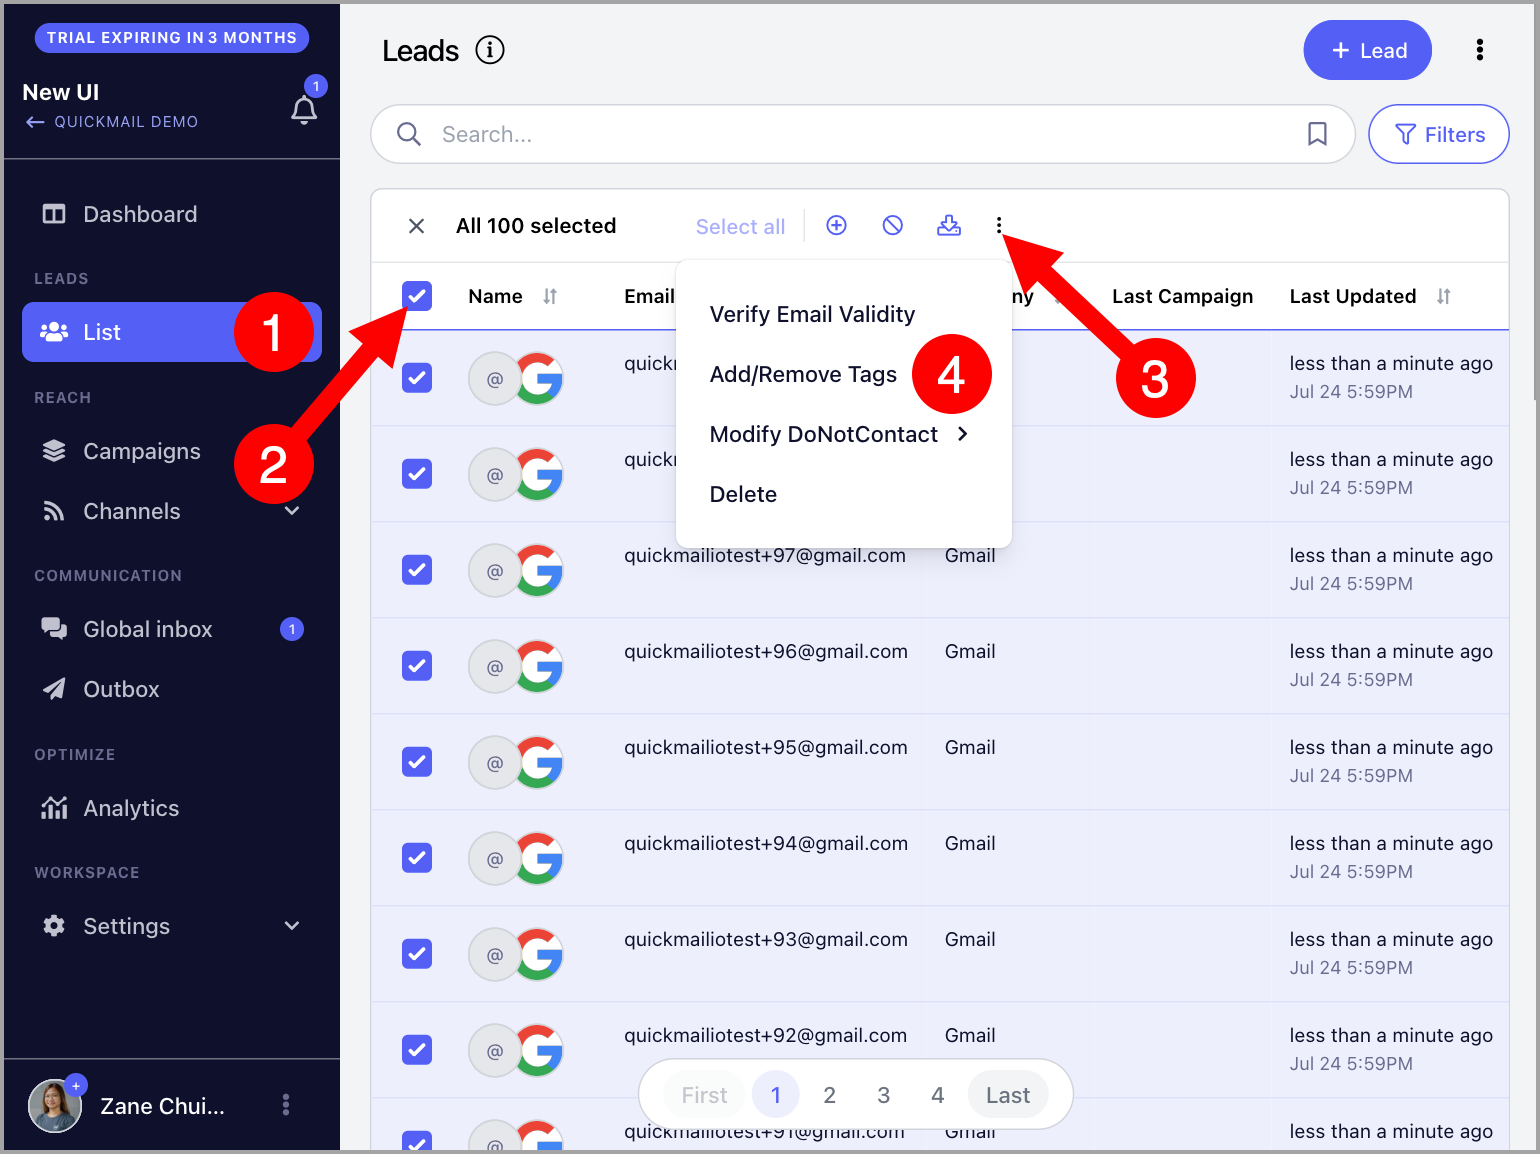
From the List Page
Go to the List page → select the leads → click the menu icon (three vertical dots) → Add/Remove Tags.
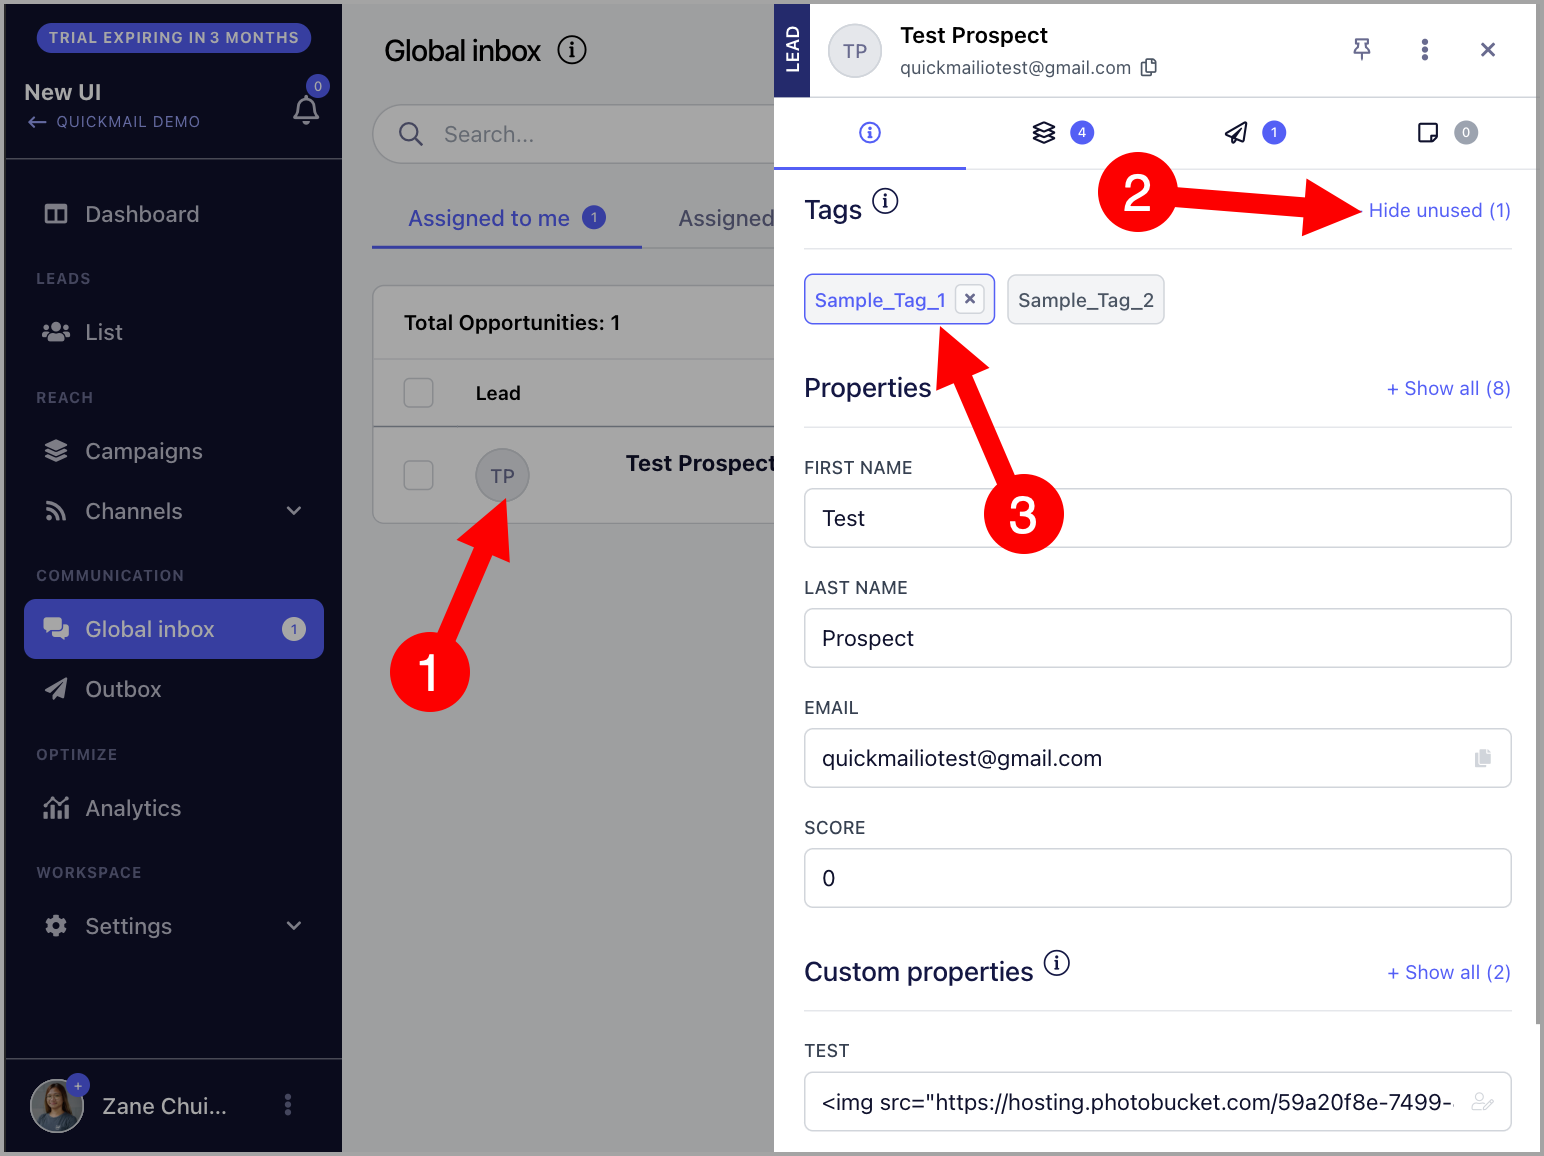
From the Lead's Quick View
The lead's quick view can be accessed by clicking on the lead's thumbnail or email address from the:
Campaign's Leads page
Opportunities page
List page
From there, you can manually add tags to a specific lead. Applied tags are shown in blue.
Bulk-Applying Tags via Import
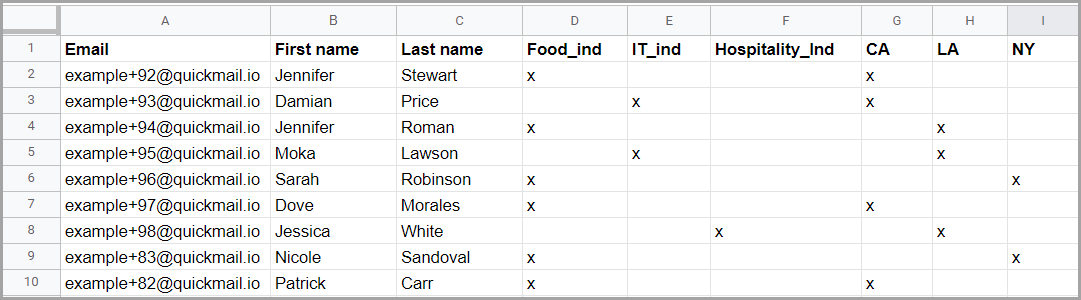
When importing leads, tags can be applied in bulk by adding tag columns to your CSV. For each lead that should receive a tag, enter any value (such as "x") in the corresponding column. Leaving a row blank means the tag will not be applied.
Here is an example of a CSV with tag columns:
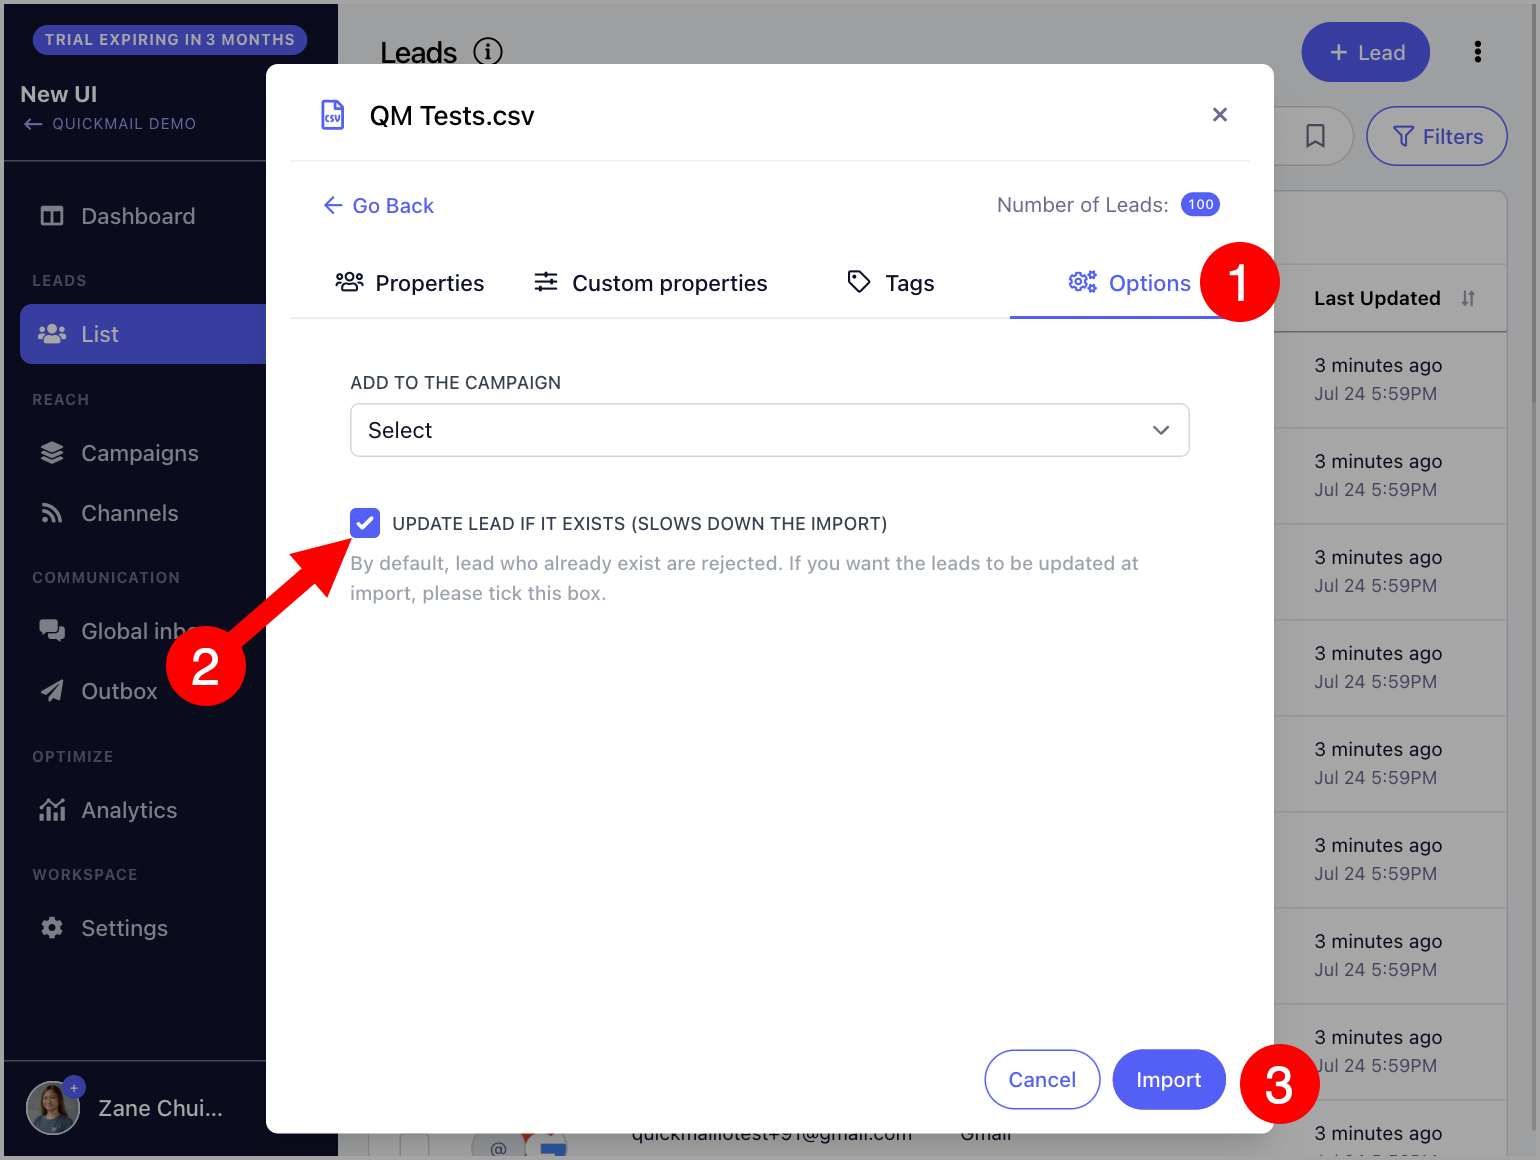
Note: If the leads being imported already exist in the list, make sure to check Update Lead if Exists so that the tags are applied to them.
Pro tip: A lead can have multiple tags, and you can filter leads by combining tags. To learn more, see: Filtering Leads.
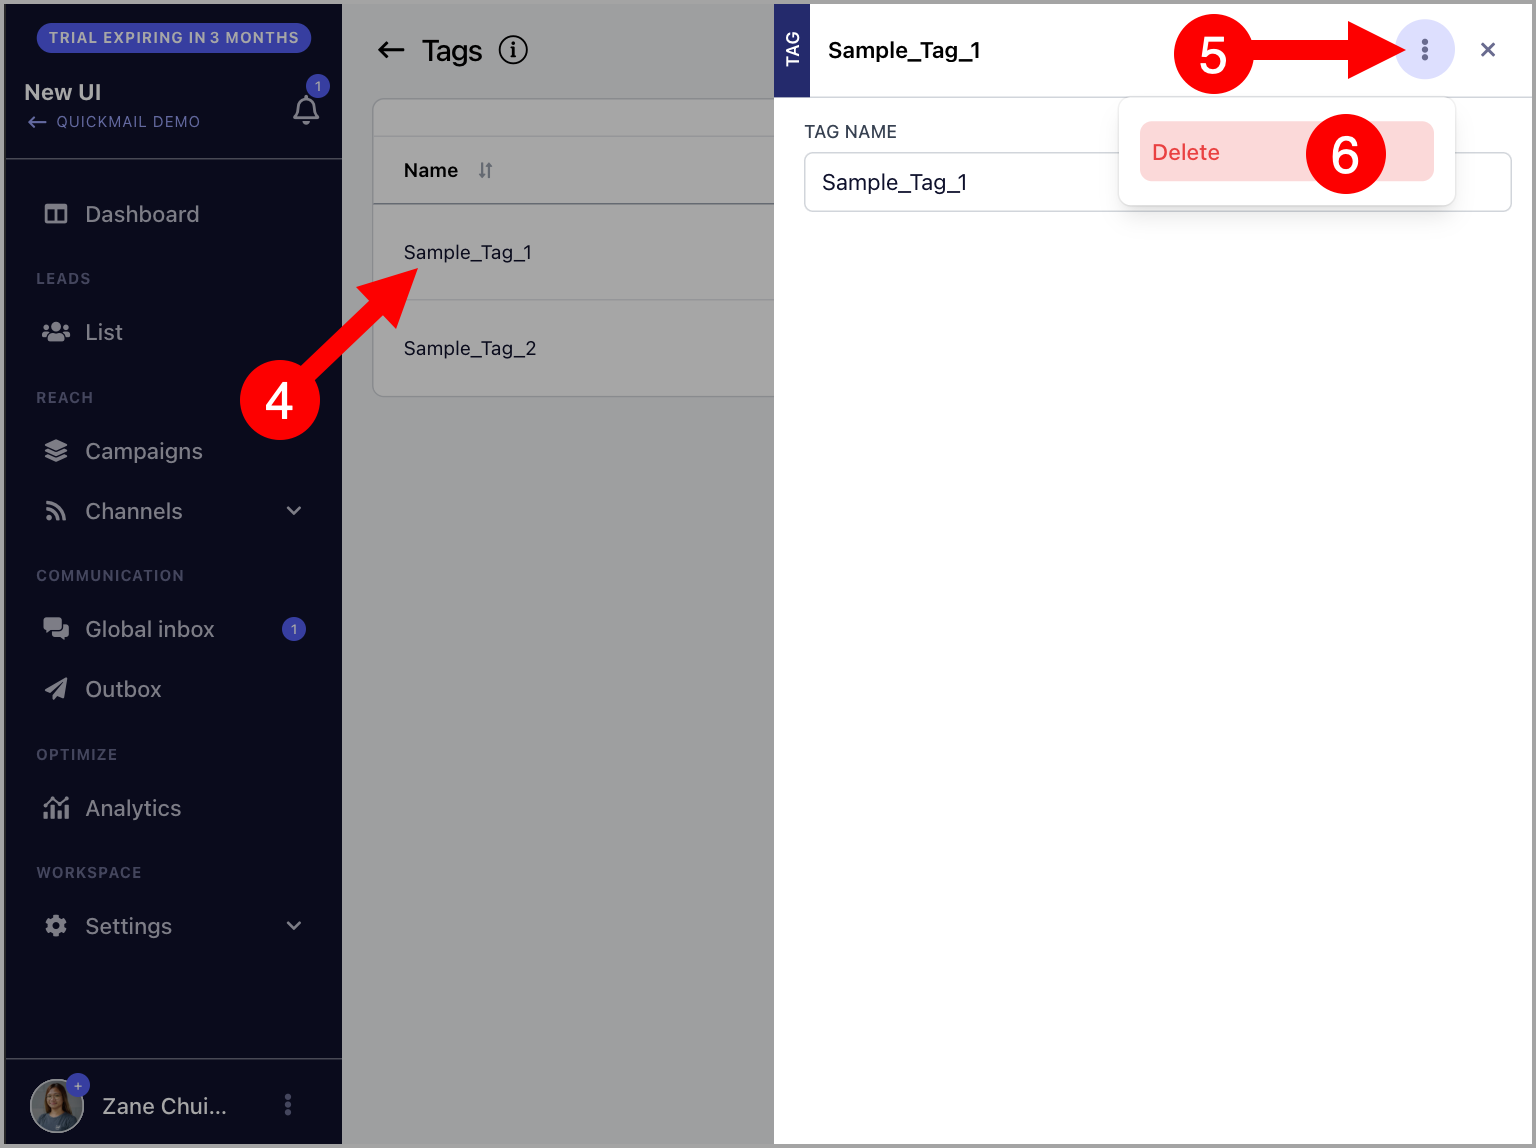
How to Delete Tags?
Go to List → click the menu icon (three vertical dots) in the top-right corner → Tags.
On the Tags page, click on the tag you want to delete → click the menu icon (three vertical dots) → Delete.