Custom Fields for Personalizing Emails
Custom Fields for Personalizing Emails
In this article:
Why use properties?
How to add properties to email steps?
Lead properties
Custom properties
Company properties
Inbox properties
Precomputed properties
How to delete custom properties?
How to edit custom properties?
Why am I getting an error?
Why Use Properties?
Properties are placeholders that can be added to email steps to personalize your emails. Using properties makes it easier to give your emails a personal touch and helps improve email deliverability.
How to Add Properties to Email Steps?
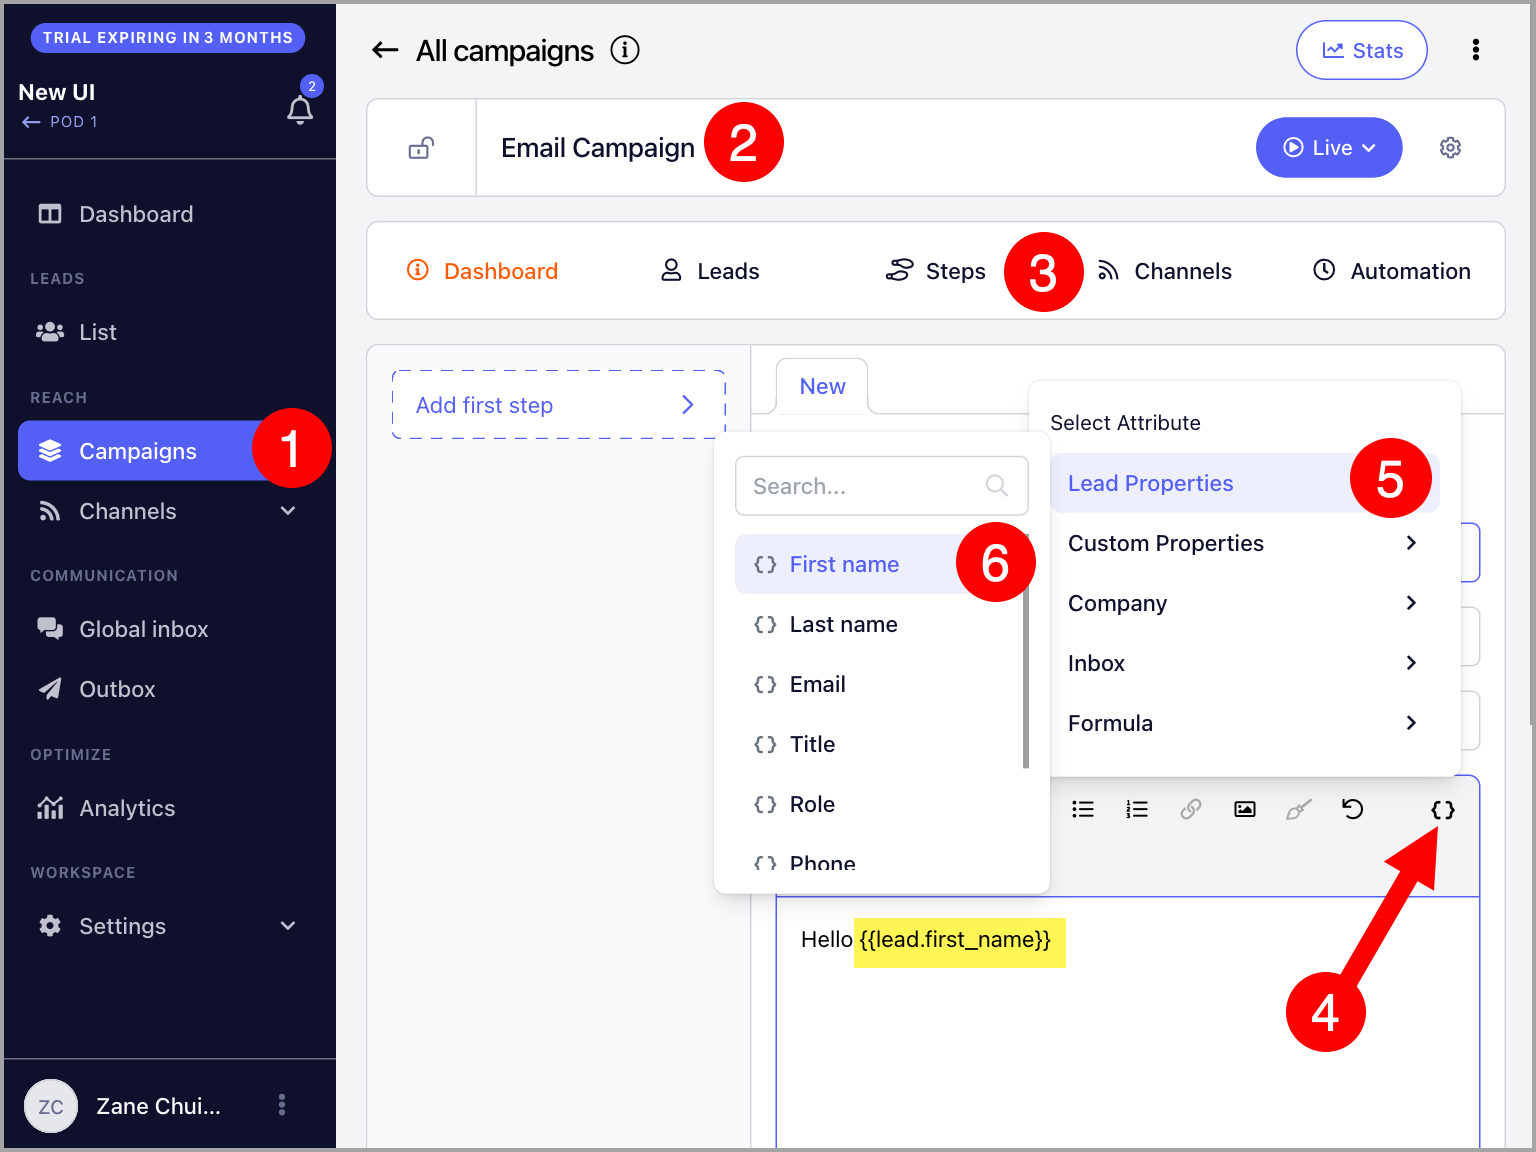
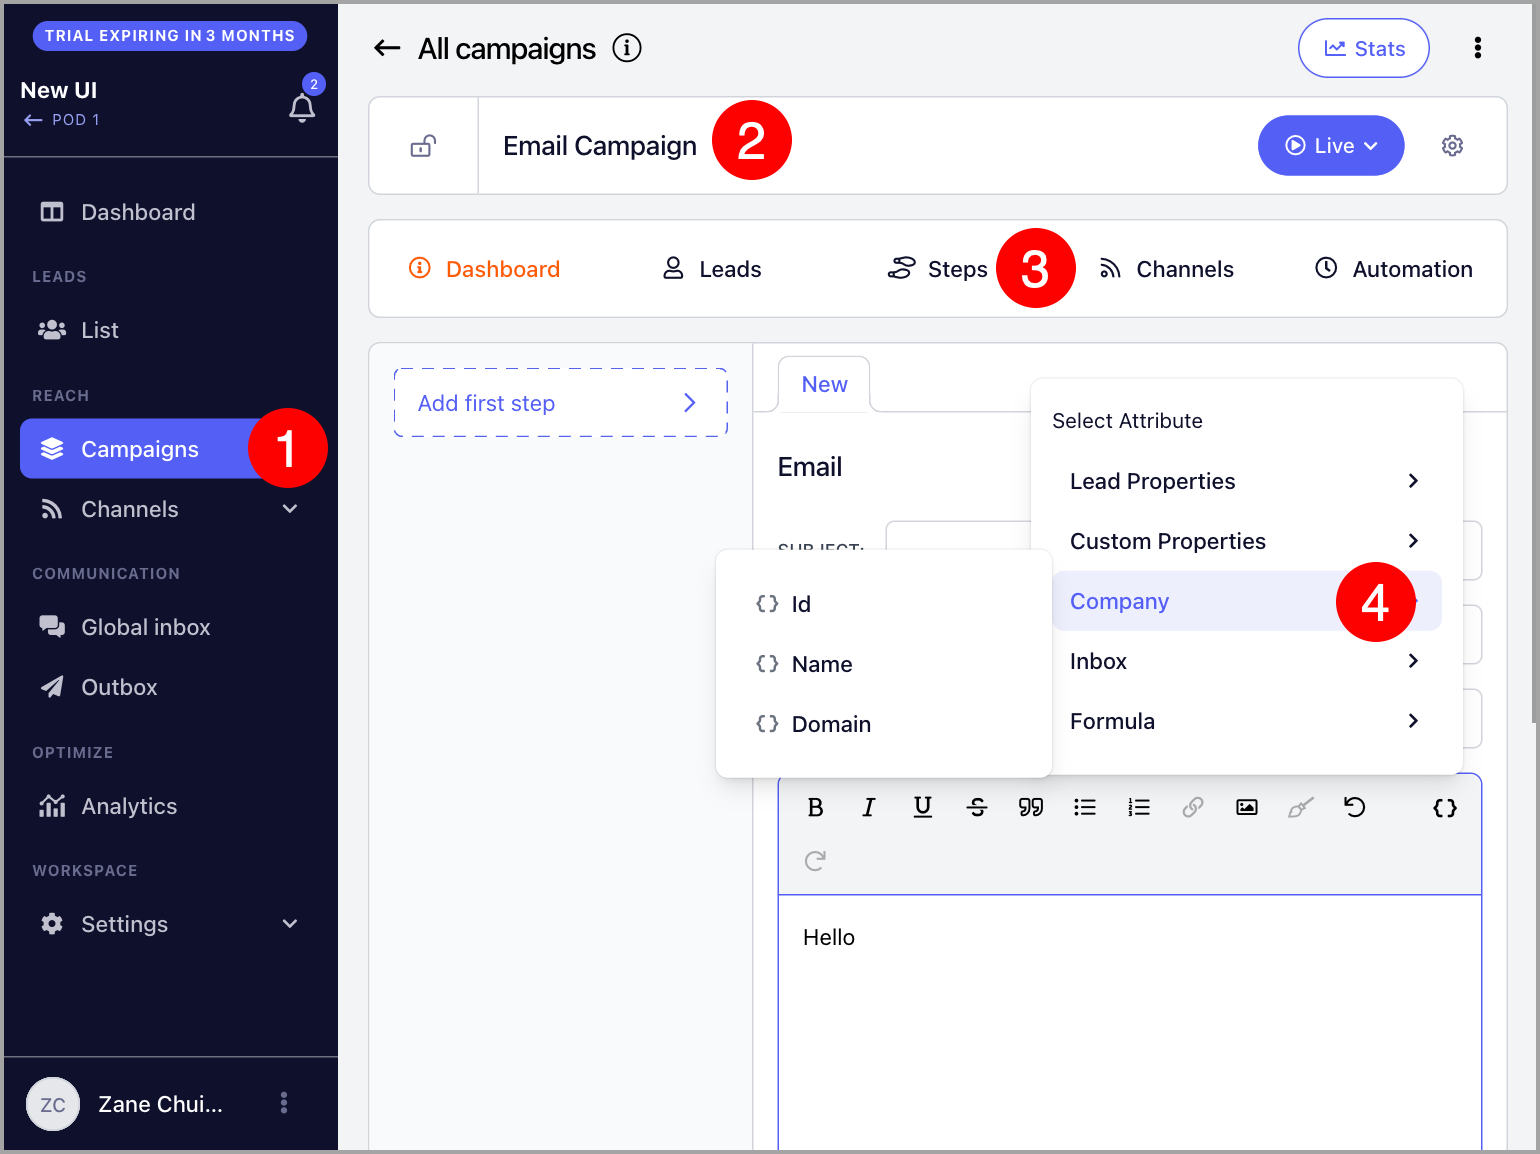
To add properties, go to an email step and click Properties on either the email subject or body field. There are several types of properties available to customize your emails.
Lead Properties
Lead properties are the basic way to personalize your emails. You can use them to include a lead's first name, last name, email, title, role, phone, and score.
For example:
Hey {{lead.first_name}}, how is it being the new {{lead.role}}?
This will translate to:
Hey Richard, how is it being the new Regional Supervisor?
Custom Properties
Custom properties allow you to include personalized details in your emails for each lead, such as their city, industry, or a unique opening line tailored to each individual.
Important: If you need to use formatting and line breaks in custom properties, you will need to use HTML.
Note: It is not possible to filter leads based on custom property fields.
Step 1: Create Custom Properties
There are two ways to create custom properties:
Via the Custom Properties page
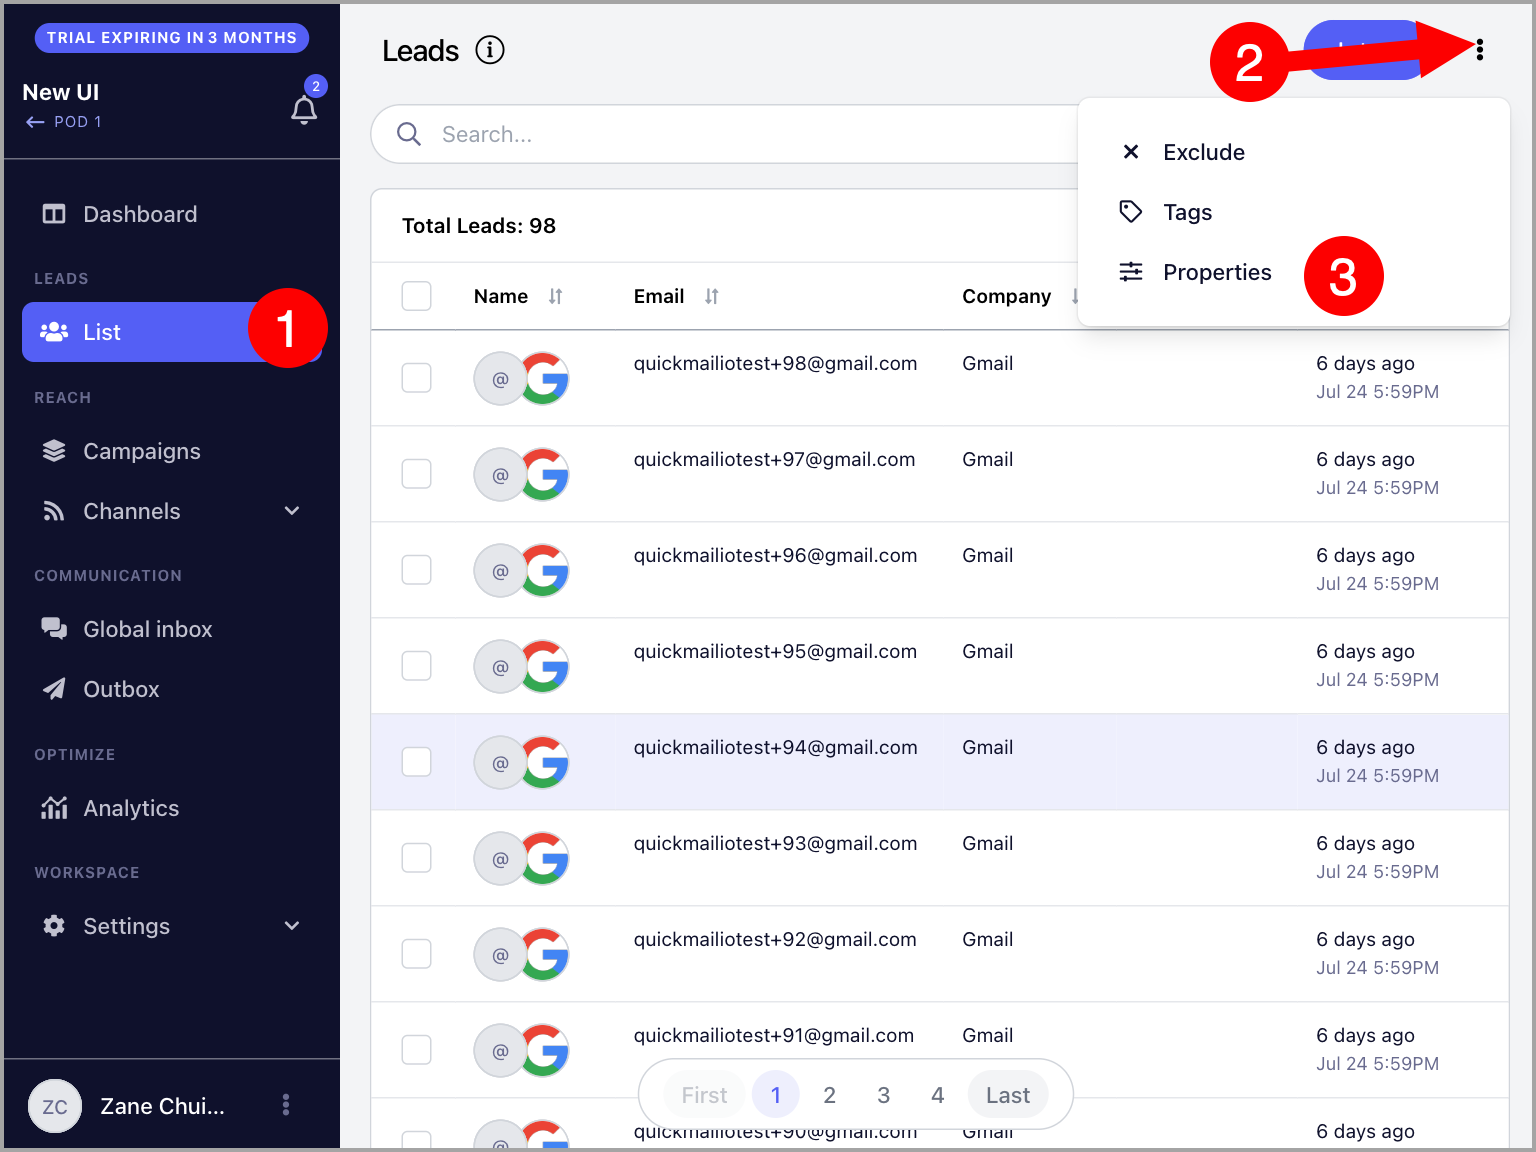
Go to List → click the three vertical dots → Properties.

Click + Property → add a custom property name → set a default value (optional) → Confirm.
The default value is used as a fallback if a lead does not have a value assigned for that property.
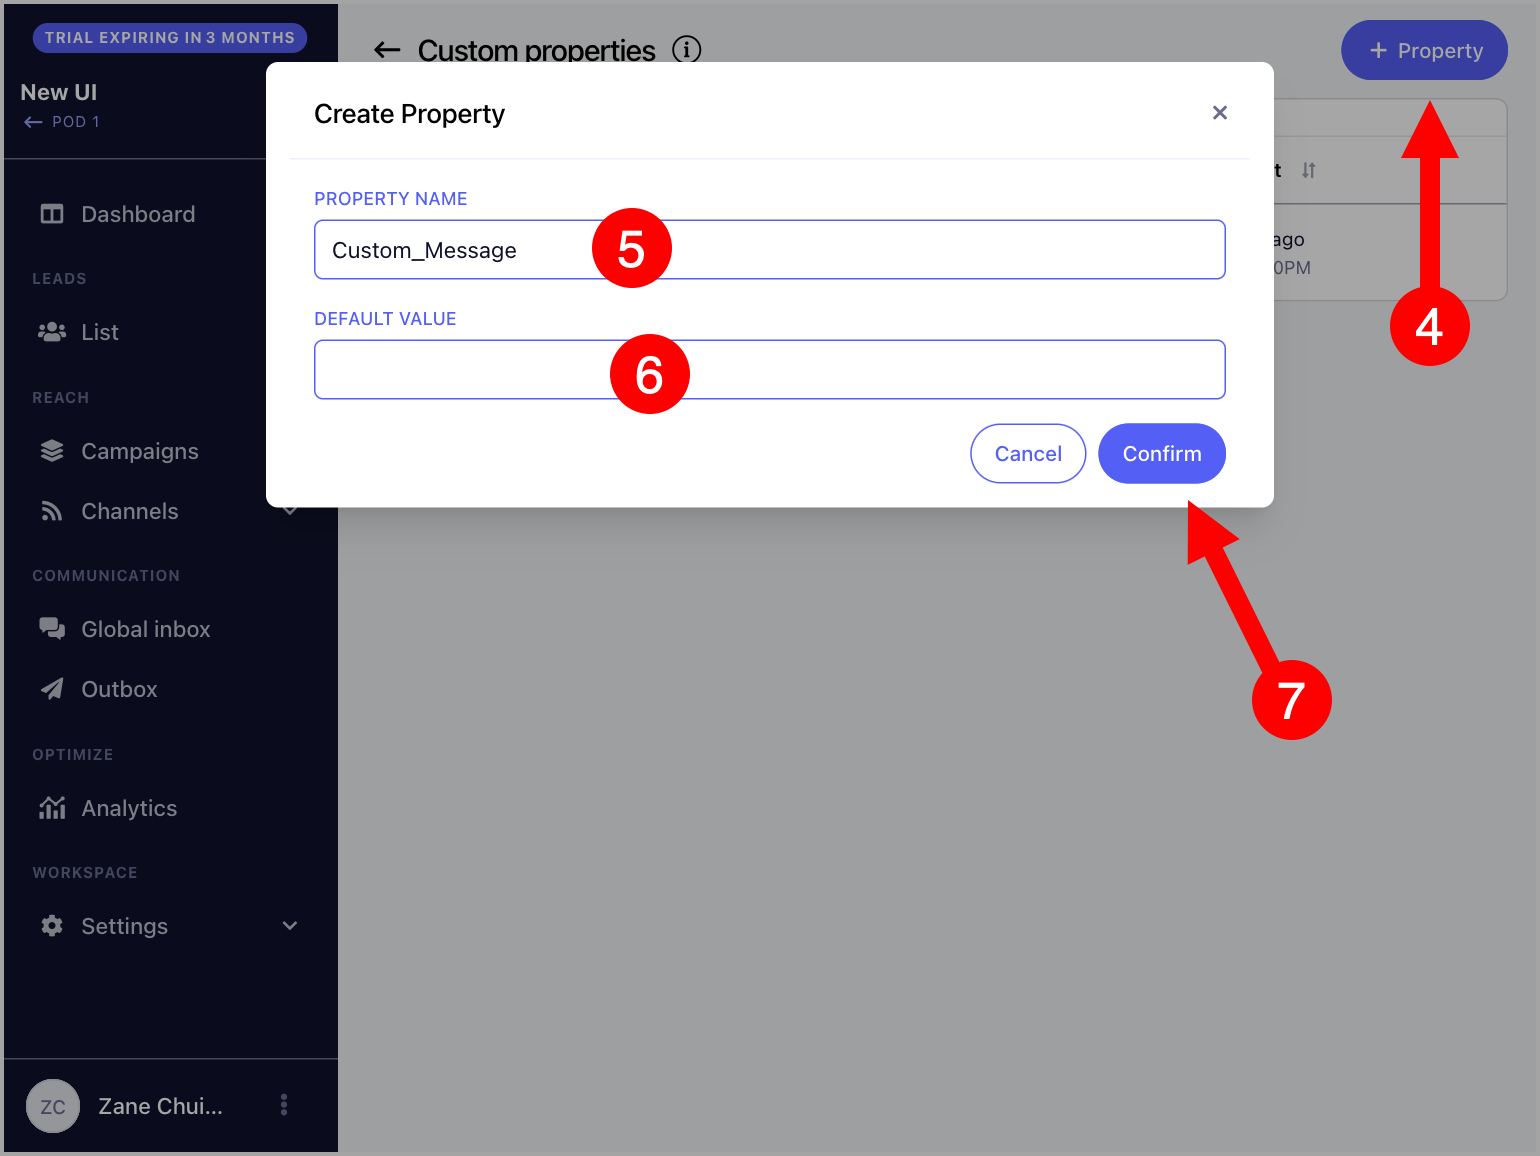
Note: Custom property names can only contain letters, numbers, hyphens (-), and underscores (_). Names with spaces cannot be created.
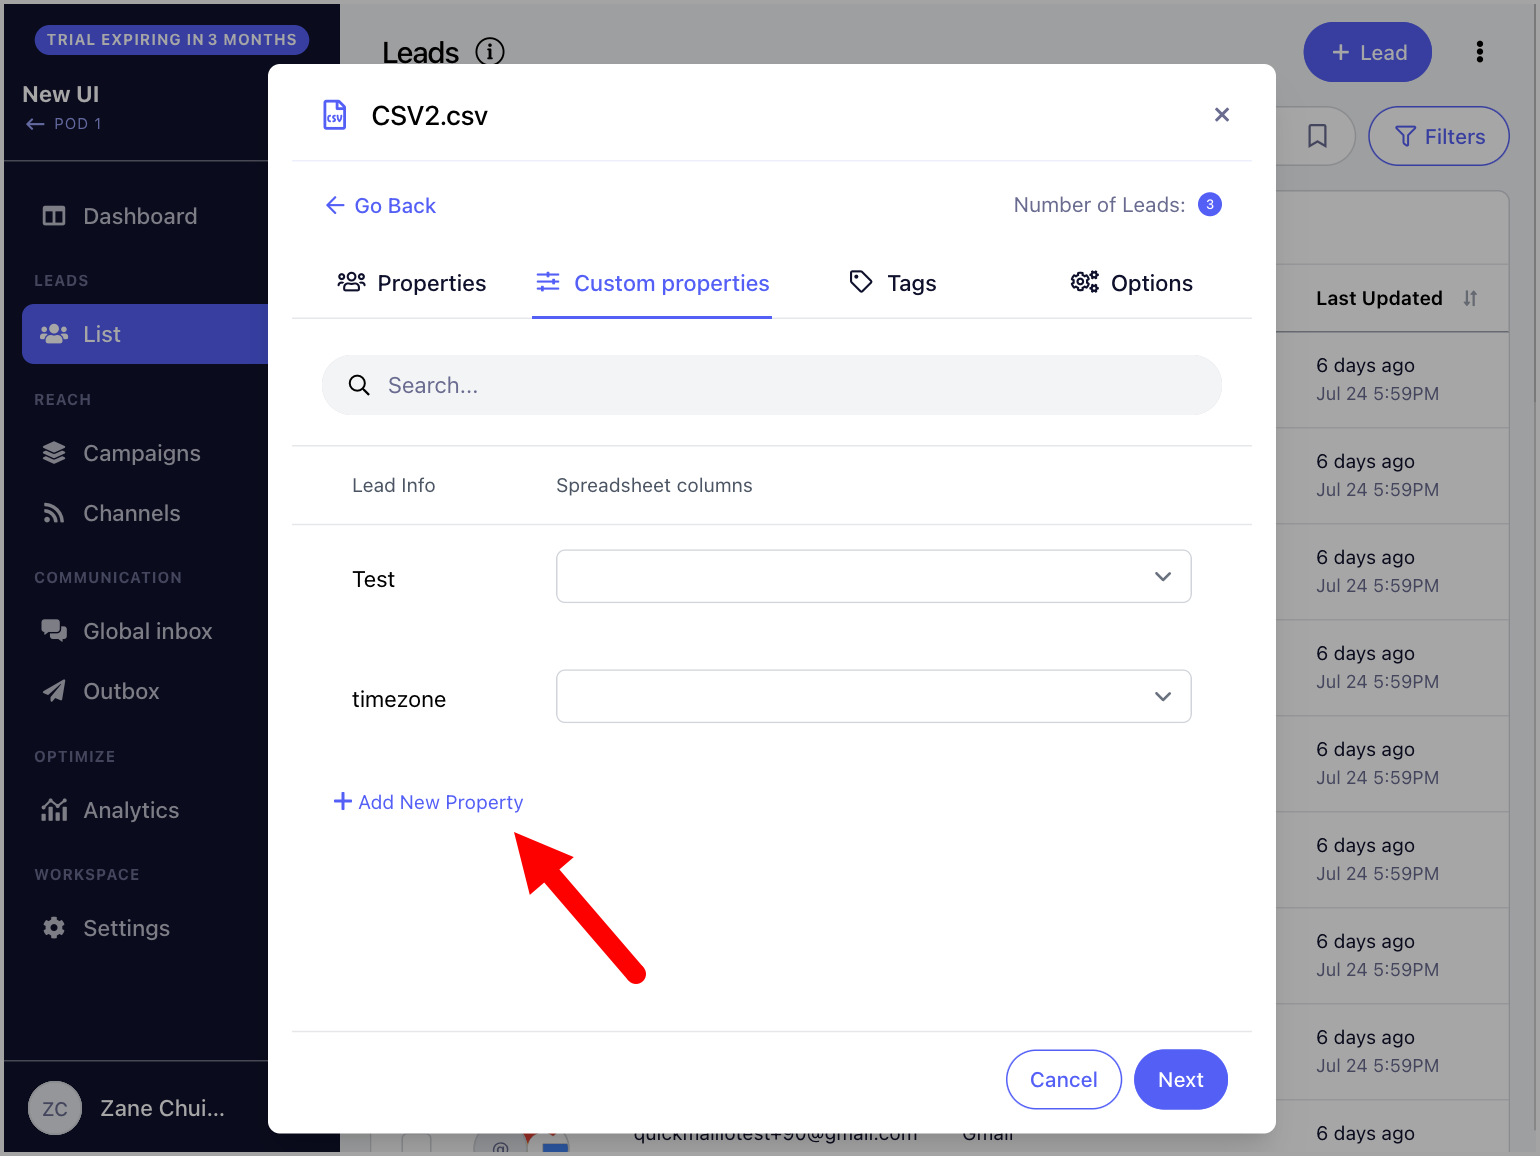
Via import
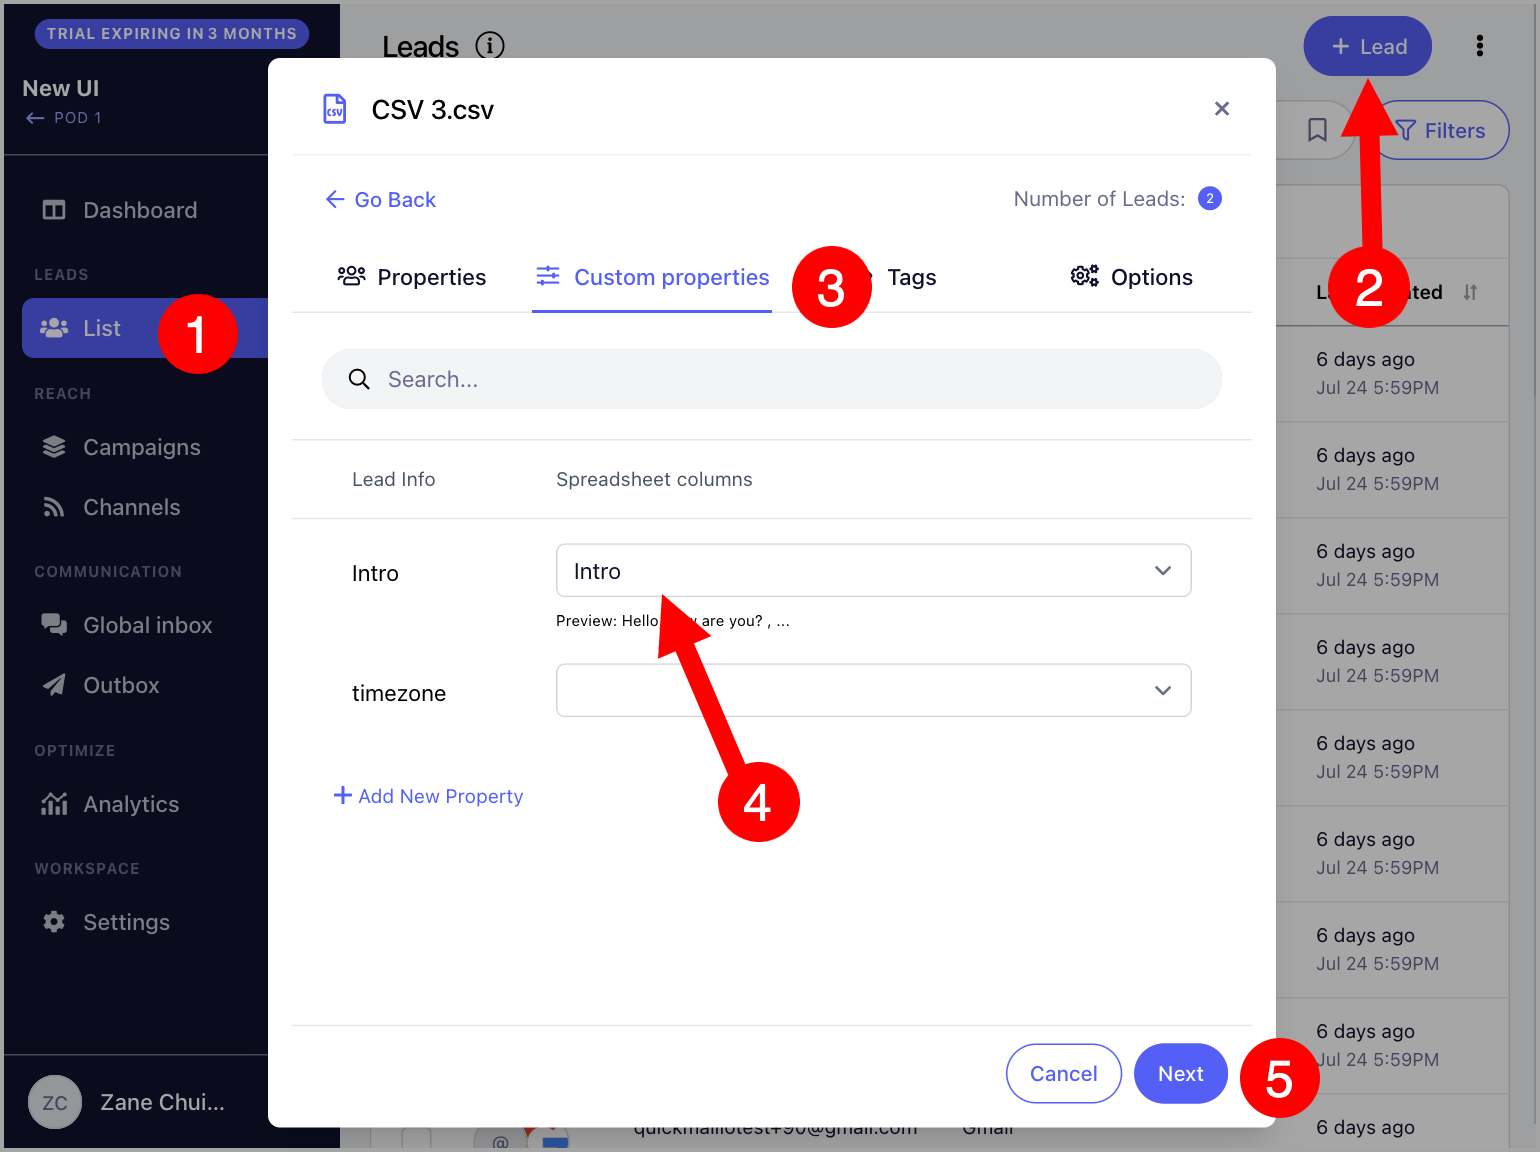
Go to List → + Leads → Import from CSV or Google Drive → Custom Properties tab → + New Property.
Step 2: Assign Custom Property Values
After creating a custom property, values must be assigned to each lead.
Via CSV or Google Sheet
Below is an example of a Google Sheet with custom properties such as City and Opening_Line. Leads without a value in the sheet will use the default value set for that property.
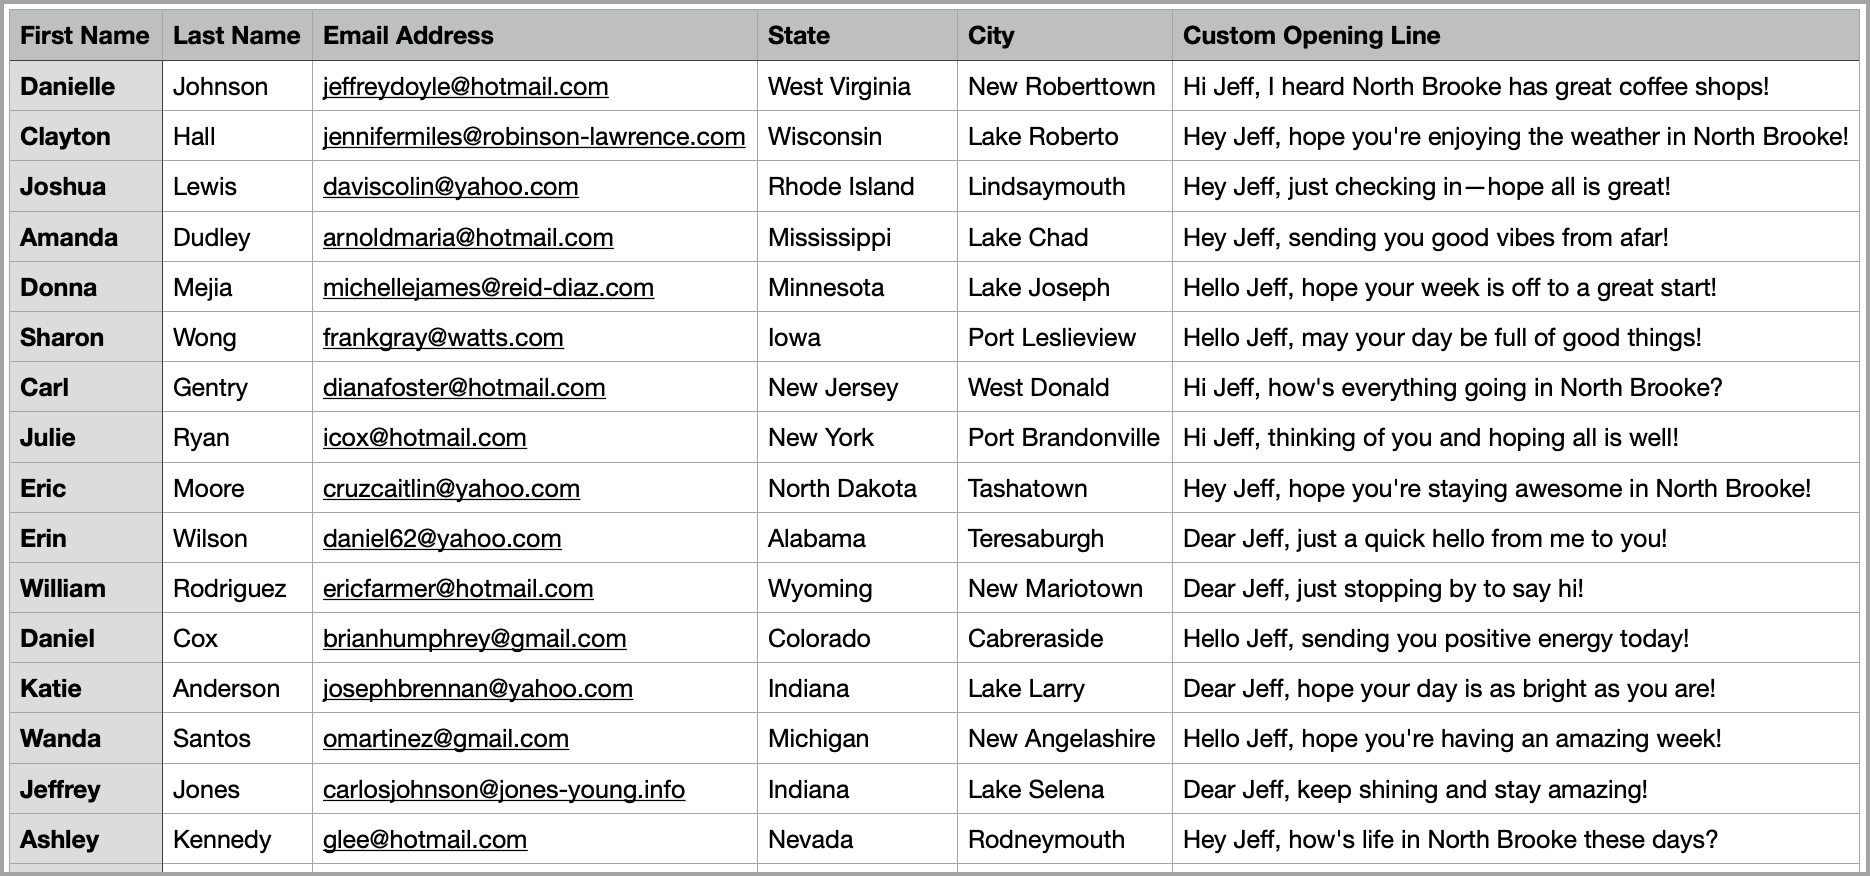
When importing, you can map custom properties under Lead Properties. Here is an example:
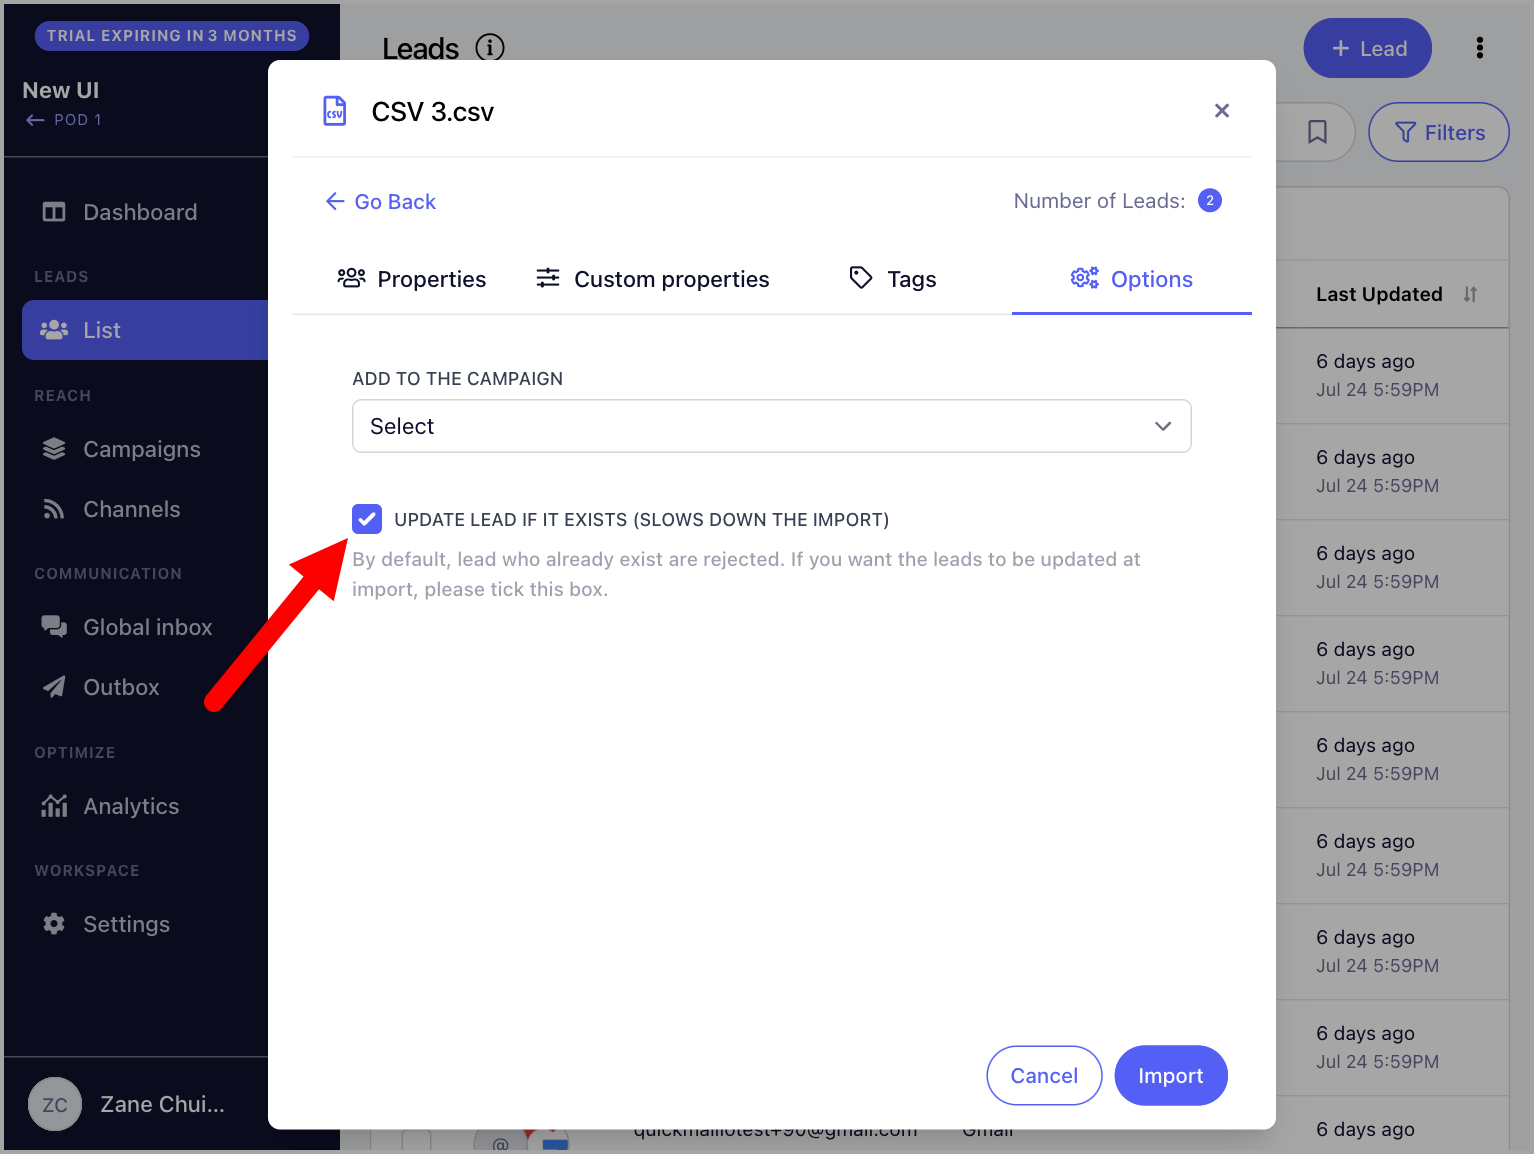
Note: When updating custom properties for leads already in QuickMail, make sure to check Update lead if it exists (slows the import process) when re-importing. Without this, the import will be rejected to prevent duplicates.
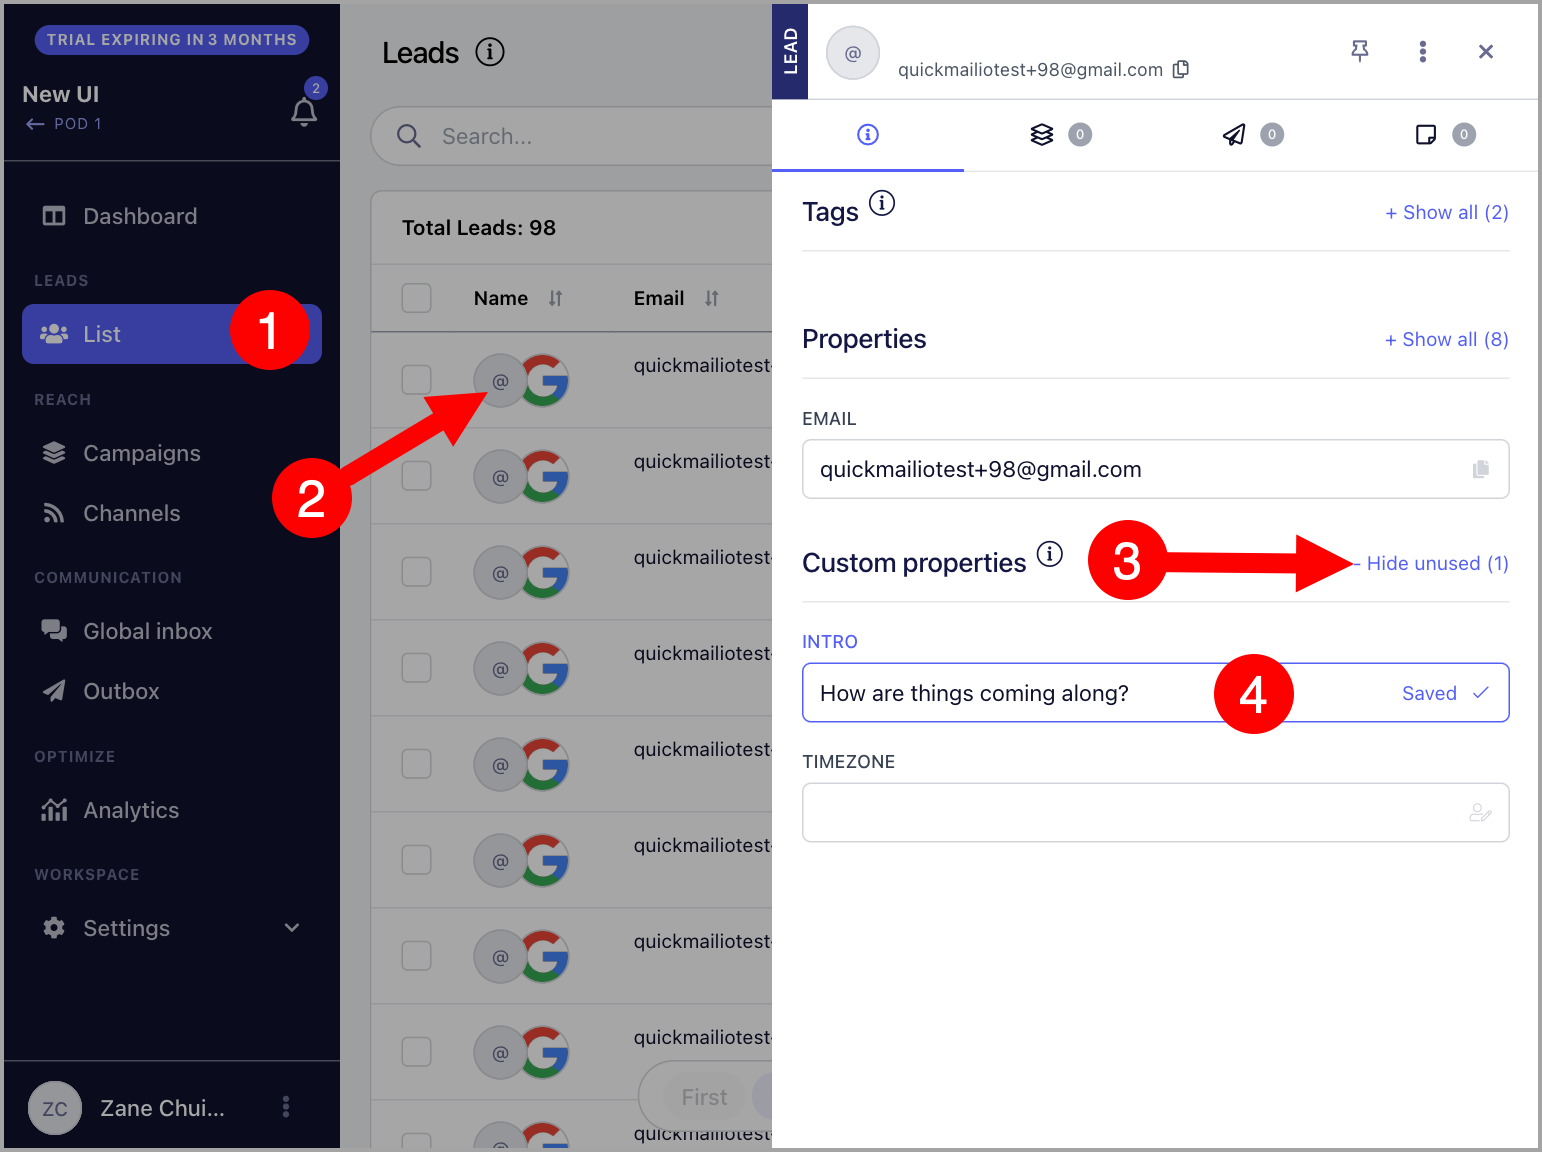
Via the lead's quick view
You can also assign custom property values by opening the lead's quick view.
Step 3: Add Custom Properties to Emails
Once assigned, custom properties will appear under the lead's properties in the email editor.
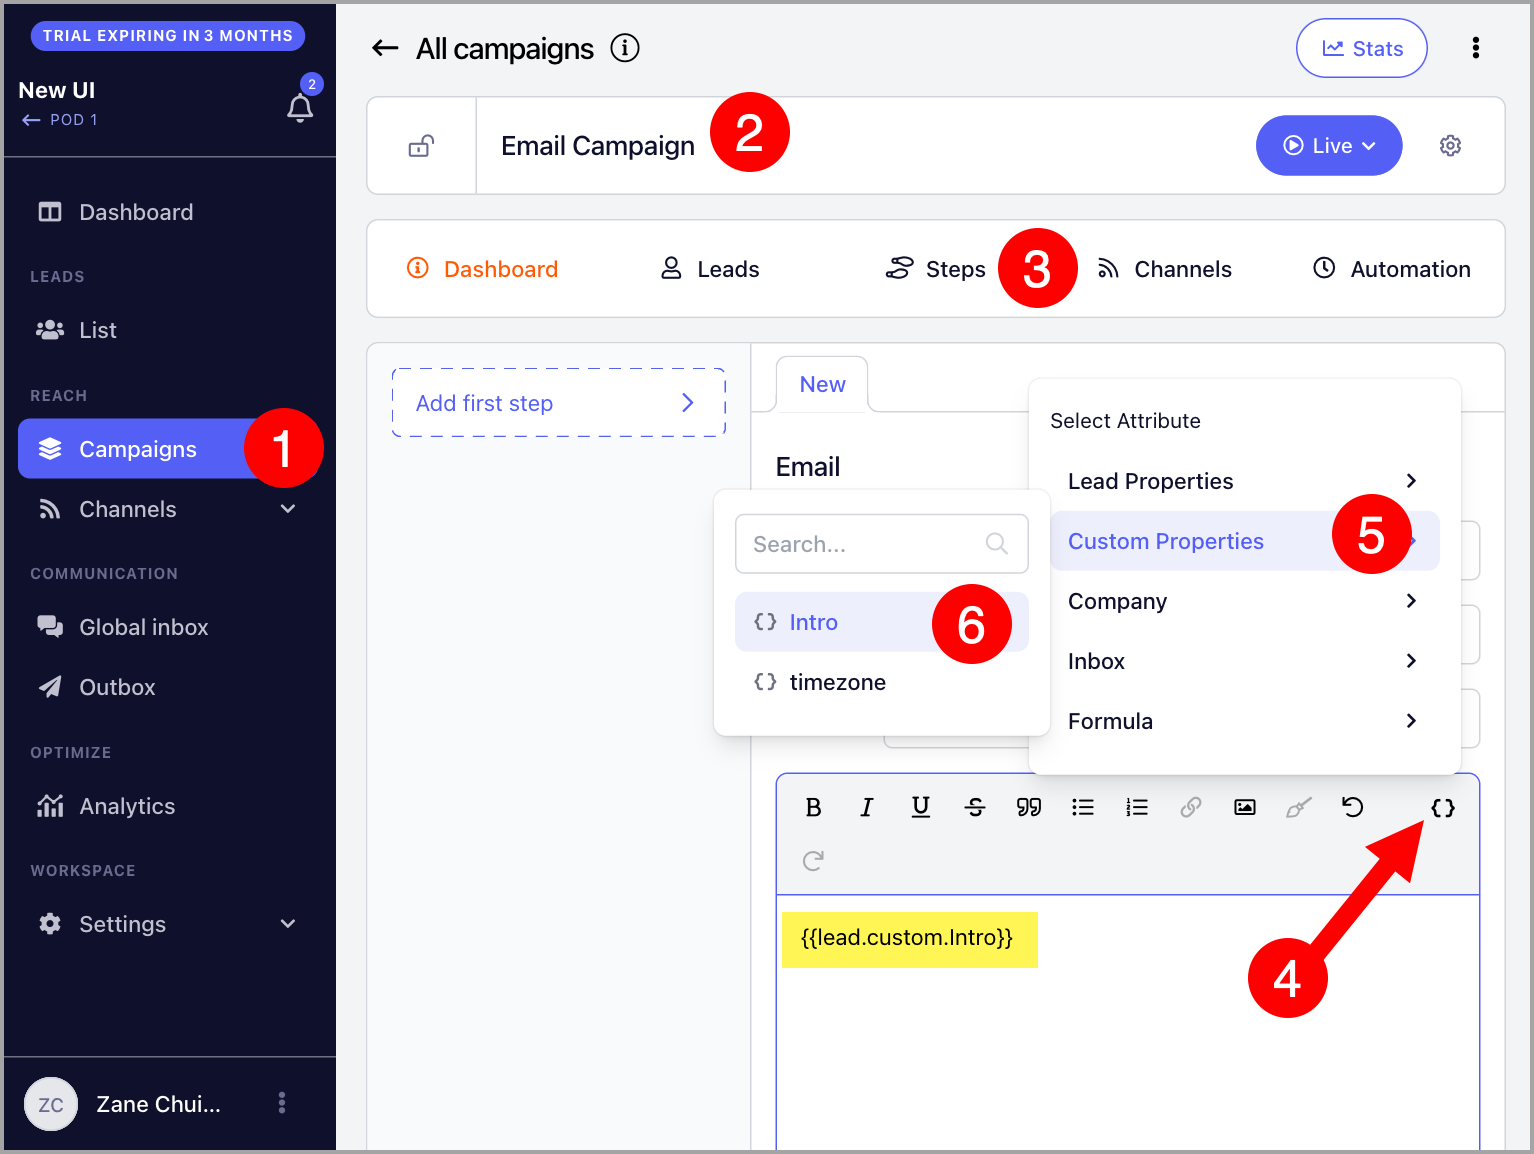
Here is an example of how a custom property can be used in an email:
Hey,
{{lead.custom.Opening_Line}}
This will translate to:
Hey,
Your podcast episode on mobile kitchens helped me pursue my dreams of providing free hot meals to people who need them!
Company Properties
Company properties allow you to include a lead's company information in your emails.
For example:
Is {{company.name}} still hiring? Saw the job posting at {{company.domain}}!
This will translate to:
Is Pied Piper still hiring? Saw the job posting at www.piedpiper.com!
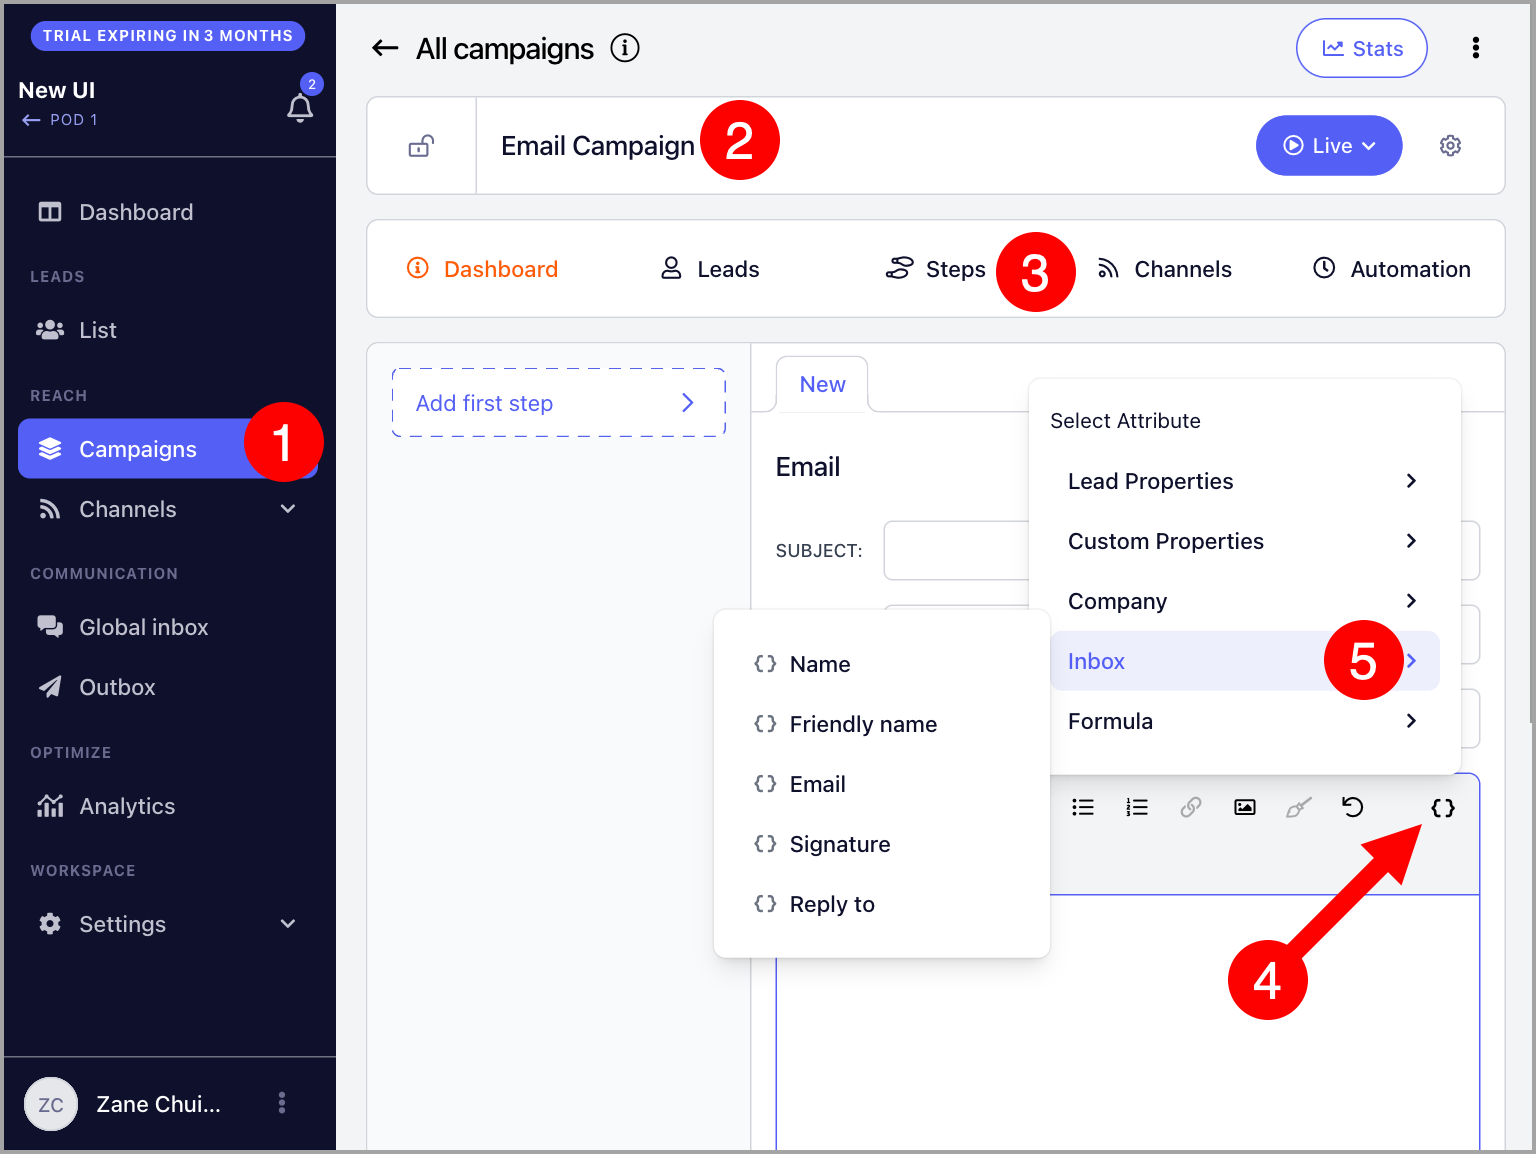
Inbox Properties
Inbox properties are unique to the email address used to send an email in a campaign. They allow you to include sender-specific information, such as a signature, in your emails.
For example, if you are rotating two email addresses for a campaign, each email can include the correct inbox signature using the Signature property.
More about inbox signatures here: Email Signatures in QuickMail
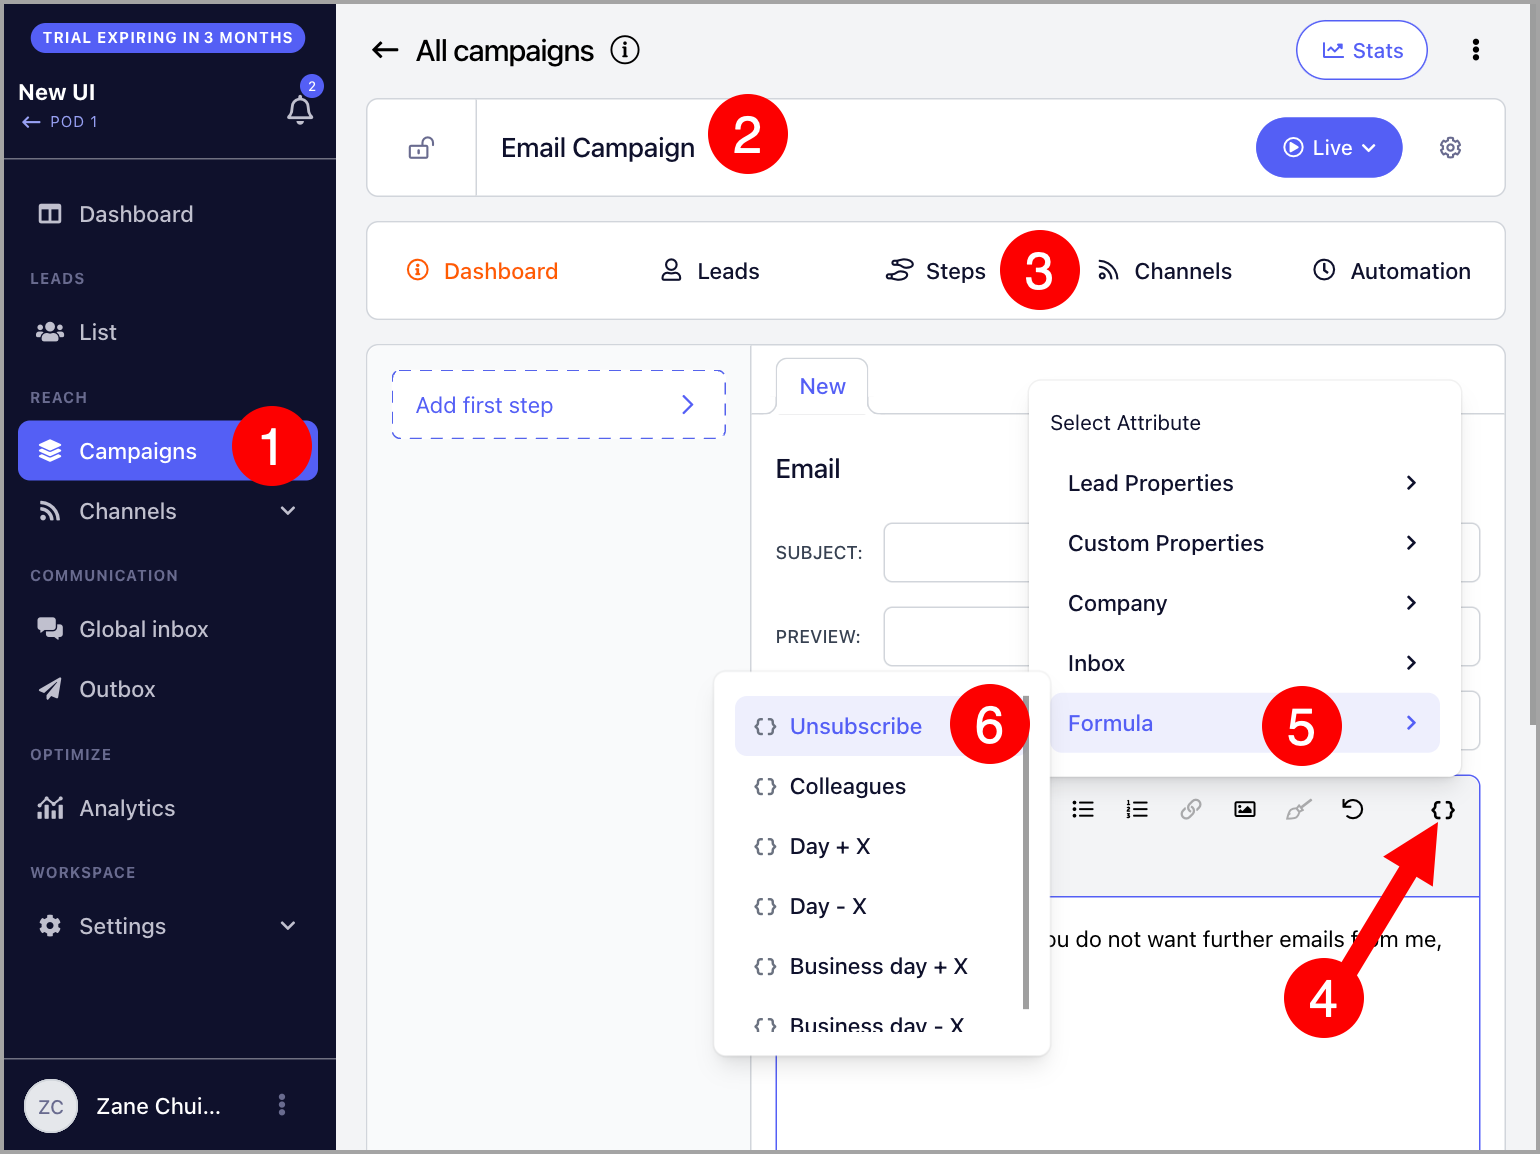
Precomputed Properties
Unsubscribe property
Allows you to include an unsubscribe link in your emails.
Colleagues property
Allows you to mention a lead's colleagues in emails. More details here: Colleagues Property.
Day and Business Day property
The Day property inserts the current day of the week. The Business Day property works the same way but only applies to weekdays. More details here: Day and Business Day Properties.
You can also type properties manually as long as they follow the same format used when inserting them via the properties button.
How to Delete Custom Properties?
Go to List → click the three vertical dots → Properties.
Select the custom property you would like to delete → click the three vertical dots → Delete.

Confirm the deletion.

How to Edit Custom Properties?
Go to List → click the three vertical dots → Properties.
Click the property → edit the default value.
Note: It is not currently possible to change the name of a custom property, but the default value can be edited.
Why Am I Getting an Error?
Some properties will prevent an email from sending if the property cannot resolve to a value.
For example, if a lead has no company value but is in a campaign with an email step that uses {{company.name}}, the property will have nothing to fill in and the email will not be sent, resulting in an error.
