Sub-Campaigns for All Replies
Sub-Campaigns for All Replies
In this article:
Why use sub-campaigns?
How do sub-campaigns for all reply types work?
How to use sub-campaigns?
How to manually trigger a sub-campaign for an opportunity?
How to automatically handle out-of-office replies with sub-campaigns?
How to automatically handle unsubscribe requests with sub-campaigns?
Why Use Sub-Campaigns?
Sub-campaigns allow you to automatically send follow-up emails based on how a lead replied. This saves time by reducing the need to manually respond to commonly received reply types.
How Do Sub-Campaigns for All Reply Types Work?
When leads respond, their replies appear in the Opportunities section, where they can be categorized manually or via AI. Once categorized, leads are automatically moved to the corresponding sub-campaign and their status in the parent campaign is updated to "Replied."
Different sub-campaigns can be triggered based on the reply category. Here are the available reply categories:
Note: Reply categories cannot be personalized or modified.
How to Use Sub-Campaigns?
First, create both the parent campaign and the sub-campaign, and make sure both are set to live.
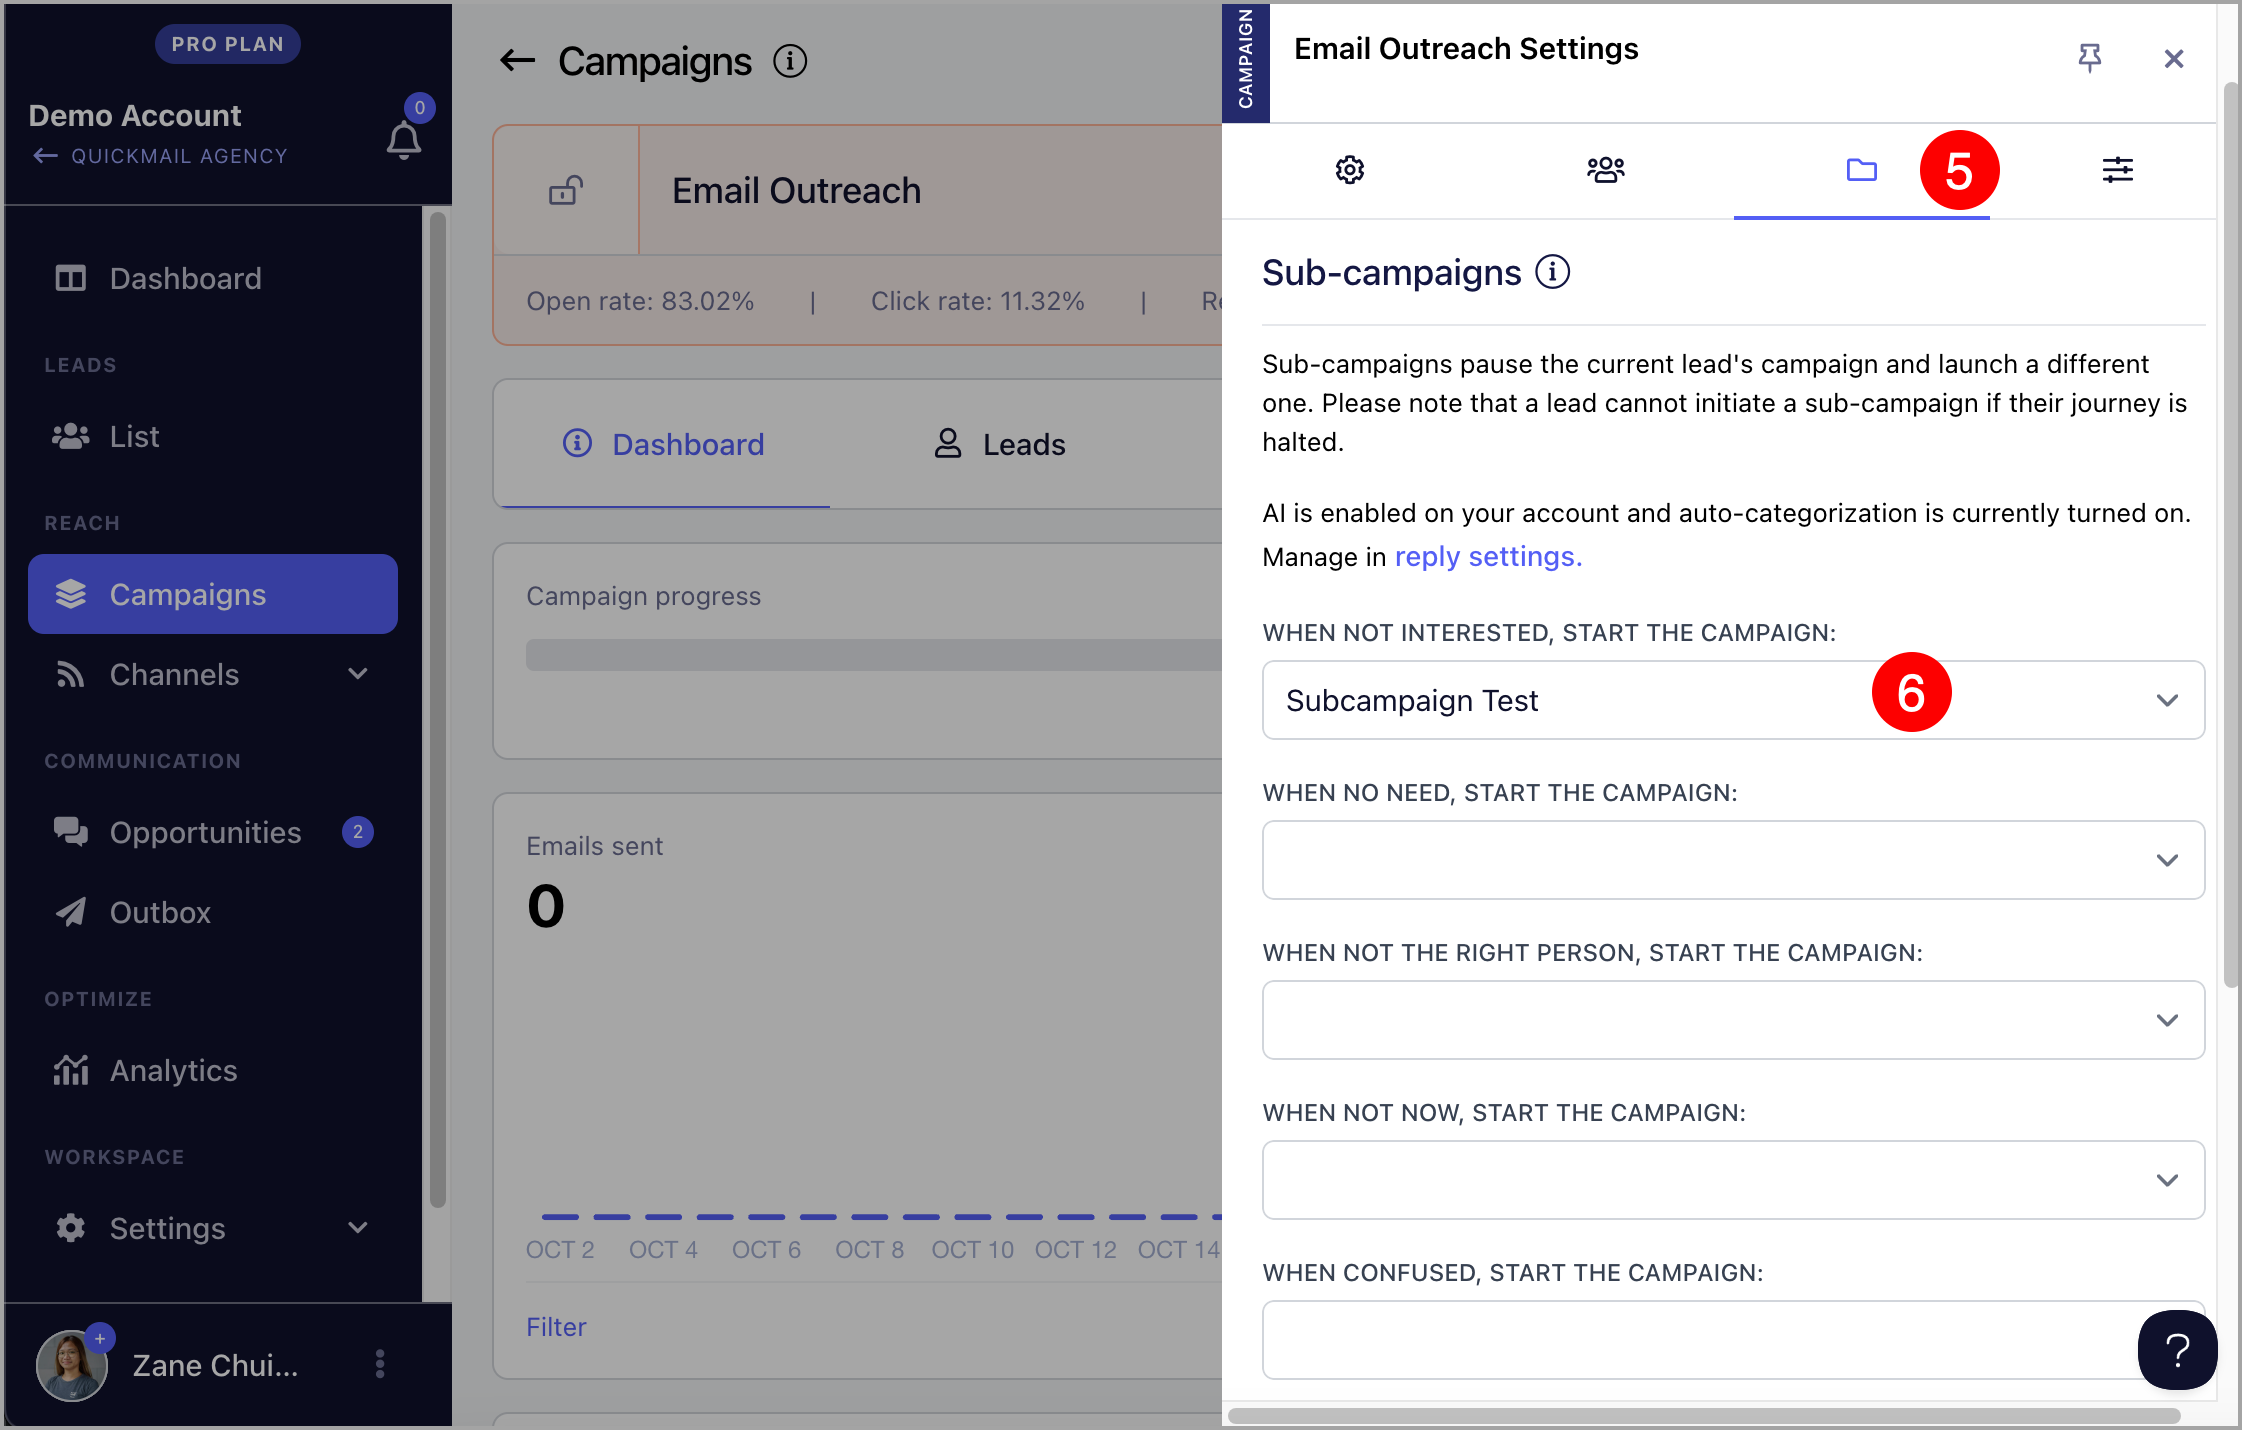
Then, assign the sub-campaign to the parent campaign by going to Campaigns → open the parent campaign → click the menu icon (three vertical dots) → Settings.

Go to the Sub-campaigns tab and select the sub-campaign you'd like to assign for each reply category.
Note: Leads added to a sub-campaign will have a "Not Started" status by default, so automation must be set up to start them.
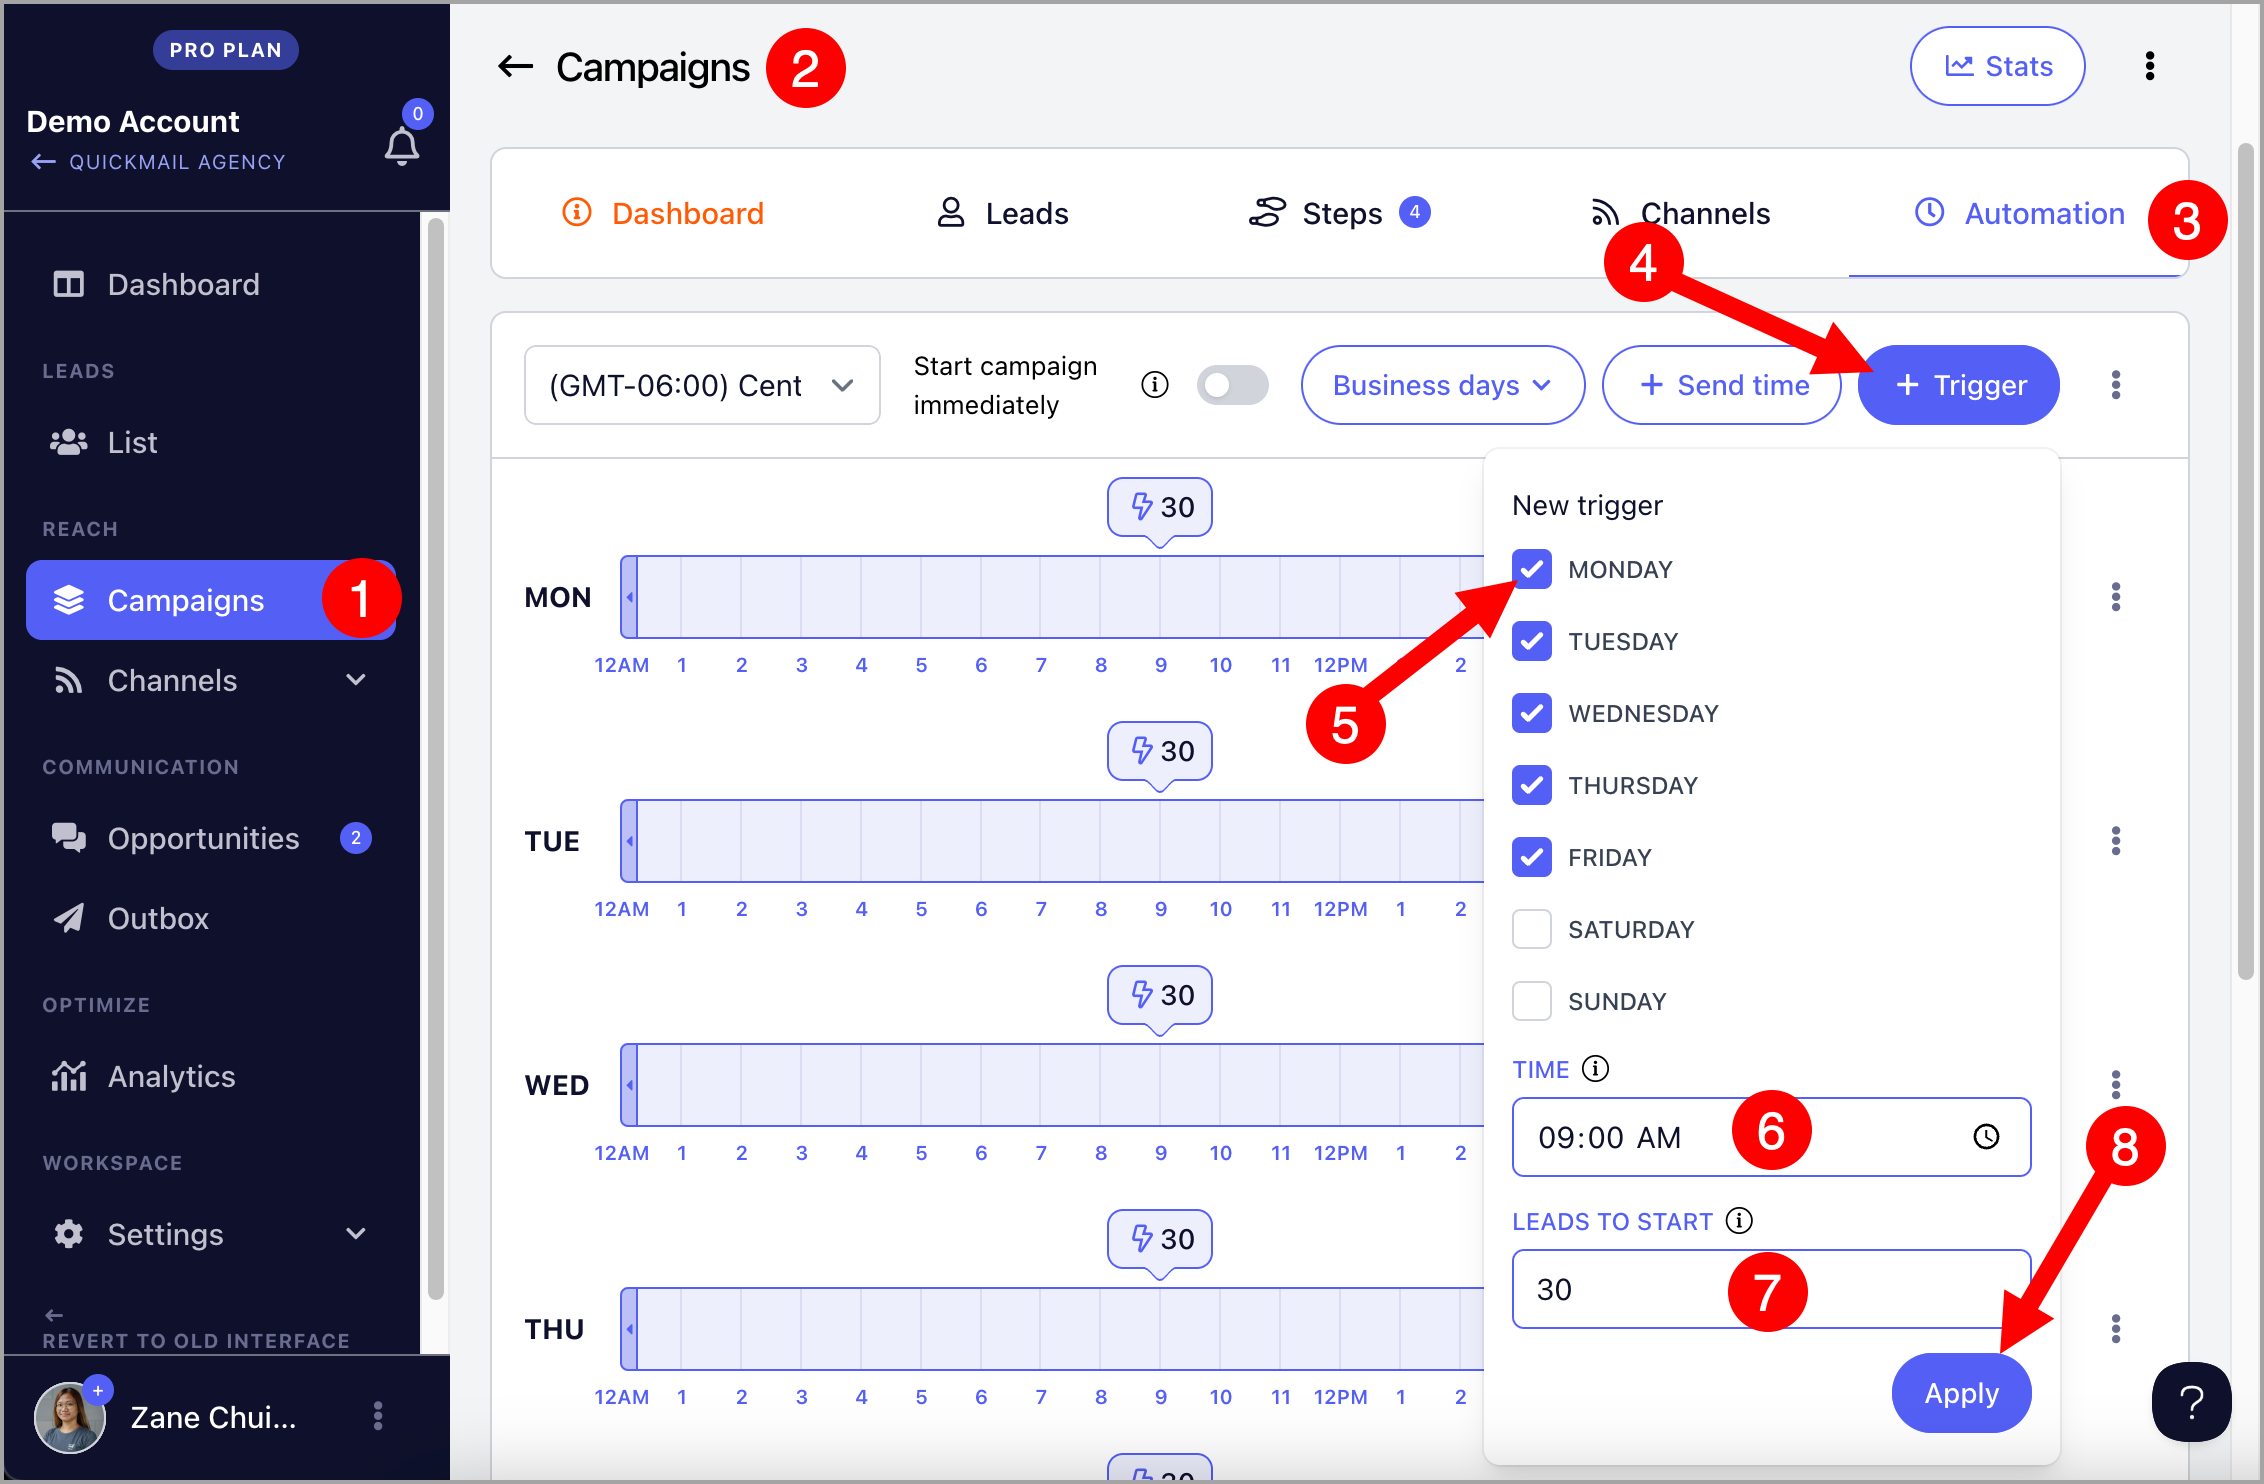
To start leads automatically as soon as a reply is detected, enable Instant Start on the sub-campaign's Automation page.
You can also add a wait step as the first step in the sub-campaign if you want to delay the first email.
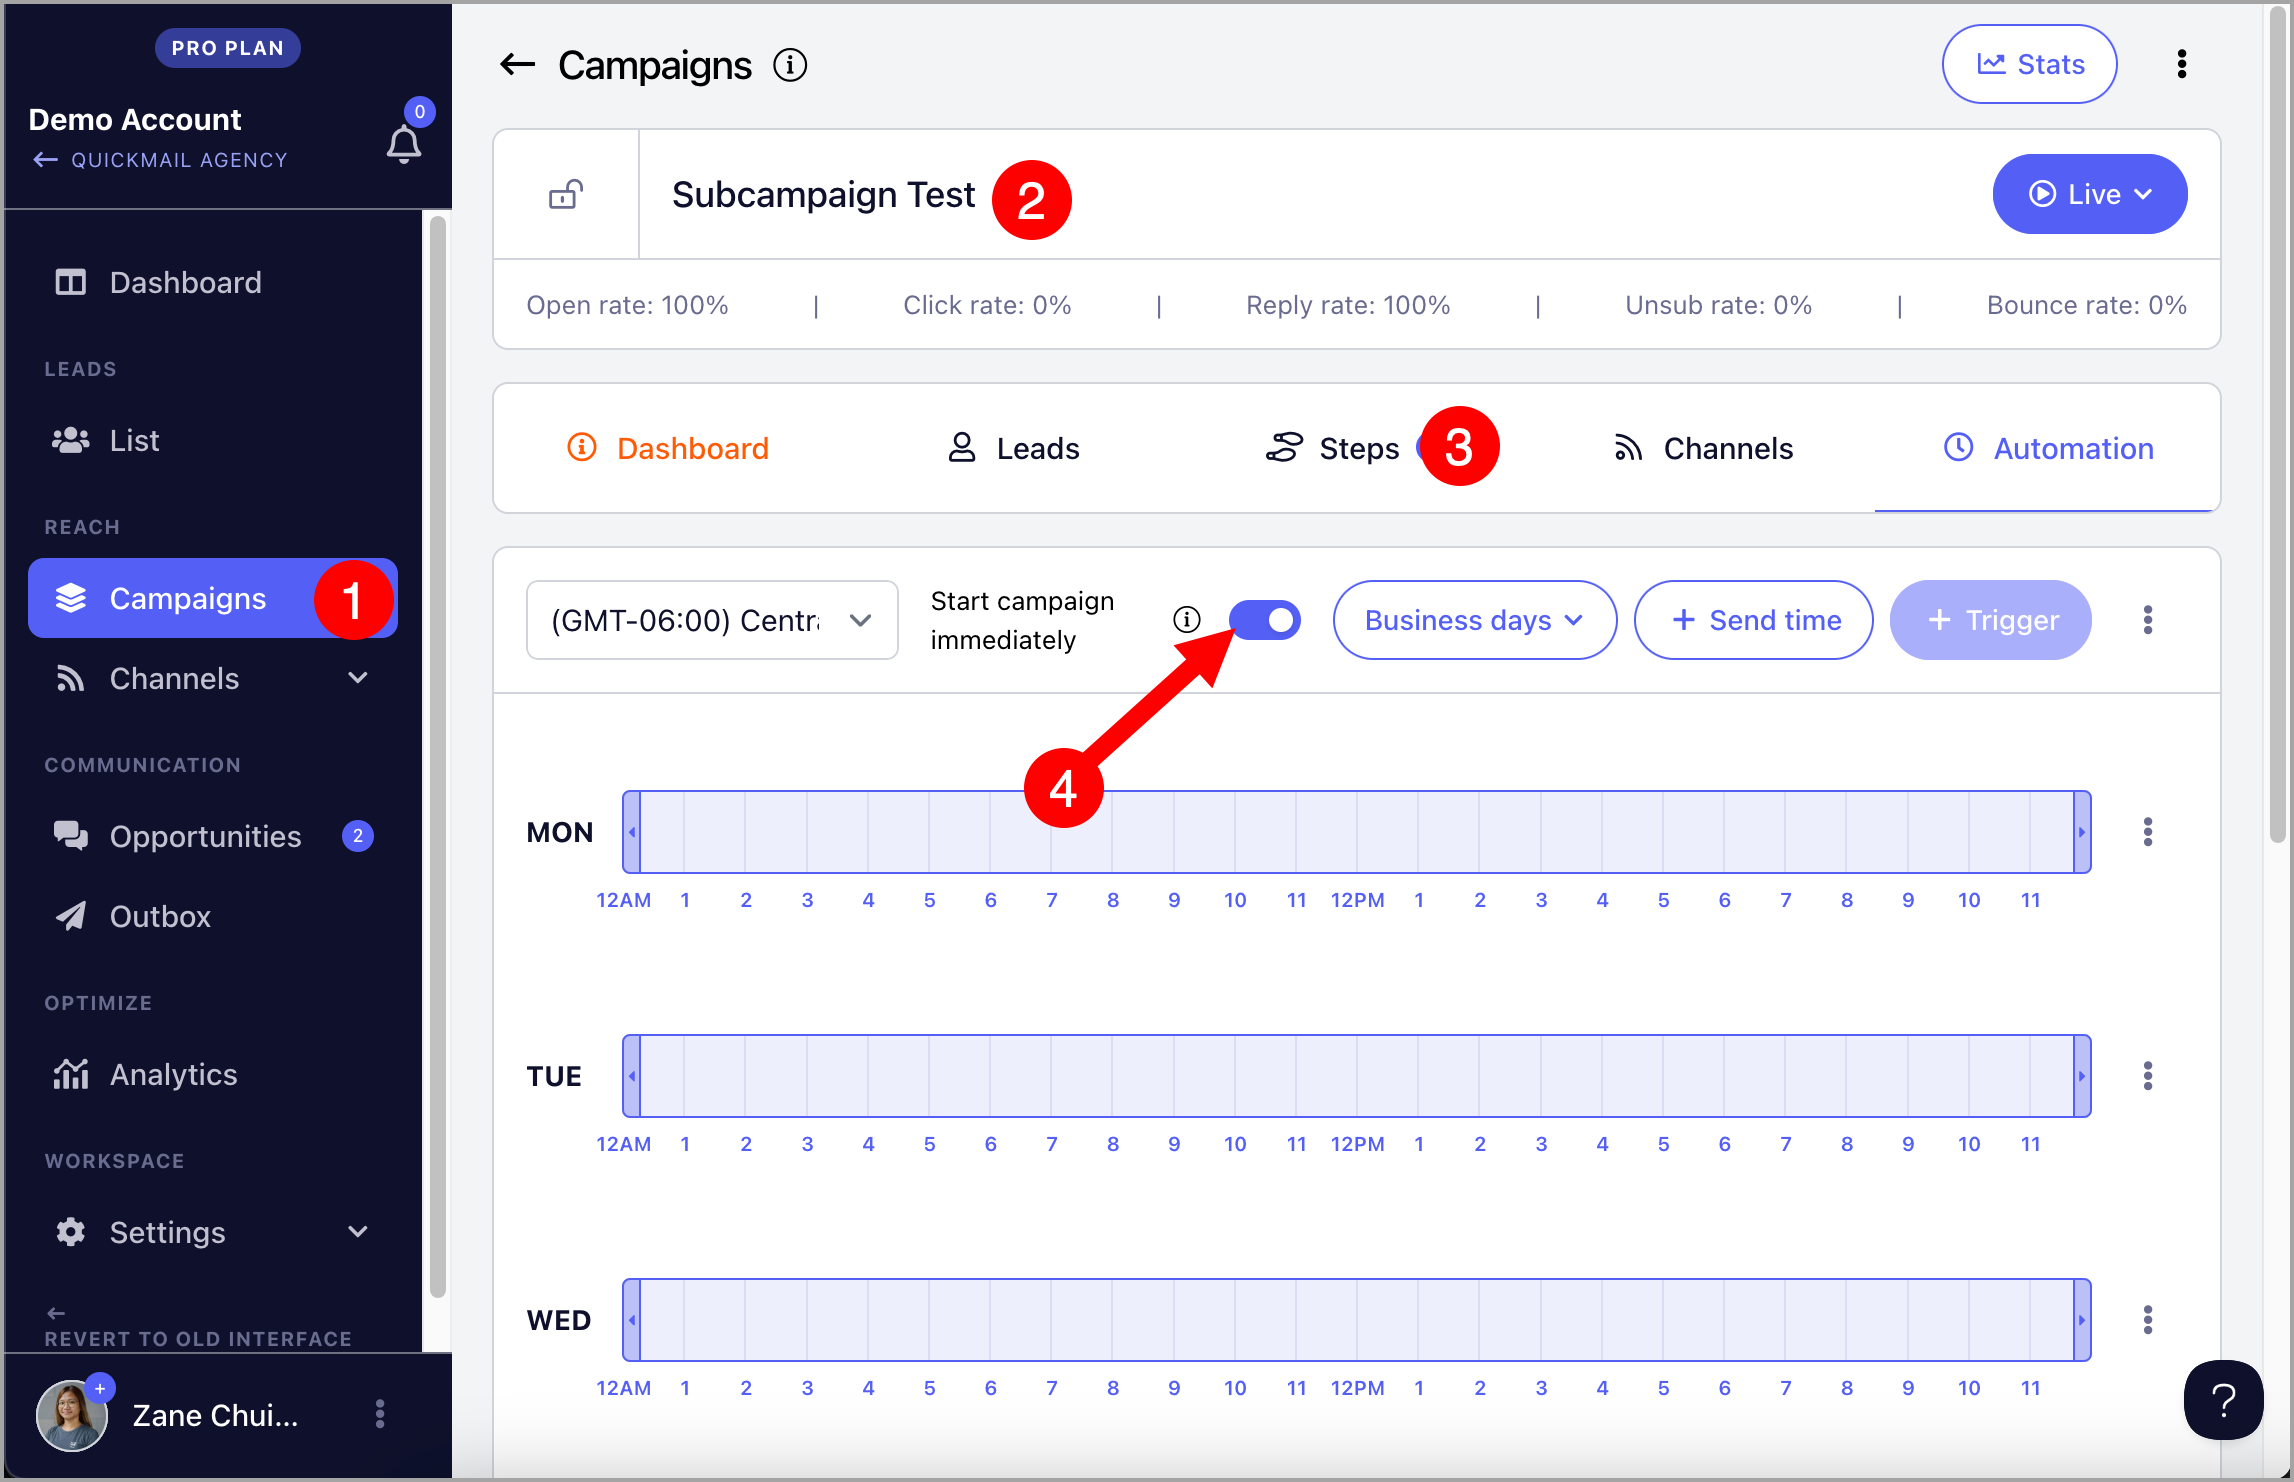
Alternatively, set up triggers to start leads at specific times and days.
How to Manually Trigger a Sub-Campaign for an Opportunity?
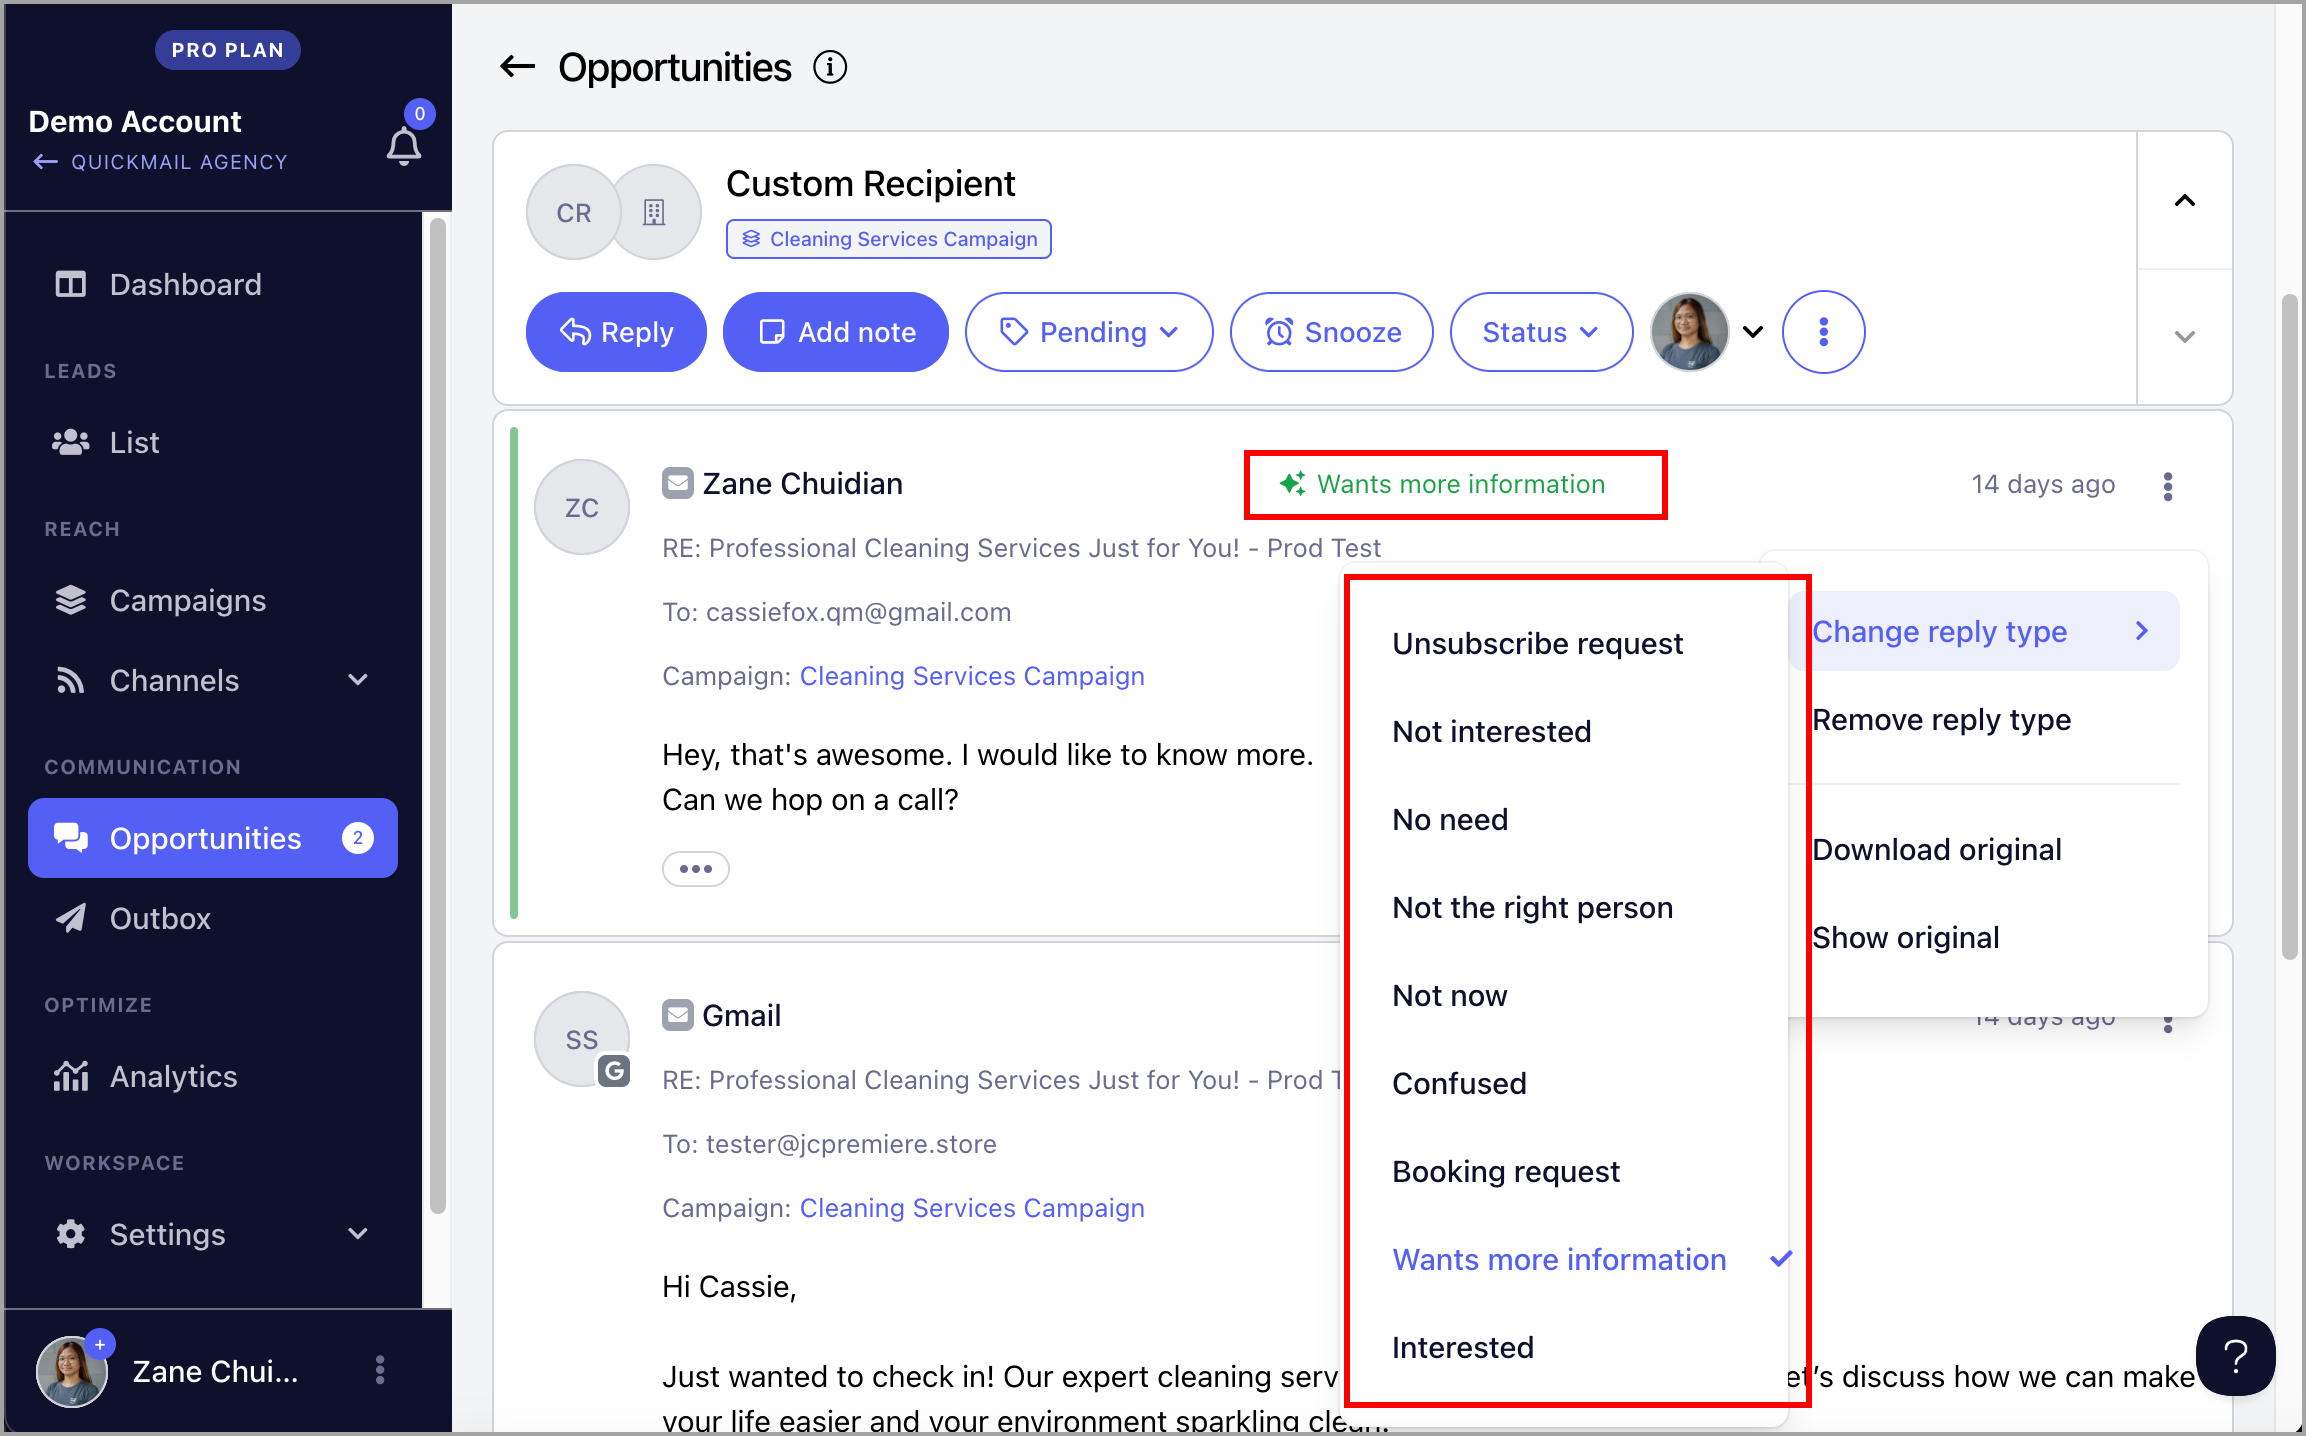
If you need to manually trigger a sub-campaign for a specific opportunity, you can do so by updating the reply type directly.
Go to the Opportunities section → find the opportunity you'd like to update → click on it to open the details → use the Change Reply Type option and select the appropriate reply type from the list.
When the reply type is updated, the sub-campaign associated with that reply type will be triggered.

Note: For this to work, the parent campaign must be configured with sub-campaigns for the relevant reply types. Sub-campaigns will only trigger if there is a predefined association between the reply type and a sub-campaign.
How to Automatically Handle Out-of-Office Replies with Sub-Campaigns?
By default, when a lead is marked as out-of-office, QuickMail adds 14 days on top of the existing wait step before sending the next email. For example, if the next wait step is 3 days, QuickMail will wait 17 days before sending.
With sub-campaigns, you can personalize the first email they receive when they return. For example:
"Hope you had a great holiday! Once you're caught back up, let's try to connect..."
When an out-of-office reply is detected, the sub-campaign feature cancels the parent campaign journey for that lead and moves them to the sub-campaign automatically.
Note: Leads start the sub-campaign immediately when an out-of-office reply is detected. Make sure to add a wait step at the start of the sub-campaign to avoid sending follow-ups while the lead is still away.
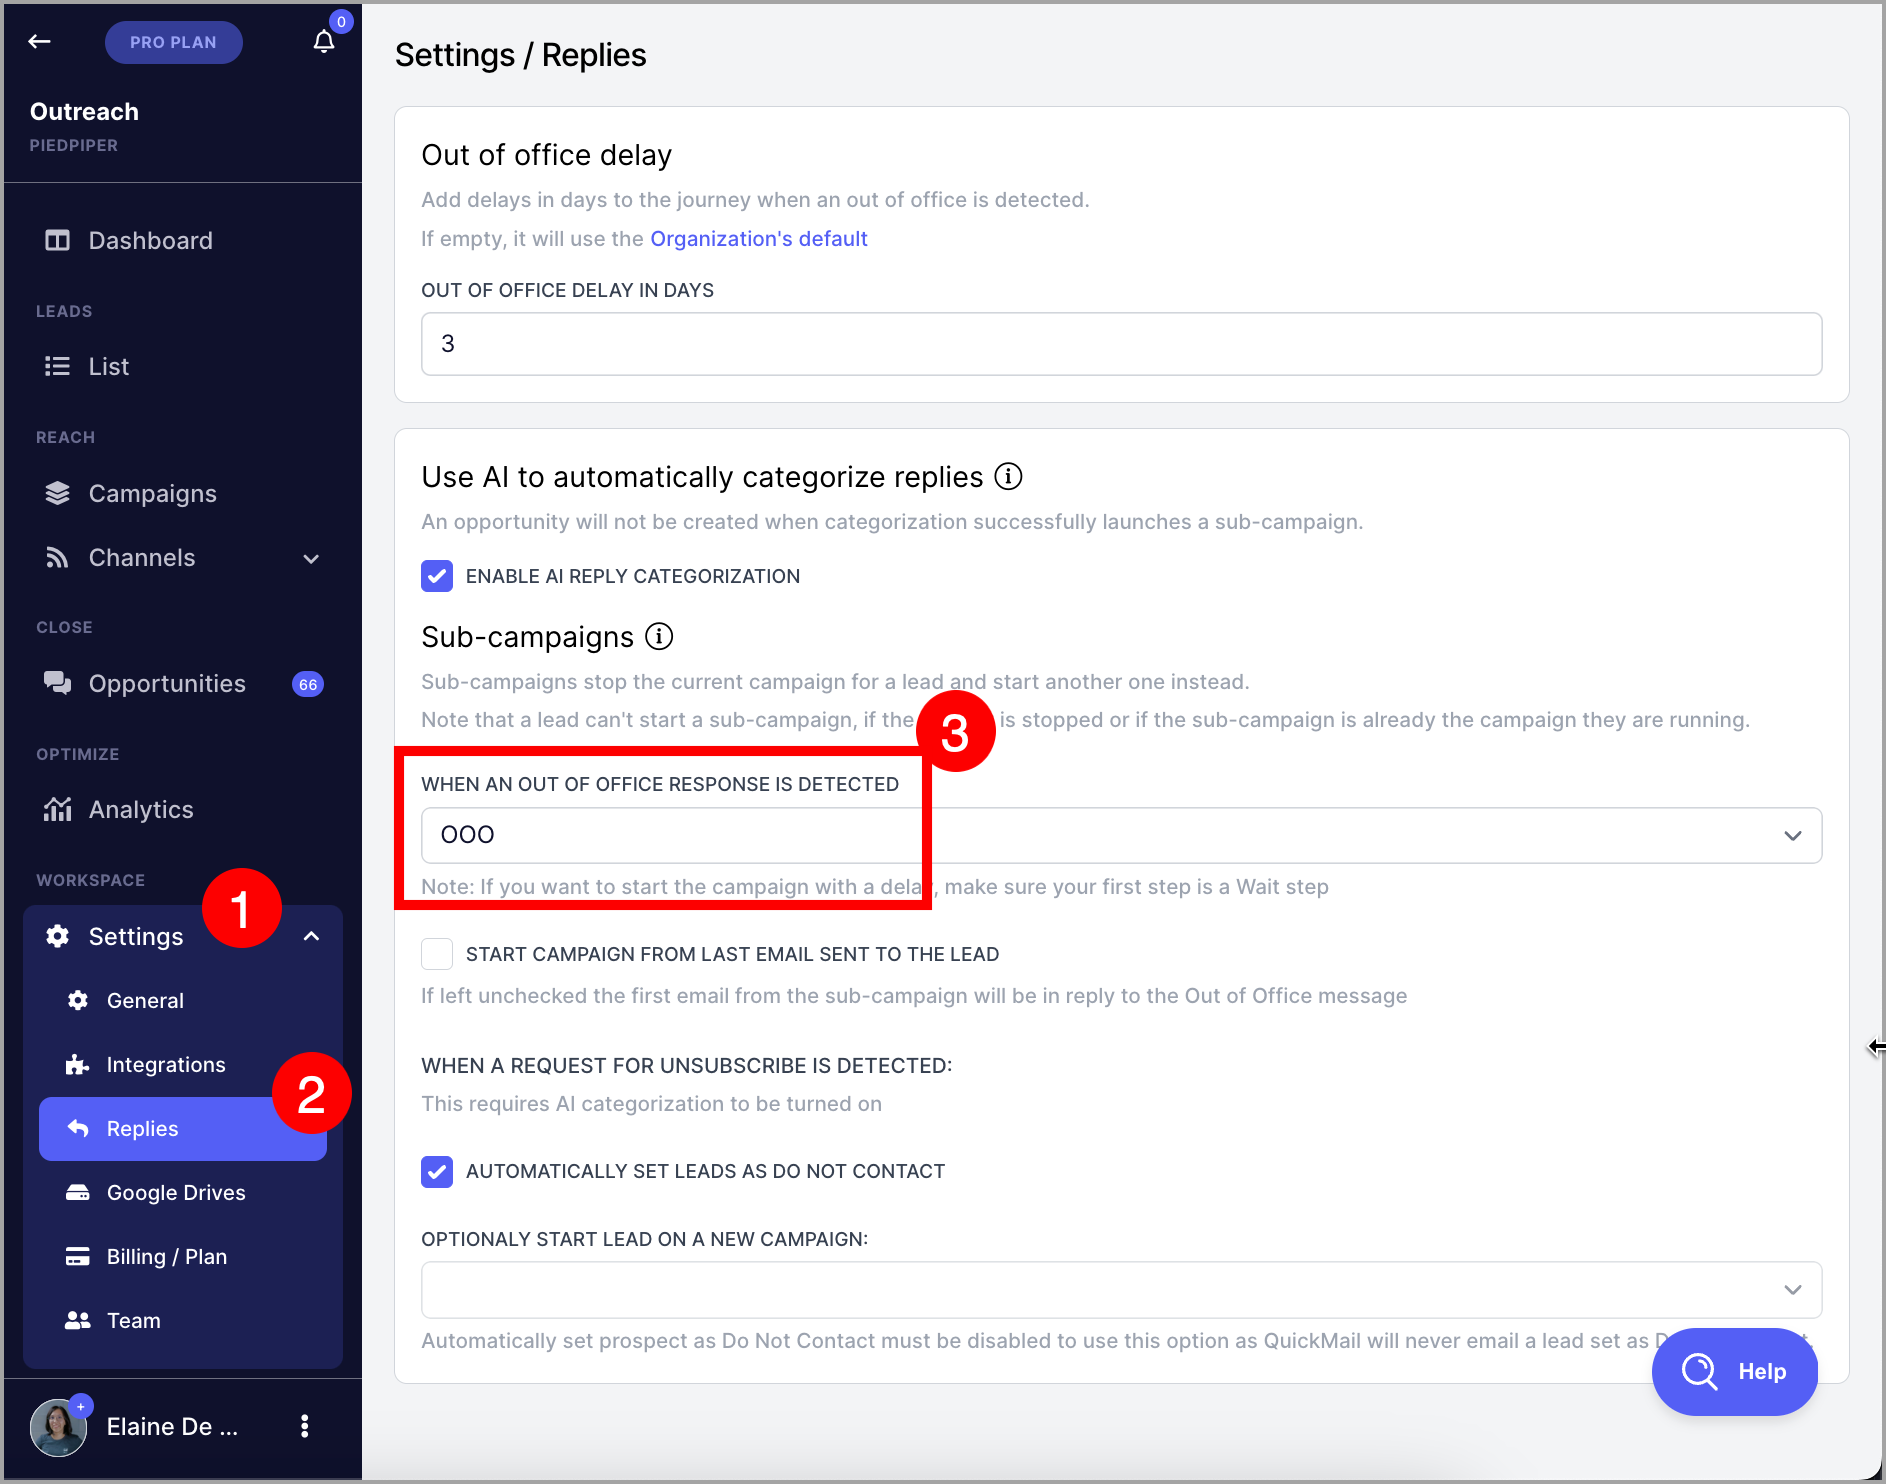
To assign a sub-campaign for out-of-office replies, go to workspace Settings → Replies → under the Sub-campaigns section, select a campaign under When OOO response is detected.
By default, the first message sent from the sub-campaign will be a reply to the out-of-office message the lead sent. To change this, check Start campaign from the last email sent to the lead.
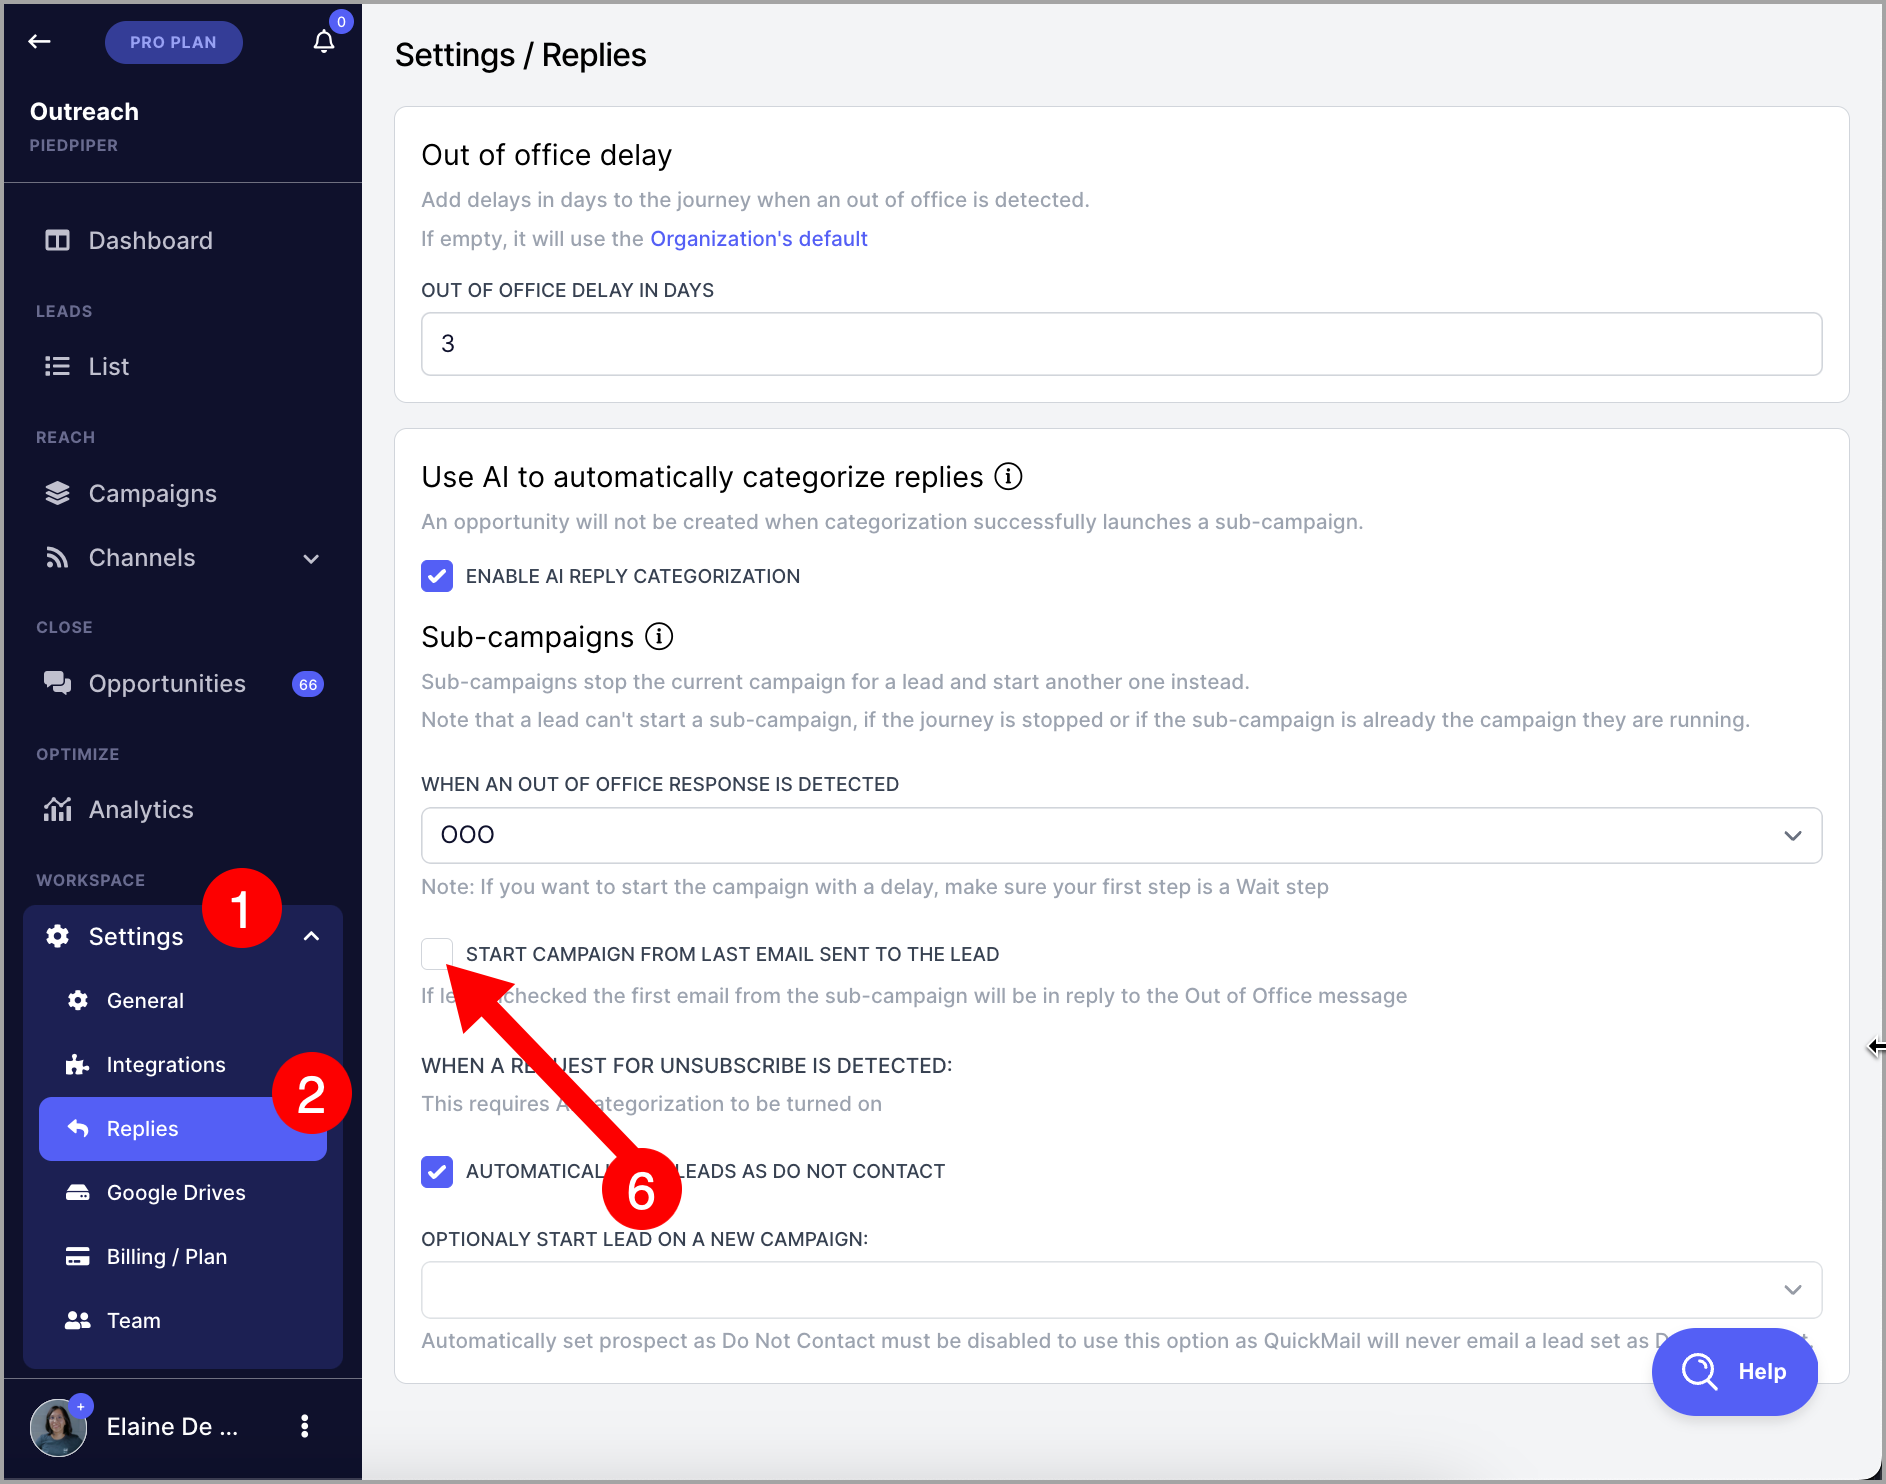
With this option enabled, the first email from the sub-campaign will be threaded as a reply to the last email sent in the parent campaign.
Note: Out-of-office replies do not appear in the Opportunities section. They can only be found directly in the email account's inbox.
How to Automatically Handle Unsubscribe Requests with Sub-Campaigns?
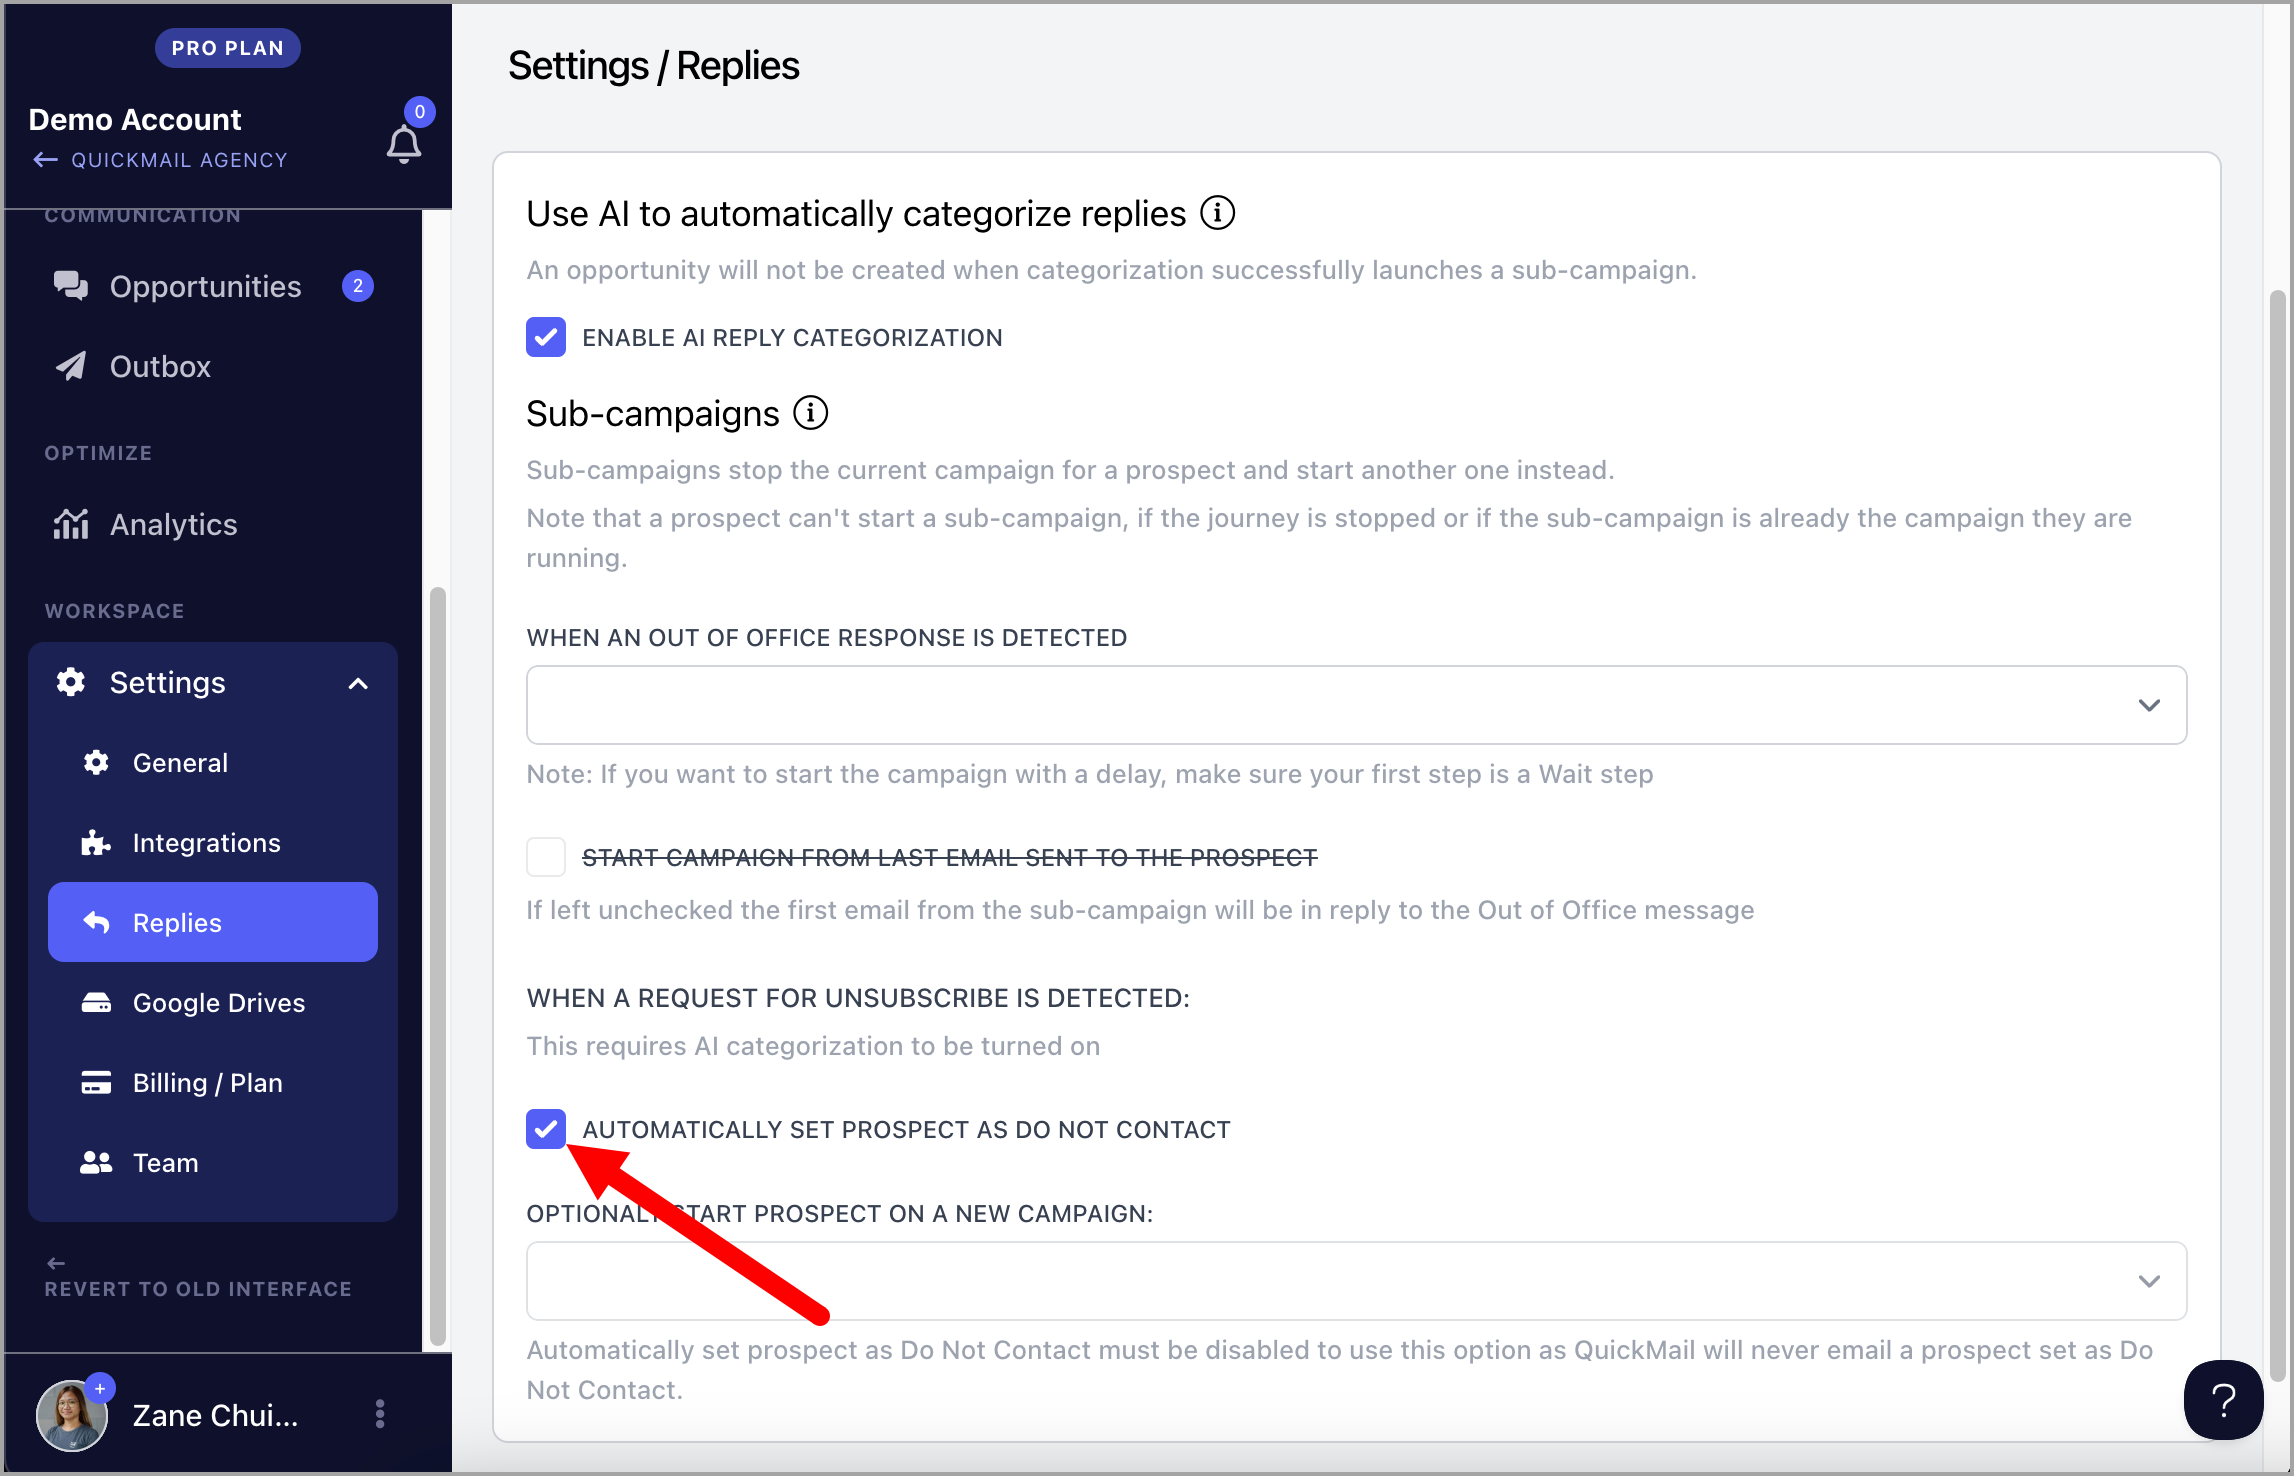
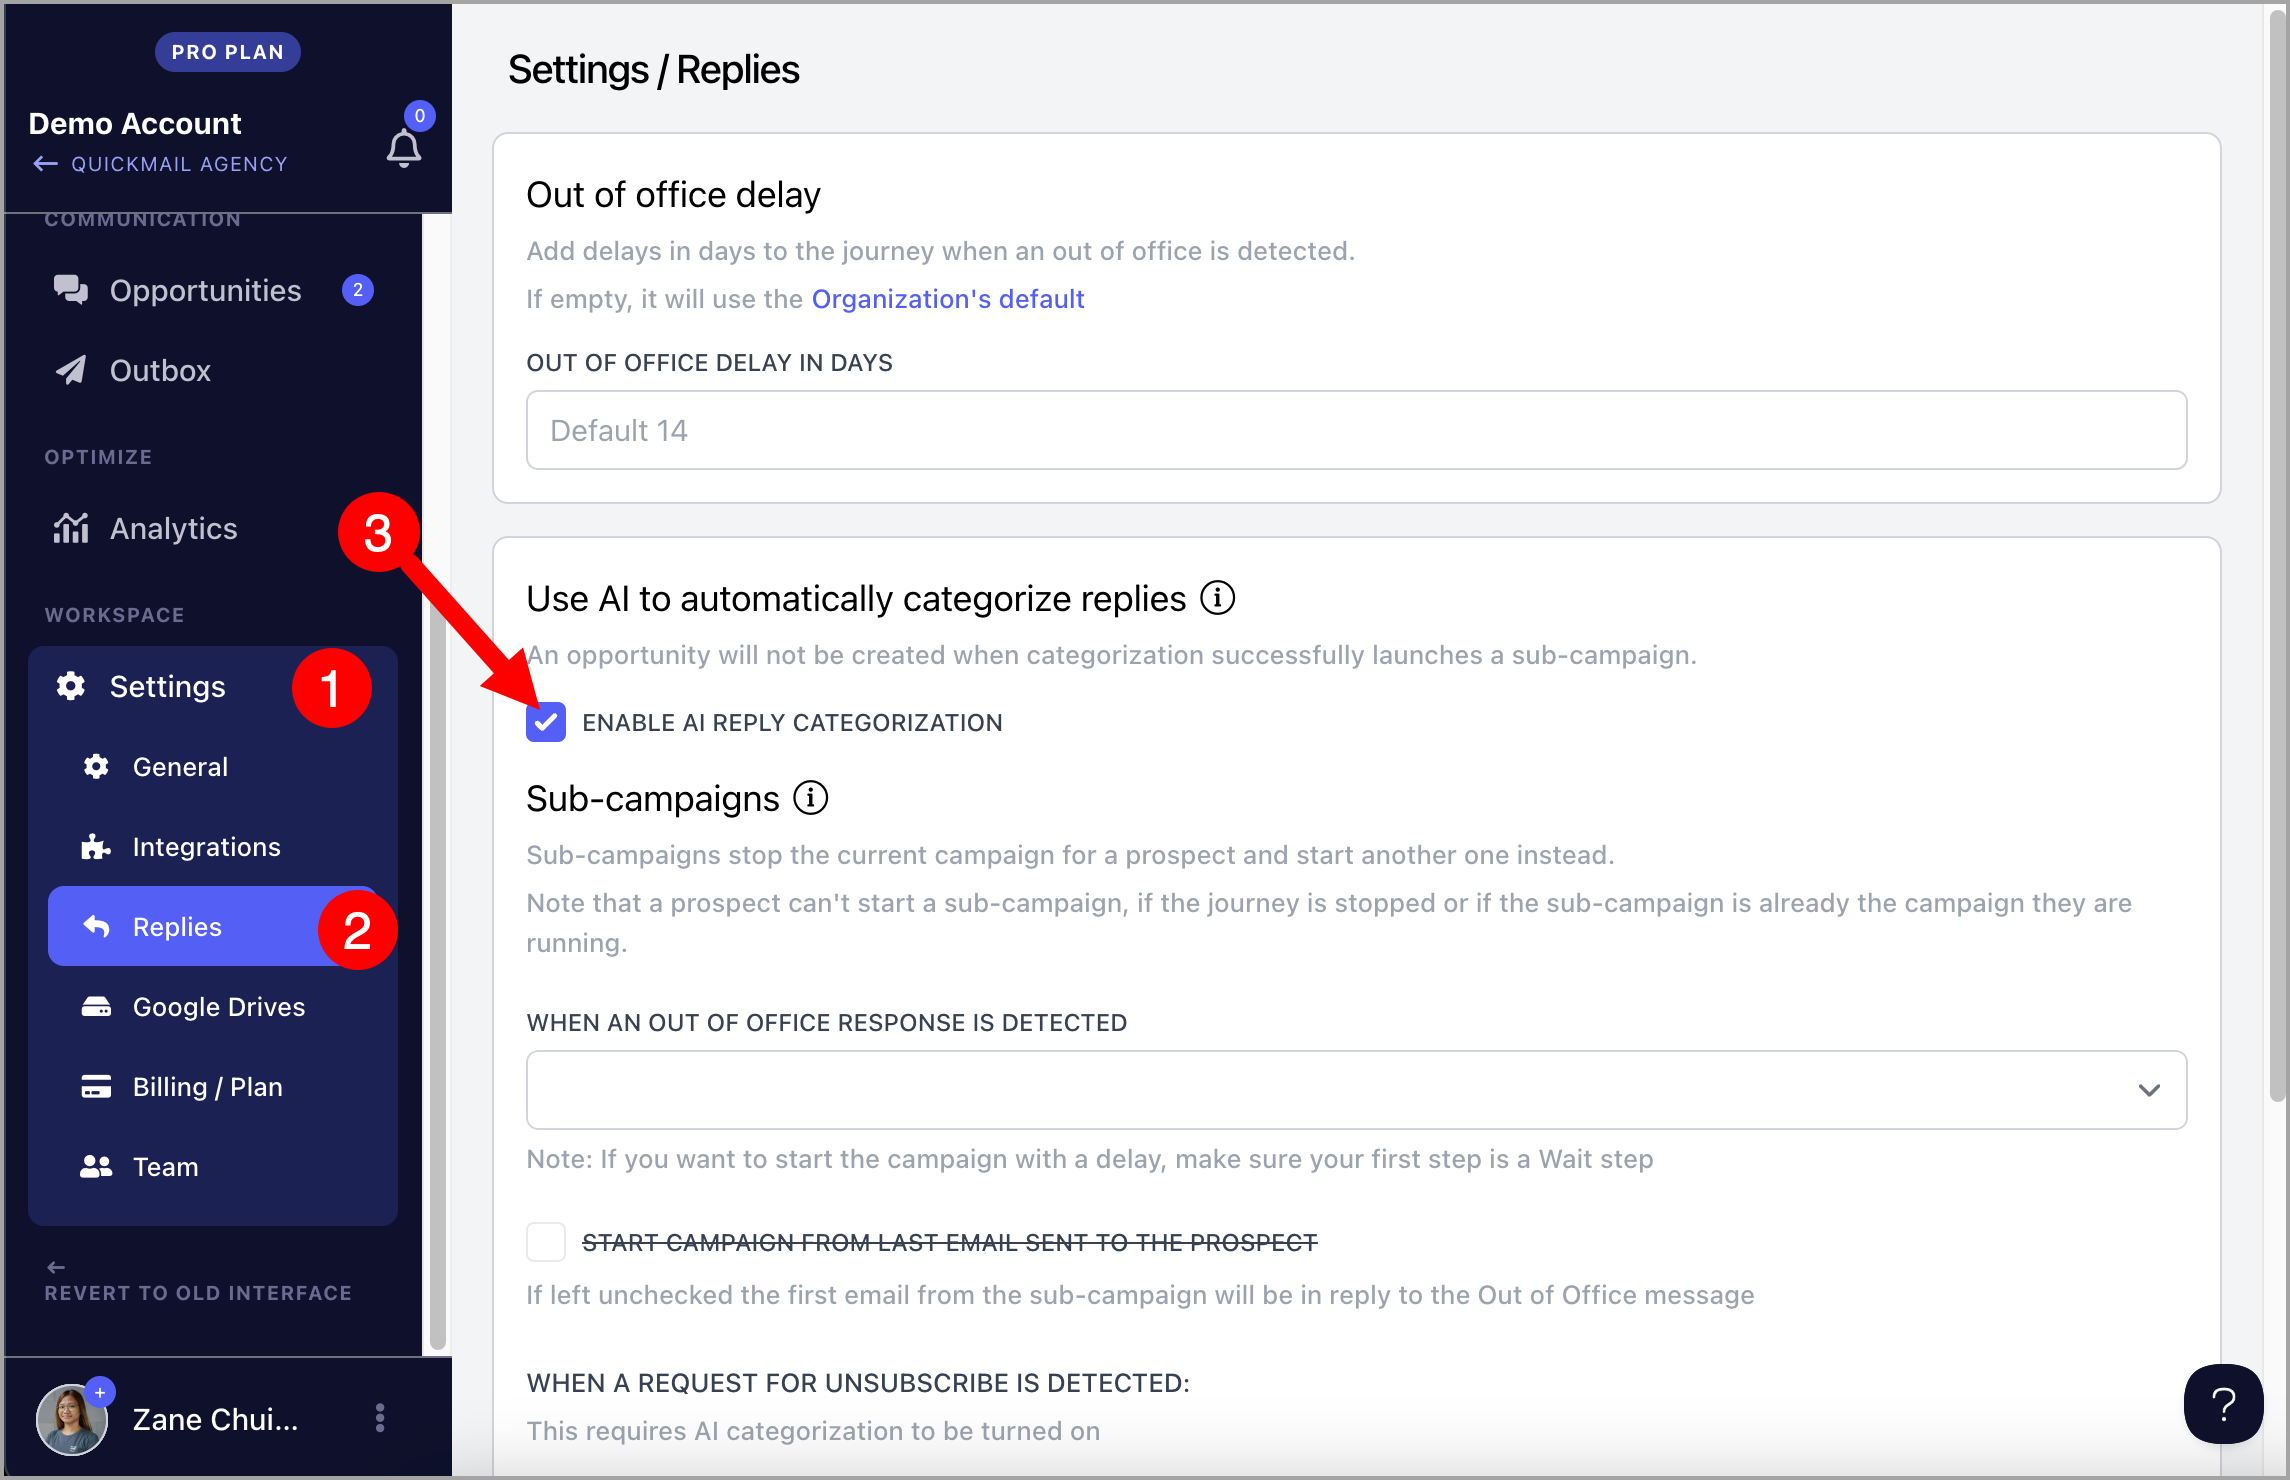
QuickMail's AI can analyze reply sentiment to automatically detect unsubscribe requests. To enable this, go to workspace Settings → Replies → enable AI Reply Categorization.
Note: If the option to enable AI reply categorization is not available, AI is not included in your current plan. AI reply categorization is only available on the Expert plan.
Option 1: To send additional emails via a sub-campaign to leads who asked to unsubscribe, select a campaign under Optionally Start Lead on New Campaign.
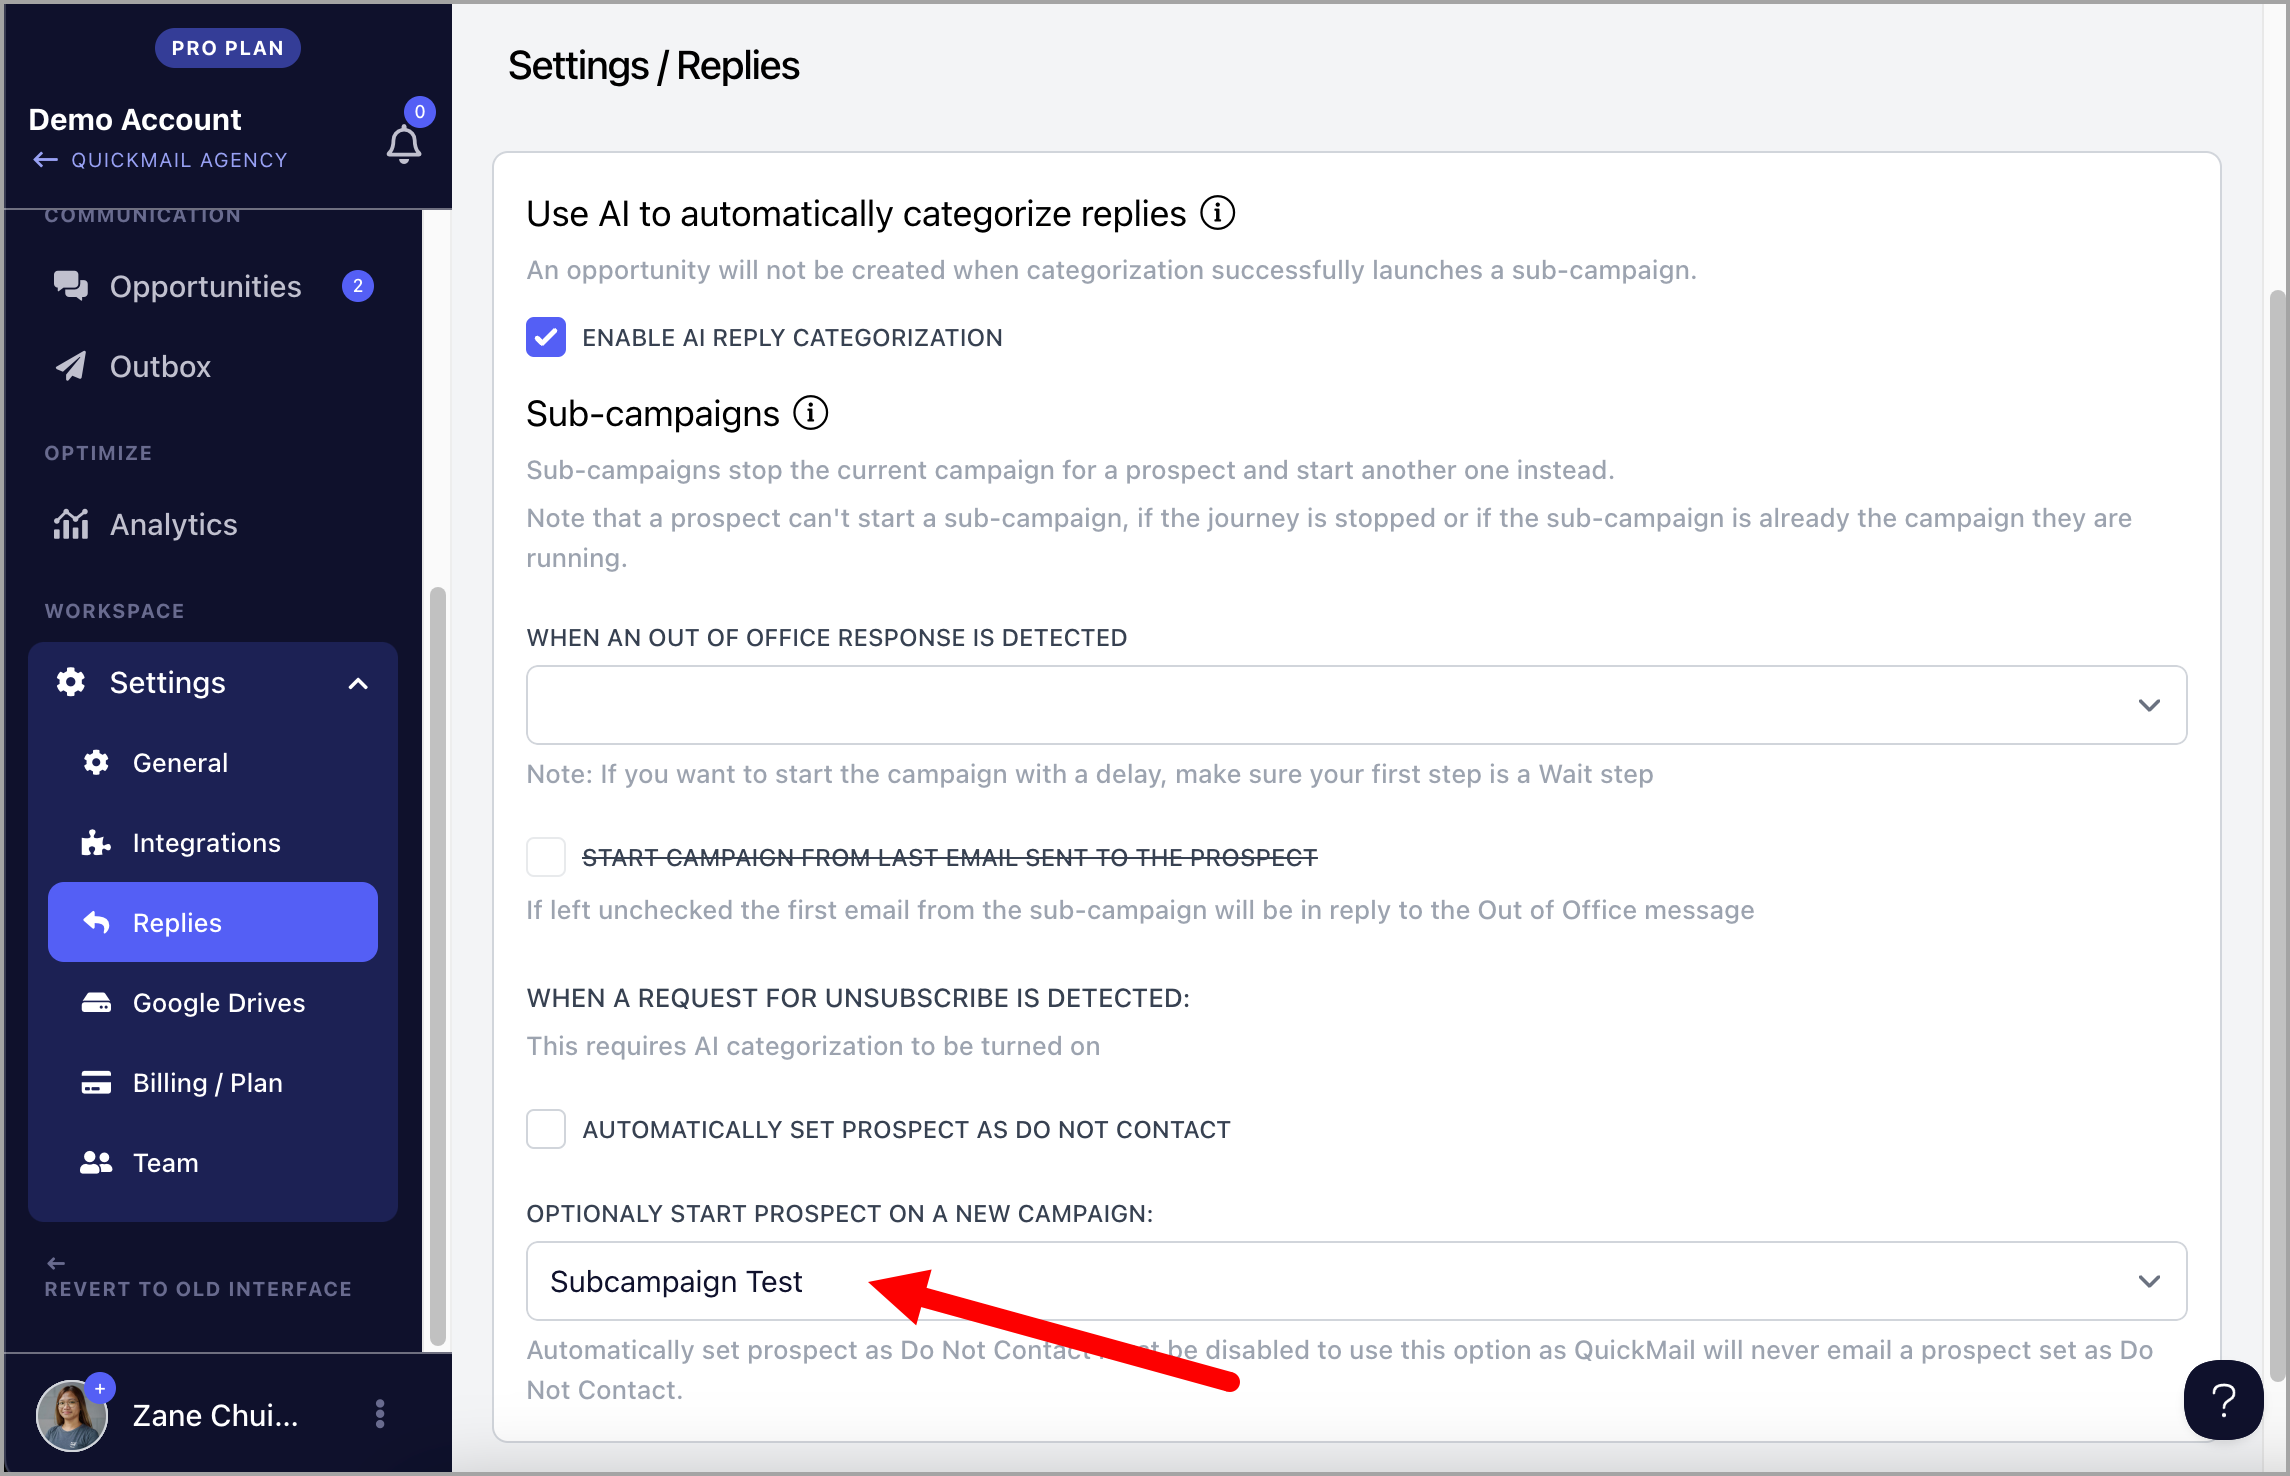
Pro tip: Sending additional emails to leads who have asked to unsubscribe may result in your email account being flagged for spam.
Option 2: To mark leads as Do Not Contact and prevent them from being added to a sub-campaign when an unsubscribe request is detected, check Automatically set leads as Do Not Contact.