Setting up an email alias (Replace Sent-From&Reply-to)
Setting up an email alias (Replace Sent-From&Reply-to)
In this article:
Why set up an alias?
How to use an alias with a Gmail inbox?
How to use an alias with a Microsoft inbox?
How to use an alias with a Custom inbox?
Why set up an alias?
Setting up an alias allows users to send emails from or receive a reply to a different address. It can serve as a disguise and help you sort your emails easily.
Can I add an alias email account as a seprate sender?
No, it's not possible to add an alias email account (or an email account without their own login or license) as a seprate sender.
Note: Changing the send-from & reply-to email address may cause replies to not get detected in QuickMail. So it's best to add the send-from & reply-to email address in QuickMail so we can also scan that email account for replies.
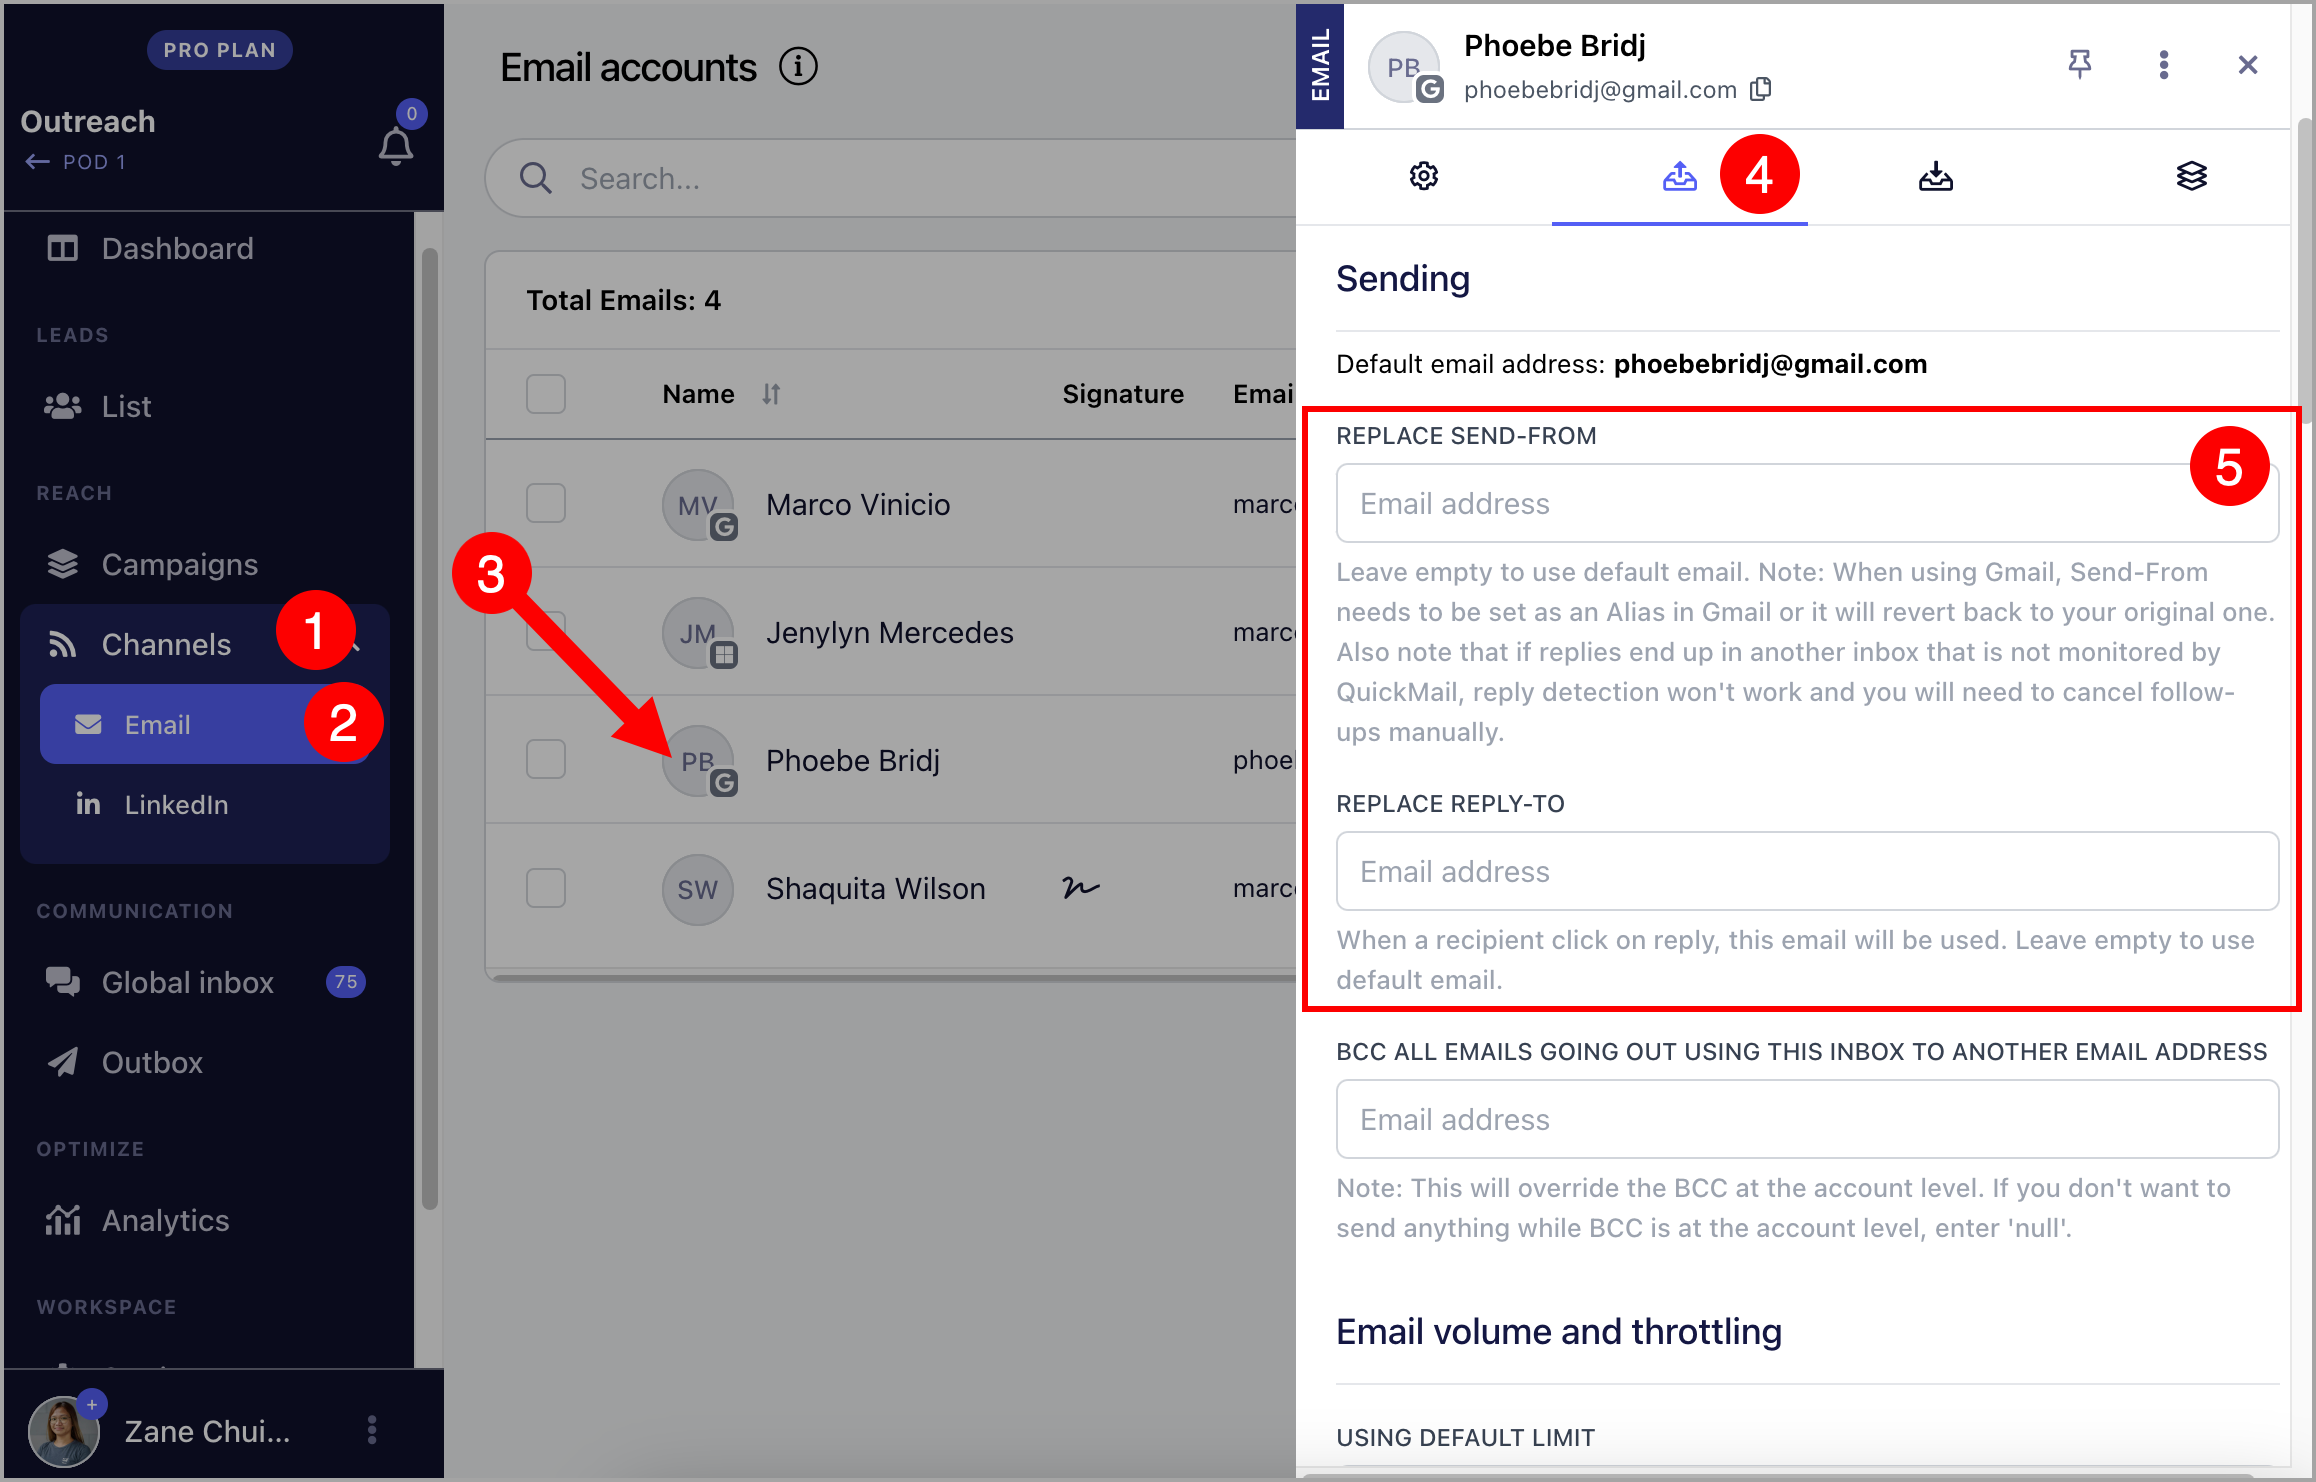
How to use an alias with a Gmail inbox?
- Set up an alias directly in your Gmail account. Here’s a guide on how to set up an alias in Gmail.
Note: If you would like to use a secondary domain in your Google Workspace as an alias, it must set it up as an alias in Gmail too.
- After setting up an alias in Gmail, go to your QuickMail account → Channels → Emails → Click on an email account → Sending Tab → Add your preferred email under "Send-From" or "Reply-To"
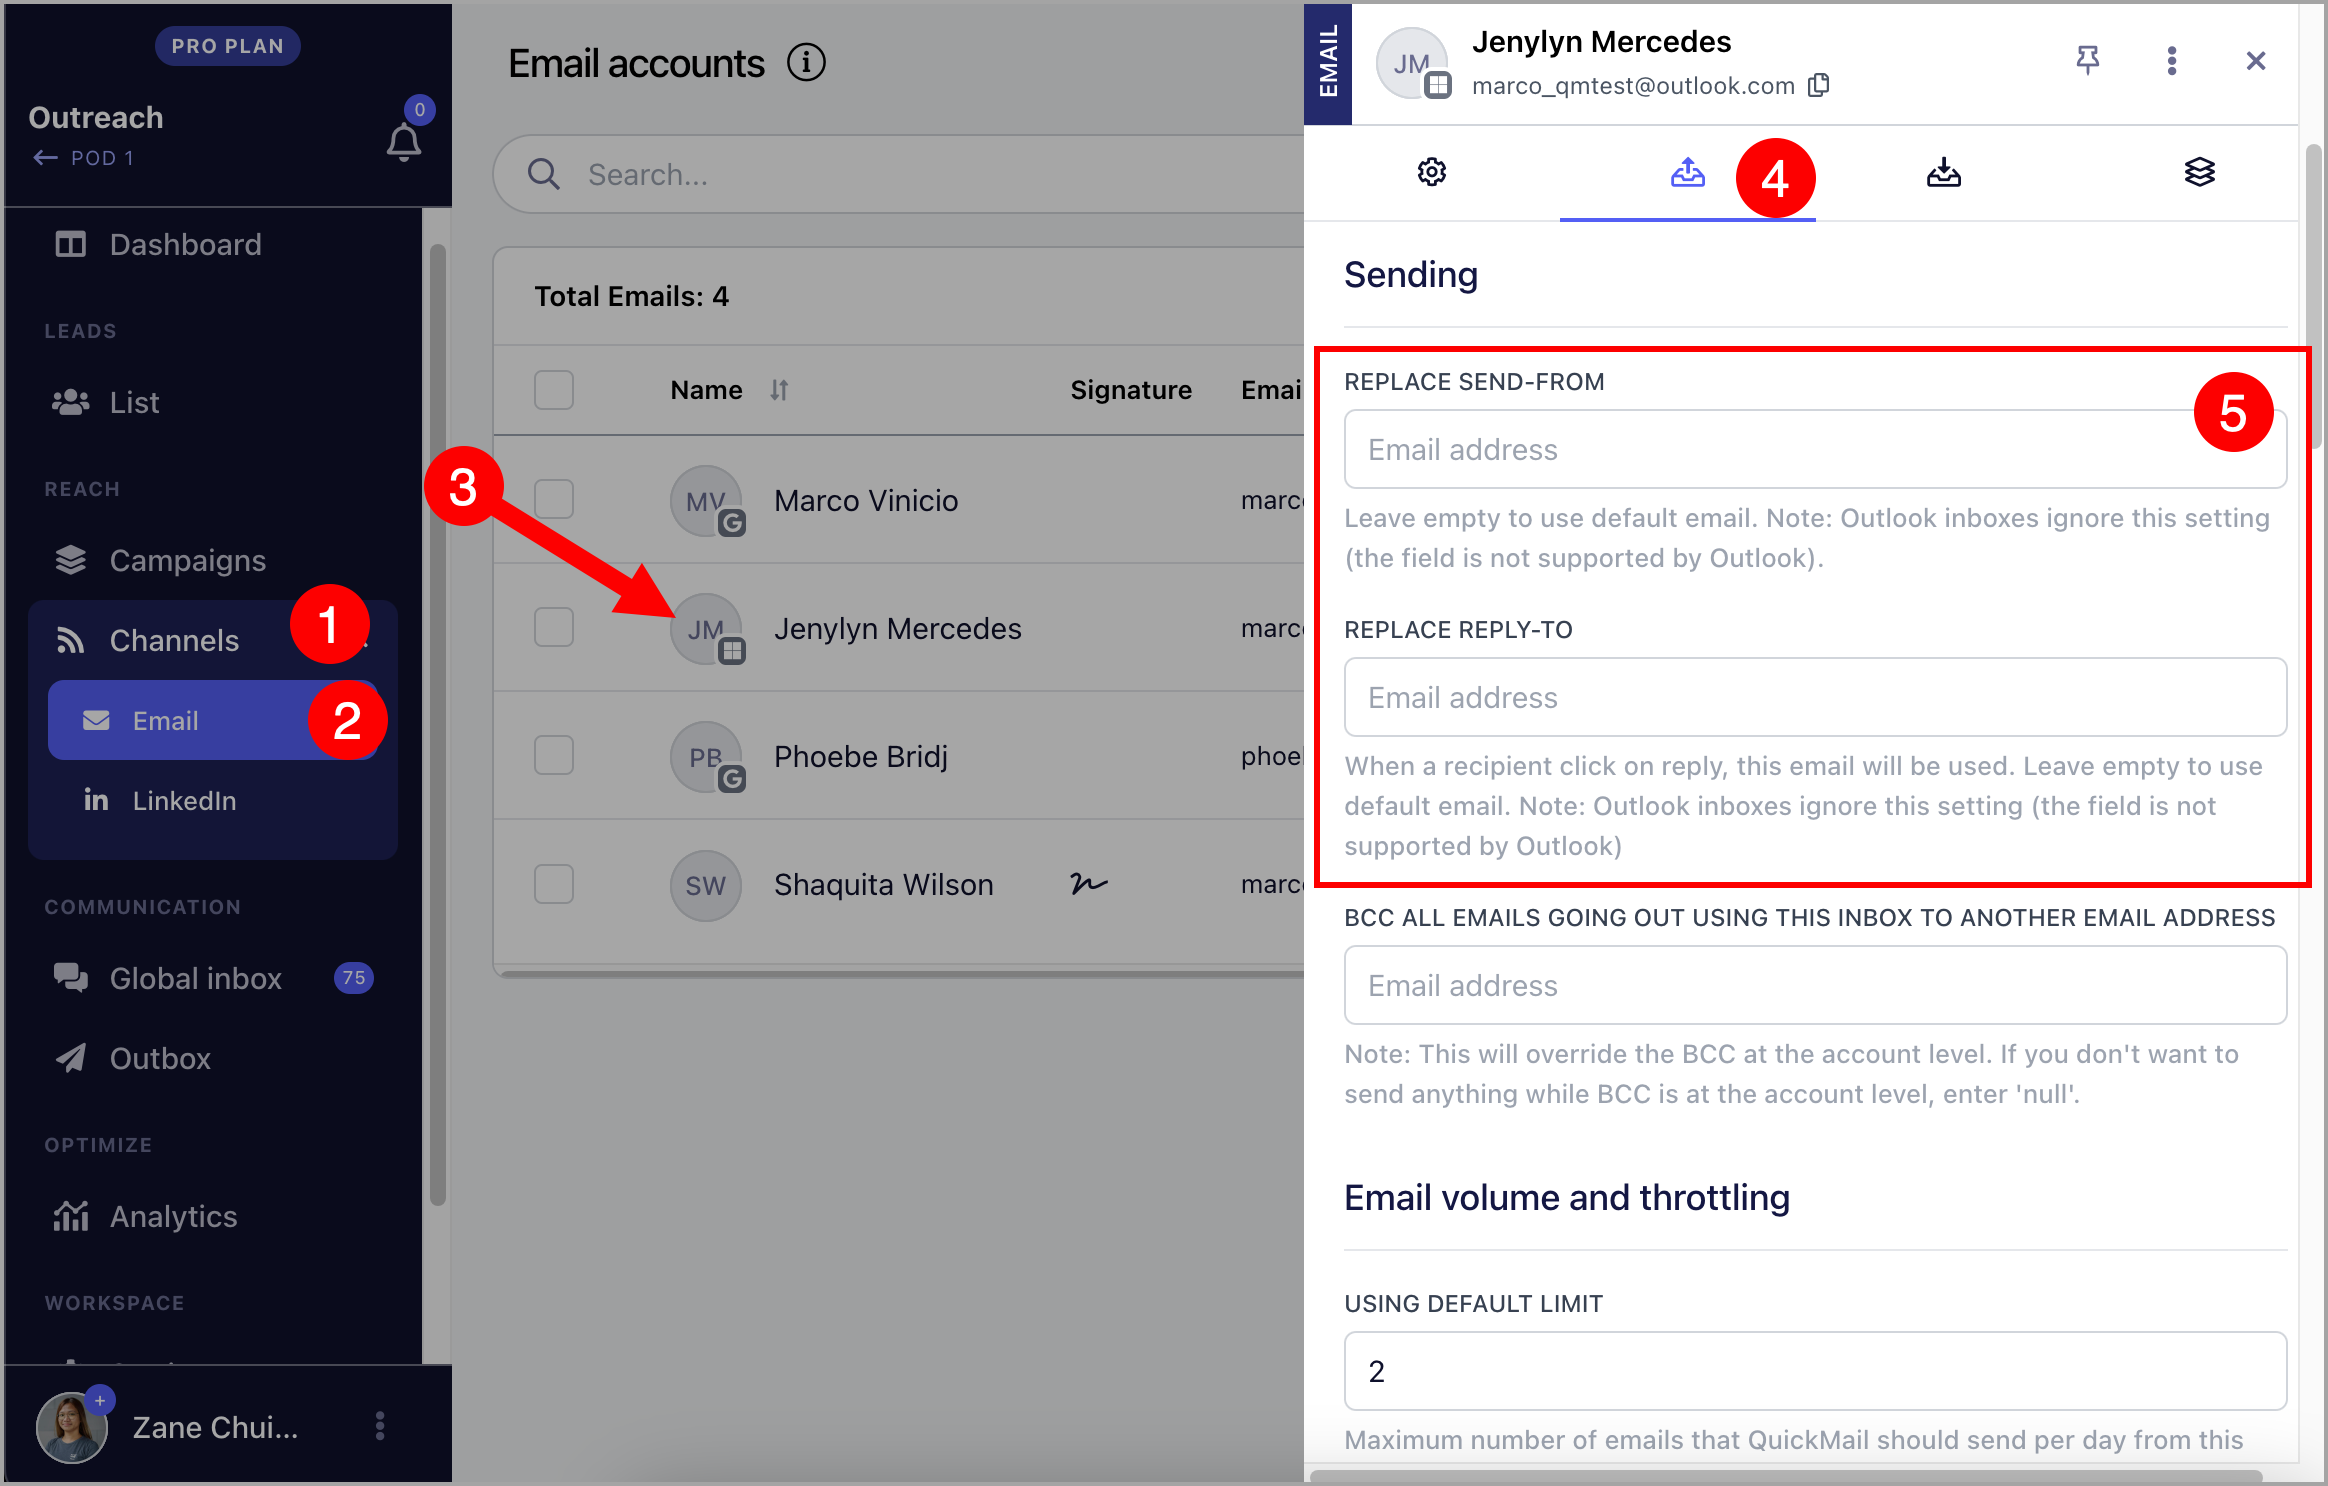
How to use an alias with a Microsoft Inbox?
- Set up an alias directly in your Microsoft account. Here’s a guide on how to set up an alias in Microsoft.
- After setting up an alias in Gmail, go to your QuickMail account → Channels → Emails → Click on an email account → Sending Tab → Add your preferred email under "Send-From" or "Reply-To"
How to use an alias with a Custom Inbox?
- Set up an alias directly in your email account. Here’s a list of guides for custom inboxes that are usually added in QuickMail.
Zoho Mail (Make sure to setup the email address as sent from email address in Zoho)
- After setting up an alias in your email account, go to your QuickMail account → Channels → Emails → Click on an email account → Sending Tab → Add your preferred email under "Send-From" or "Reply-To"
